Puzzle Maker For Kids (Names, Letters, Shapes...)


Print Profile(4)


Description
Boost Me (for free)
Feel free to leave a boost if you enjoyed the model!
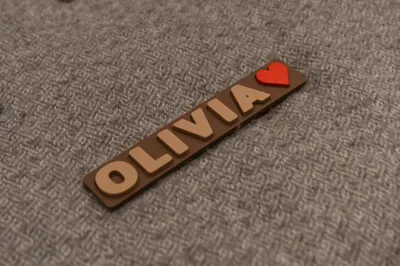
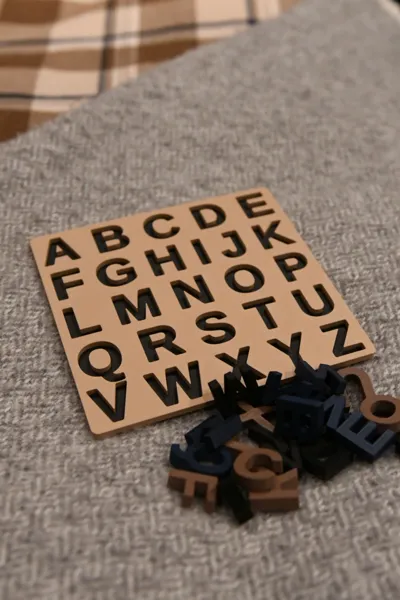
I original planned on making some name puzzles specifically for my children, but as i got started it felt like a good opportunity to use OpenSCAD to make it customizable!
With this design you can:
- Enter any text you want. Just fire up the customizer and enter the text you want and the puzzle will be automatically generated
- Choose text properties such as Font, Font Size, Font Style. Adjust the different font properties to get the right size and style you are looking for.
- Enter multiple lines of text. Adding an extra line to your puzzle is as easy as adding a comma (",") Every time the customizer encounters a comma, it will add a new line to the puzzle.
- Upload SVGs to be included in the puzzles. With limited SVG support, you will be able to upload simple SVGs to use in your puzzle such as the the shapes seen in the pictures. More information below!
- Adjust various parameters to get the design just right for your needs. Fonts and styles can vary significantly so there are many options to adjust the puzzle to you needs. Ex. Spacing between text, alignment of different lines of the text, spacing around the text and the edge of the board, etc.
- Test different color combinations. Try out the different color settings to get a preview of how the puzzle will look when its printed!
Let me know if there are any other features you would like to see!
Instructions
- How to Customize: On a desktop computer click “Customize” which will open the model maker. Enter the text you want and adjust any settings you want. Once you are ready you can download a .3mf and open in your slicer. When in the slicer the puzzle will appear as a single assembly so you just need to click the “Split to objects” button and arrange the pieces as you want. I normally group the different color letters and print by object as in the official print profiles.
- Multi-Line printing: The inputted puzzle text will be split into different lines every time a comma is used. So the text “Hello, World” will be split into two lines, and the text “A,B,C” will be split into 3.
Multi-Line alignment: When making multi line puzzles you likely will want to align the text in another way than “left” aligned. I've added three options to make this smoother. Below you can see the difference between “left”, “center”, and “space evenly”


- SVG support: SVG support is limited but will allow you to upload basic shapes and icons to use in your puzzle. To use an SVG, open the “SVG Settings” and upload and SVG to “svg 1” - “svg 9”. Once you have uploaded the SVG you can use it in your puzzle by using the following special characters “{1}”. Where the number between the brackets corresponds to the number you uploaded the SVG. So if you uploaded a heart to “svg 3”, you can use that in your puzzle by doing something like: “This is a heart {3}”. I normally just search for SVGs on sites like svgrepo.com or similar.
Disclaimer: The support for SVG is limited and mostly designed to handle SVGs which have an equal height and width, if you upload complex or odd dimensioned SVGs the results may be unexpected. Let me know if you need any questions around this!. - Using spaces: You can use blank spaces before, between, or after letters to make minor adjustments to the puzzle if you need to have a specific alignment
- Board Adjustments: For some fonts, you might find the letters go off the board like in the pictures below, generally you will avoid this by using Uppercase letters, but you can also add padding to the board by adjusting the “Base Padding" value. Below you can see and example where a lower case q goes of the board with the default settings, and after when we have increased the “Base Padding” to 10.
In Additional Settings you can also find Horizontal and Vertical offset parameters which allow you to adjust the text Up, Down, Left, or Right if needed.

I considered adding emoji support as well, but the font which supports emojis on maker world (Noto Emoji) doesn't play super well with the puzzle concept as most of the emojis are outlines or multiple pieces, which aren't ideal for this kind of children's puzzle.
License
You shall not share, sub-license, sell, rent, host, transfer, or distribute in any way the digital or 3D printed versions of this object, nor any other derivative work of this object in its digital or physical format (including - but not limited to - remixes of this object, and hosting on other digital platforms). The objects may not be used without permission in any way whatsoever in which you charge money, or collect fees.
Comment & Rating (35)