Tasktris – A Motivational Tetris Task Board


Print Profile(1)

Description
IMPORTANT: Please read the instructions before printing this project
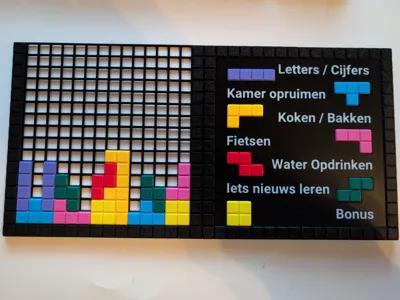
Tasktris is a fun and engaging way to track tasks for yourself or your kids. Assign tasks in the description area, and when a task is completed, place the corresponding Tetris-style block on the board. This can serve as direct motivation or be used as part of a reward system—once the board is full, a reward can be given!
Preparation & Customization:
There are two ways to label your tasks:
- Quick & Easy: Use a writable sticker and a pen.
- Printed Text (AMS Required): For a more polished look, you can embed printed text directly onto the board.
Steps to add printed text in Bambu Studio (requires AMS):
- Open the project in Bambu Studio.
- Select the Plate 5, then the part, and click "Text Shape" at the top.
- Enter your custom text in the "Input Text" field.
- Set "Thickness" to 0 and "Embedded Depth" to 0.8.
- Rotate the text 270 degrees if necessary.
- Click on the model to place the text, then adjust its position.
- In the Objects panel (left side), select your text shape, right-click, and choose "Change Filament" to assign a color.
- Repeat for each text block as needed.
Printing Instructions:
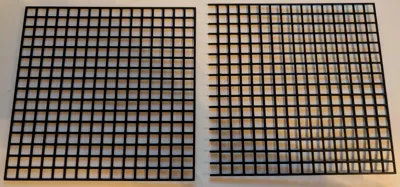
- Bed Adhesion Tip: On the Bambu Lab A1 Mini, I experienced curling issues with the grid pieces, even on a properly cleaned plate. Using 3D Lac or a glue stick significantly improved adhesion.
- No AMS Required: Each plate can be printed in a single color, except for Plate 5 if you opt for printed text.
- Recommended Material: Prints best in PLA on a textured PEI plate.
- For a premium finish: Consider printing Plate 5 (instruction area) on a smooth PEI plate for a sleeker look.
Assembly Instructions:
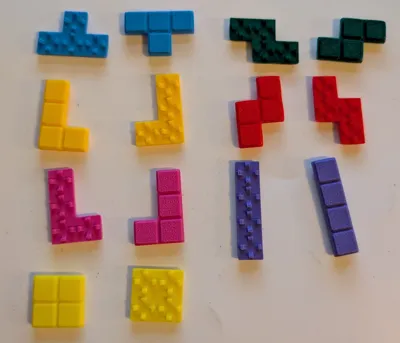
- Simply snap the pieces together on the grid.
- For the best fit, use the top side of the printed grid rather than the bottom (build plate side), as the snap mechanism works better from that direction.
Enjoy & Stay Motivated!
Tasktris turns task management into a game—have fun and stay productive!
License
You shall not share, sub-license, sell, rent, host, transfer, or distribute in any way the digital or 3D printed versions of this object, nor any other derivative work of this object in its digital or physical format (including - but not limited to - remixes of this object, and hosting on other digital platforms). The objects may not be used without permission in any way whatsoever in which you charge money, or collect fees.
Comment & Rating (0)