Sunlu new spool Greenhouse


Print Profile(1)

Description
A seedling greenhouse with a high recycling factor (part of the Sunlu spool and 2+ packaging materials of said spools)
As a hobby gardener, I have already tried many seedling experiments with various mini greenhouses.
As I am slowly printing more and more and have decided on Sunlu, I am constantly left with plastic spools.
So I had the idea to make a small greenhouse from parts of the spool, and not just that. Transparent printing didn't work somehow. Thus, the idea arose to use the packaging of the spools.
Each greenhouse requires 2 packages + a plastic welding device (ideally a vacuum sealer) + Sunlu spool
- First of all, print all the parts.
Boost Me (for free)
Please give me a boost,
I thank you for your support, so I can implement further great ideas.

cut the packaging like this and repeat with the second packaging

Glue 2 A4 sheets butt to butt, as well as a third sheet, but only 2 to 2.5 cm of this is needed.
In the end you have a measure of 61.4 or 61.9cm which corresponds to the circumference + welding allowance through the laminating device, and a width of 16.5cm, then cut out
Next, weld the 2 films together, which are unfolded, make sure that the folds are on the outside.

Then put the pattern on, tape it down a little with tape or packing tape so that it is easier to cut out.

Then it should look like this. Now you can weld it together with 1 cm as a fold

now you can thread the foil like this

Insert the 3 pot holders, then insert the small pins (printing plate lying on the right) for the outside like this (larger pin points downwards)

now apply some pressure so that it snaps in properly, then remove the part

- now the bolt (on the printing plate on the left) is used. Narrower pin diameter points downwards, then connect it so that it fits. (sometimes it may also be necessary to glue it to the Sunlu spool.)

in the best case it should look like this now

- now the connected pins are connected with the upper ring

now it is connected with the lower ring

now the wedding begins, the drip tray with the foil, now comes the adapter for the small pots, still
seems relatively loose…

now the insert comes in and is pressed down, now it holds perfectly

now the clamping strips are placed around. First on the pin and then clamp the small sleeves.
For the last piece, it may be necessary to fold the foil a little at the fold. (It depends on how precisely you welded the foil (accuracy).)

Adjust the foil a little

with ventilation wheel

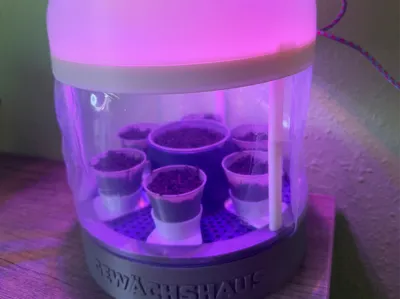
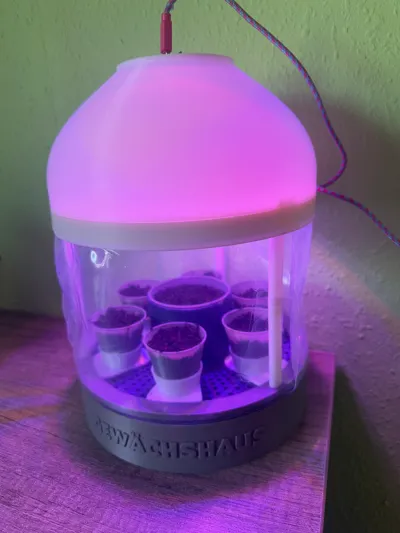
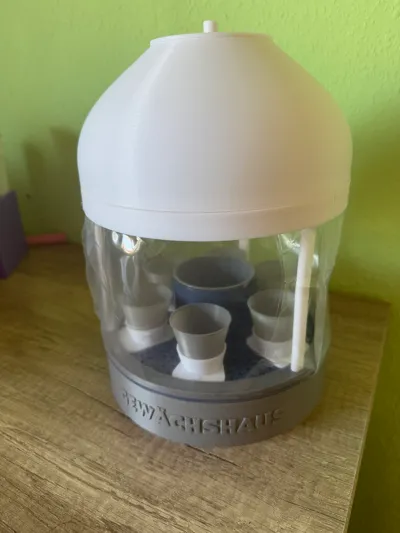
now your greenhouse is finished

Full spectrum lamp can be rotated so that the ventilation holes are open
You have the option of installing a normal ventilation wheel at the top or integrating a full-spectrum lamp that can be ordered online. (available from Ali)
For questions, suggestions, please let me know :)
License
You shall not share, sub-license, sell, rent, host, transfer, or distribute in any way the digital or 3D printed versions of this object, nor any other derivative work of this object in its digital or physical format (including - but not limited to - remixes of this object, and hosting on other digital platforms). The objects may not be used without permission in any way whatsoever in which you charge money, or collect fees.
Comment & Rating (8)