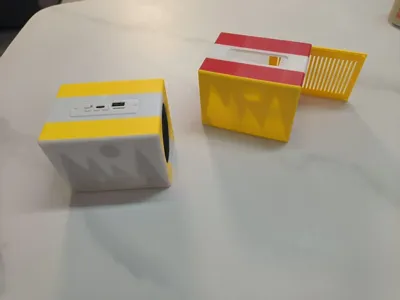
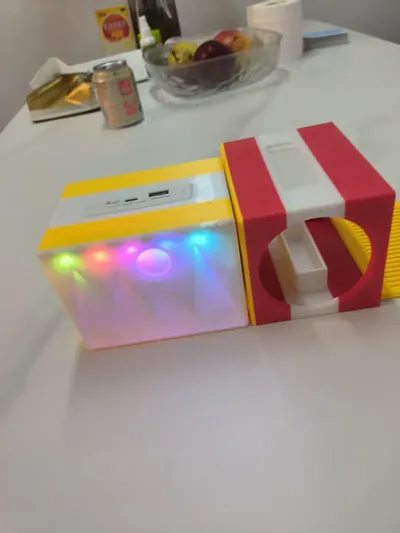
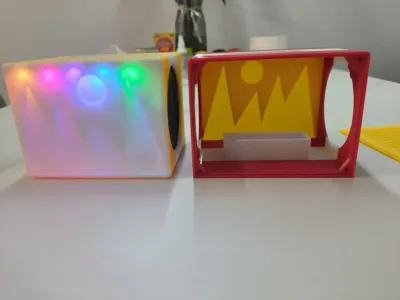
Dual-Speaker Bluetooth Audio System


Print Profile(2)
Description
A DIY Bluetooth speaker boasting impressive functionality. Experience powerful volume and extended battery life. A perfect project for enthusiasts. Print the enclosure after acquiring the components; no multi-color printing required, simply change filaments mid-print.
(I've also included a back panel without a grille for enhanced audio quality; this can be printed separately)

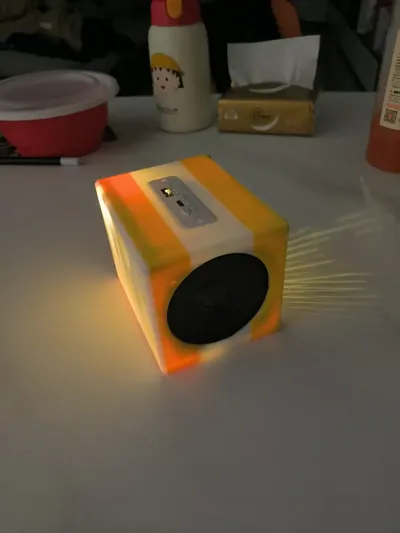
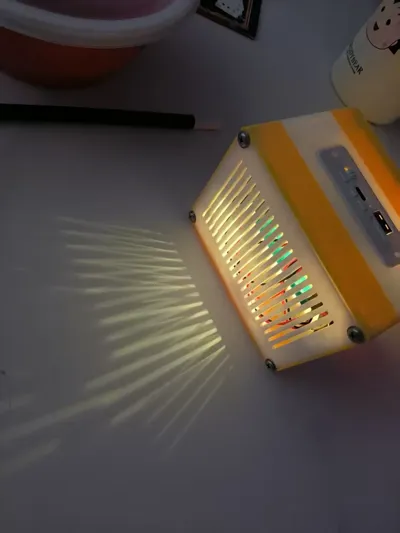
- Aesthetics and Illumination: The compact design and vibrant color scheme are complemented by integrated lighting, creating a unique ambiance perfect for gatherings.
- Portability: Its small size ensures effortless portability, ideal for both outdoor adventures and convenient in-home use.
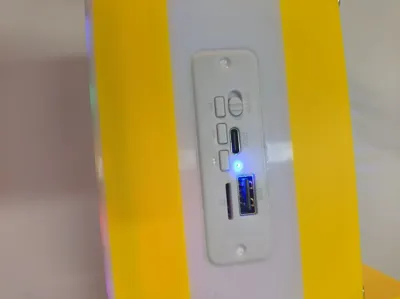
- Functionality: Featuring multiple interfaces, it supports diverse playback methods, including Bluetooth connectivity, card playback, and Bluetooth telephony, catering to a range of audio sources.
- To minimize dimensions, the light strip simply slides into place. Trim approximately 5mm from each side (carefully avoid cutting any circuitry).
- I secured the speaker using glass adhesive. Hot glue is also suitable; avoid excessive application to prevent unsightly overflow (pre-drilled screw holes are provided, though I lacked appropriate screws and found insertion inconvenient).
- The battery fits snugly into its compartment. For added security against loosening, consider applying a few drops of adhesive.
- The control panel snaps into its designated position (it's a snug fit). Secure it with a couple of drops of adhesive at the base (ensure correct orientation).
- I used four 15MM self-tapping screws for the rear panel (while not ideal, they suffice). Consider securing it with screws (pre-drilled holes are provided) or adhesive.
Links for component purchasing are provided below for your consideration.
https://mobile.yangkeduo.com/goods.html?ps=x3DPmRoASJ
License
You shall not share, sub-license, sell, rent, host, transfer, or distribute in any way the digital or 3D printed versions of this object, nor any other derivative work of this object in its digital or physical format (including - but not limited to - remixes of this object, and hosting on other digital platforms). The objects may not be used without permission in any way whatsoever in which you charge money, or collect fees.
Comment & Rating (0)