AMS rotating ceiling mount


Print Profile(2)


Description
❤️Support
Like my model's? You can support my work via MakerWorld Boost or Buy me a coffee. Thank you!
Membership
Join my Commercial license and profit from selling physical print of my models
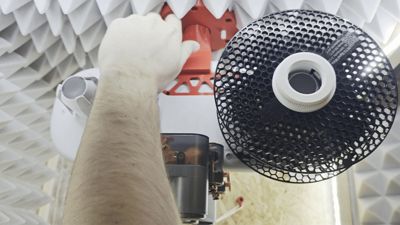
This is the swivel ceiling mount for ams lite. It secures the ams module to the ceiling and allows rotation with the option to select any number of fixed positions (0-8 positions). Compatible with AMS Lite Enclosure.

Change log:
- Bracket V2 – This version was released after users reported strength issues with the bracket (AMS Lite module mount). The design has been reinforced and weight-optimized to improve durability, reliability. Please note that the bracket shown in all photos and in the GIF is still Bracket V1.

Dimensions:

Non-printable parts:
- 1x Radial ball bearing 6008-2RS (inner diameter 40mm, outer diameter 68mm, width 15mm. If you don't want to buy a bearing, there is a part in the print profile that has the dimensions of the bearing)
- 7x drywall screws (Lenght 25mm)
- 1x M8x90 screw
- 1x M8 nut
- You probably won't have enough cable to the AMS module and will have to buy an extension. If you want to do it yourself, it is a micro fit molex connector.
Assembly manual:
1.Step
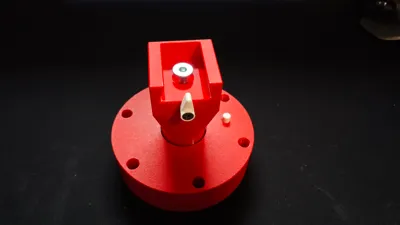
- Insert the bearing into the base
- (If you don't want to buy a bearing, there is a part in the print profile that has the dimensions of the bearing)

2.Step
- Insert the button into the square hole in the base

3.Step
- Insert your selected number of locks into the pin (At the point of lock insertion, rotation will stop and a button will need to be pressed to continue rotation)


4.Step
- Insert the nut into the pin (glue is recommended)

5.Step
- Insert the pin into the base (make sure the locks don't fall out, make sure you have the button inserted)

6.Step
- Screw the latch into the groove

7.Step
- Insert the transition on the pin and insert the groove on the transition.

8.Step
- Insert the screw and screw it in.

9.Step
- Use 6 drywall screws to screw the base to the ceiling
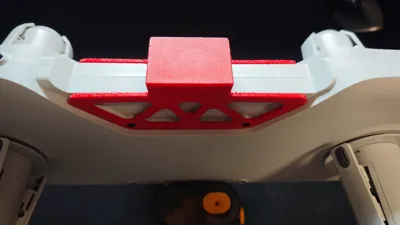
10.Step
- Screw the ams bracket using the screws supplied with the AMS module

11.Step
- Insert the ams bracket into the groove and secure with the latch

If you like my model, it makes me smile if you like it, leave comment, like print profile, follow me or boost me. Thanks for downloading and enjoy :)
License
You shall not share, sub-license, sell, rent, host, transfer, or distribute in any way the digital or 3D printed versions of this object, nor any other derivative work of this object in its digital or physical format (including - but not limited to - remixes of this object, and hosting on other digital platforms). The objects may not be used without permission in any way whatsoever in which you charge money, or collect fees.
Comment & Rating (10)