


Print Profile(1)

Description
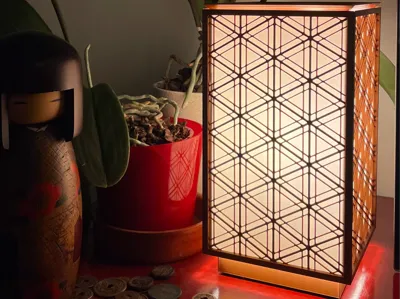
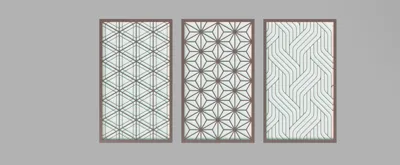
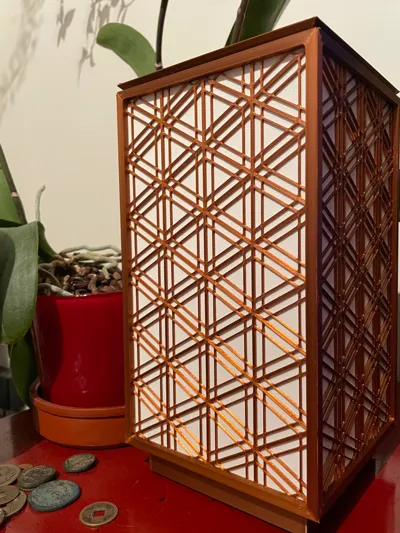
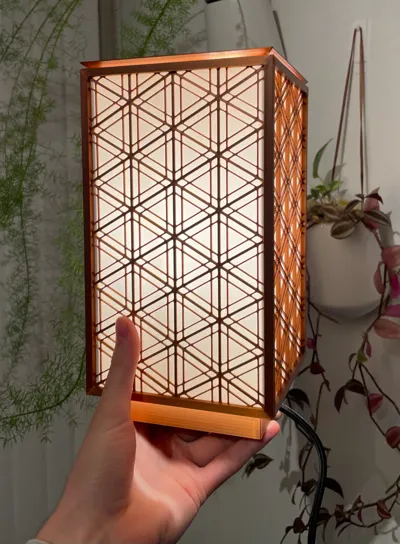
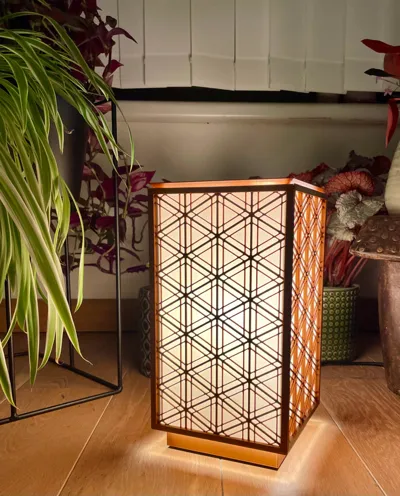
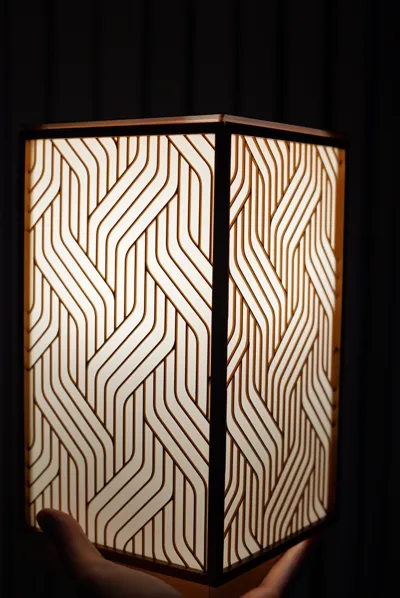
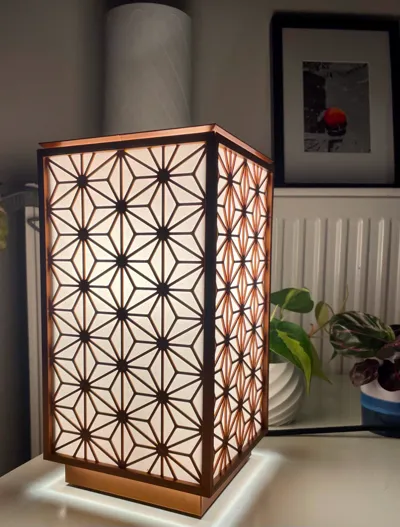
This is a cozy lamp i designed about a year ago and i finally decided to release the files. There are 3 different patterns that you can choose from. Having a ams does make the print easier but its not at all necessary. everything is printed in pla except for the neck that holds the light socket. I recommend to print this in petg or abs/asa. I also recommend to use only led lights for this lamp. The socket neck is made for sockets with a outer diameter of about 40mm, If yours happens to differ in size send me a message and I will model a neck for your socket and add it to the listing. I bought this socket and cable in Action which is a budget store that exists in some european countries. The following are the assembly instructions:
You will need some painters tape and contact adhesive or superglue (cyanoacrylate). I do recommend to use contact adhesive as it does not bond as quickly as the superglue does.
Step 1:
Glue the two internal frame parts together as the image shows. Be sure to use a solid, flat surface to make sure everything is aligned properly.

Step 2:
Glue the square frame to the internal frame, make sure to press firmly to ensure good adhesion.
With every step it's important to make sure that everything is nice and square, this will result in a nice finished lamp.


Step 3:
Align all the panels next to each other ensuring that they line up as good as possible and that the slanted sides all face the same direction.
use some making tape or painters tape and tape over the edges. Really try to get the gap in between the panels as tight as possible to ensure the best end result. Rip off a extra piece of masking tape and set it aside for the next step
Tip: deburr the edges of the white diffuser that were touching the print plate to remove any potential elephants foot and ensure a good adhesion.

Step 4:
Add contact adhesive in between every panel and roll up in to a box.
Add glue to the last two surfaces and tape them together forming the box shape.
Allow some time for the glue to set before going on to the next step.


Step 5:
Add glue to the internal edges of the lamp shade and slide in the internal frame. the cross bar should be on the side with the slanted edges. Be careful as glue might seep down the bottom. ensure that all edges are aligned and the same height. if you set the lamp shade down with the flat sides down you can just slide the internal frame down as far as it goes and it should line up perfectly.
press the legs of the frame firmly into the lampshade to make sure that they bond well and are touching the lampshade through their entire length.

Step 6:
Add glue to the top and align it with the crossbar of the internal frame. make sure that its properly leveled.
Give it some time for the glue to set.

Step 7:
Screw in the socket neck and install your socket and wire. I also recommend to stick some rubber feet pads on the bottom om the base.


Step 7:
Screw in a light bulb, align the lamp shade with the base and you're done. Enjoy your new lamp!

Boost Me (for free)
If you like the lamp give me a boost, it really means a lot.
License
You shall not share, sub-license, sell, rent, host, transfer, or distribute in any way the digital or 3D printed versions of this object, nor any other derivative work of this object in its digital or physical format (including - but not limited to - remixes of this object, and hosting on other digital platforms). The objects may not be used without permission in any way whatsoever in which you charge money, or collect fees.
Comment & Rating (11)