Dune Monitor Stand - Elevate Your Workspace


Print Profile(6)


Bill of Materials


Description
Everyone loves a good workspace and a monitor stand elevates your viewing and ultimately enhances your workspace experience.
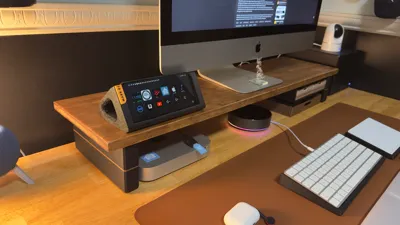
I currently have a beautiful workspace a 10 foot X 30 inch depth Wall to Wall table (which I made with butcher block 2 years ago) with two wooden monitor stands which I built with wood. Honestly wish I was into 3d printing 2 years ago. I just got into it just 6 months ago and it has been ultimate fun.
My wife works in another room where she has her work setup. She has a nice office table, but no monitor riser. She had been asking for a monitor stand since I made mine, and you know how husbands usually are. Life happens and that project had been delayed until I seen this contest. So, I can proudly say - I made this solely for my wife and never put anything to contest before.
WIFE APPROVAL FACTOR - 100 %.
I have always liked Balolo setup cockpits but they are ridiculously expensive. So, my inspiration comes from the Balolo setup cockpit. I did not want to go overboard complicating the design for a simple monitor riser. So I made this.
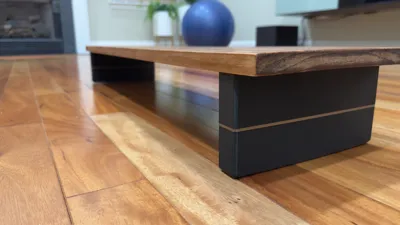
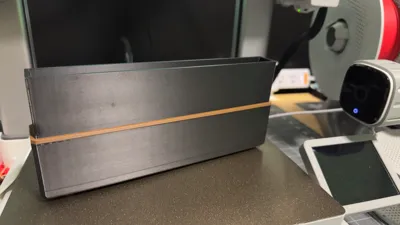
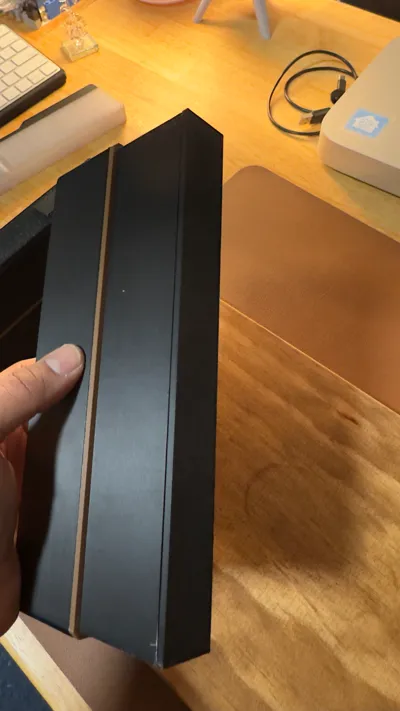
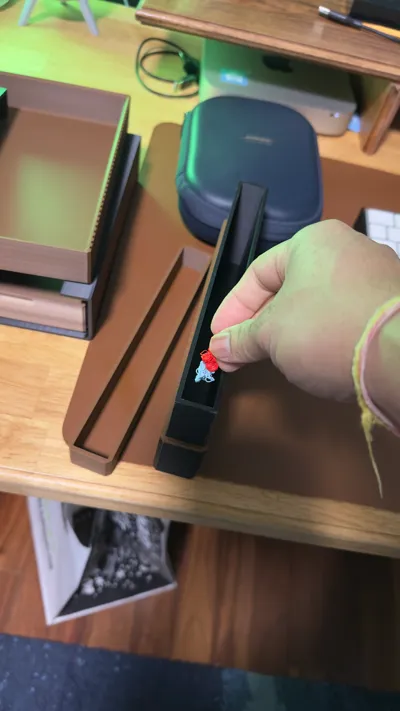
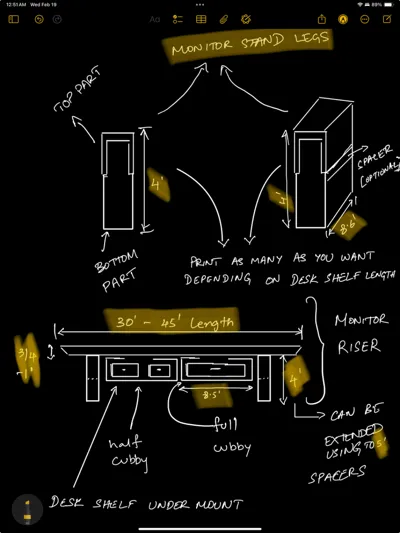
I purposefully made the monitor stand legs hollow, so you can fill it with stuff. My initial idea was to fill it with play sand - hence the name “DUNE”, but I thought I will fill it with purge from my two a1s. Thought I could save some filament, but I could have added infill. Later I realized, this can be used as a secretive compartment where you may as well add stuff you think is to be kept secret for ever, like love letters etc. Also, I thought of adding a slot for coins, so it could have been used as a piggy bank.
Also, thought of printing this in a translucent/transparent filament and add some lighting hardware to make it more aesthetically pleasing, but I did not go any overboard as this was primarily for wifey and she just wanted it simple and sober. I did not have the translucent/transparent filament in hand at the moment. Another wish was I owned a router - I would have had a nice slant cut on the wooden piece (like I made in my design - added a picture of the ideation process).
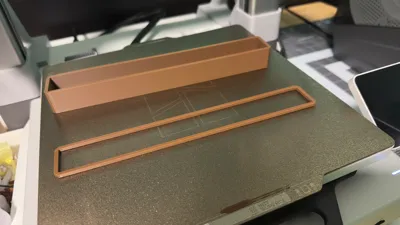
I have made a lid for closing the hollow part after you fill it with your preferred stuff (use some super glue to secure it and never to be opened again). Then slide it into the top compartment that is screwed to the wooden board. If needed, add the spacers (profiles added) for a pop of color or increase the height by another inch.
The initial height of the monitor stand legs is 4 inches and adding a 10 X 3/4 inch / 1 inch wooden piece from Home Depot or Lowe’s / any hardware store will increase is to 5 inches (which is usually a standard height for a good monitor viewing angle on standard height desks). However,I have added print profiles to add spacers - I did a 3 mm spacer initially for a pop in color, but later thought just adding another 23mm spacer can increase the height of the leg by another 1 inch, which takes the whole height to a total of 6 inches.
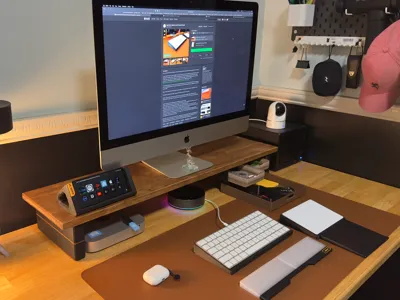
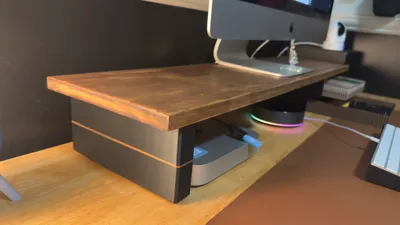
I have also added some necessary accessories like an under desk shelf mount with full and half cubbies (Nothing fancy, but just utilitarian).
Specs of the wooden top I used:
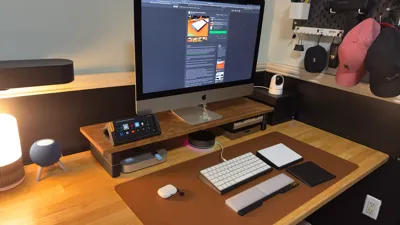
- 10 Inch Depth X 1 inch Height X 36 inch Length Select Pine - (Costed me US $28.98 for a 6 ft board which I cut in half). Added two legs at the ends and the monitor stand is extremely stable, I tried it with my 27 inch iMac and another 28 inch monitor I had. I can confidently say, it works with bigger monitors. In fact, I literally tried load testing it by placing my knees and putting my weight on it (I am 175 lbs). You can add more legs if you want a longer version to hold two monitors and more accessories.
- I used a red Mahogany wood stain which I had from before and finished the wood piece using polyurethane.
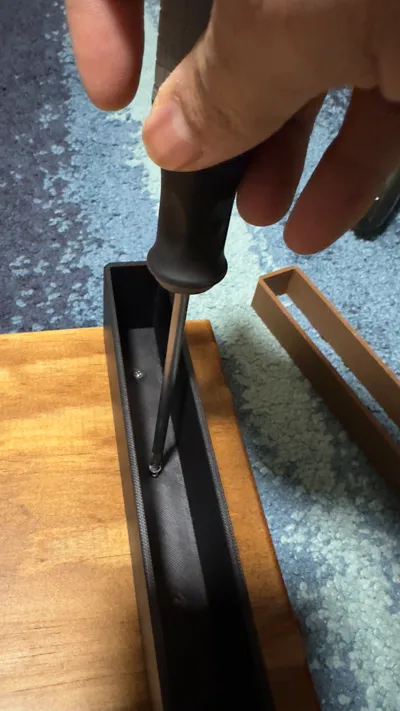
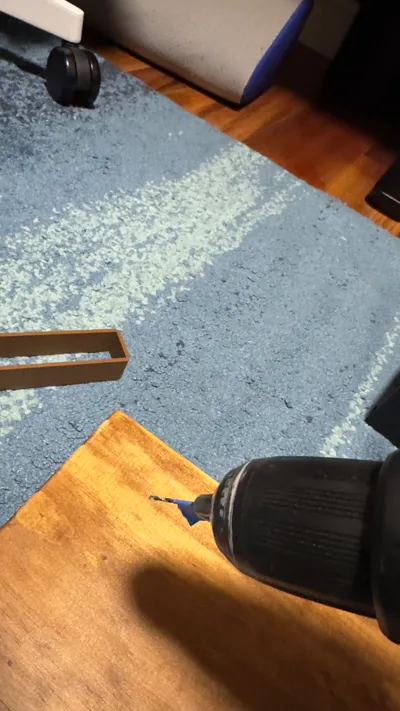
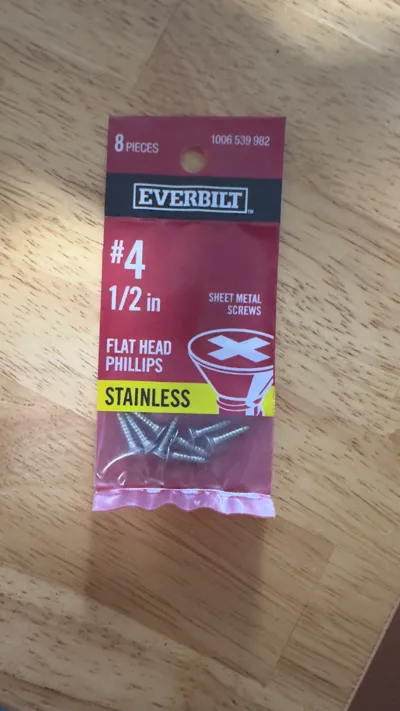
- I have used #4 1/2 inch screws for securing the legs and accessories to the wood. US $ 1.49 for 8 screws (I bought a few packets, like 4 for adding any future accessories when I print them).
- Make sure to drill 1/2 inch pocket holes before driving in the screws, to keep your wood intact.
I have added print profiles for the following:
- Main profile is for the monitor stand - Monitor riser leg assembly_4INCHES - Please print 2.
- Under desk mount for 8inch L x 9inch D for cubbies - (Optional - print as many as you like, depending on how many cubbies you want to mount)
- Desk cubby full - 8 inch to fill in the under desk mount - (Optional - again print as many as you like, depending on how much stuff you want to organize)
- Desk cubby half - 4 inch (2 will fill the under desk mount) - (Optional - again print as many as you like, depending on how much stuff you want to organize)
- Rim Spacer 3 mm for monitor riser leg- retains 4 inch height of the riser leg. May be increases it by 3 mm. - printed this in a different color and used PLA for some pop.
- Rim Spacer 23 mm for monitor riser leg- increases the riser leg height by 1 inch, making the monitor riser to a total of 6 inches. - (Optional - added this profile for those who have a Mac Studio or bigger units to place under the desk mount) - printed this in a different color for some pop.
Note: May need a bit of sanding around the edges of the monitor riser for easy sliding (tolerance is 0.01 to 0.02 mm).
Filaments I used:
I used Bambu PETG-HF black for the main monitor legs , but folks can use PLA, ABS or other filaments as they wish. Make sure there is no warping at the base, as it may disfigure the riser base and render it uneven. I also used brown and wood PLA for the spacers and cubbies.
I also added a anti-slip strip at the bottom of the legs for grip on the table.
License
You shall not share, sub-license, sell, rent, host, transfer, or distribute in any way the digital or 3D printed versions of this object, nor any other derivative work of this object in its digital or physical format (including - but not limited to - remixes of this object, and hosting on other digital platforms). The objects may not be used without permission in any way whatsoever in which you charge money, or collect fees.
Comment & Rating (2)