Filament Heater for PolyDryer / Cereal Box Dry Box


Print Profile(2)

Description
Boost Me (for free)
If you like my work and would like to support me, please consider leaving a boost! it GREATLY helps me out! ♥
Note: I am open to allowing remixes, but with caution. If you would like to, please DM me first and we can discuss further!
UPDATE 01/20/2026:
Updated the model license to allow remixes on MakerWorld!
Update 5/4/2025:
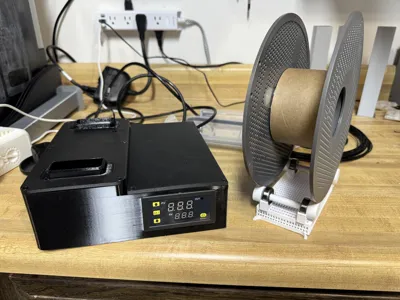
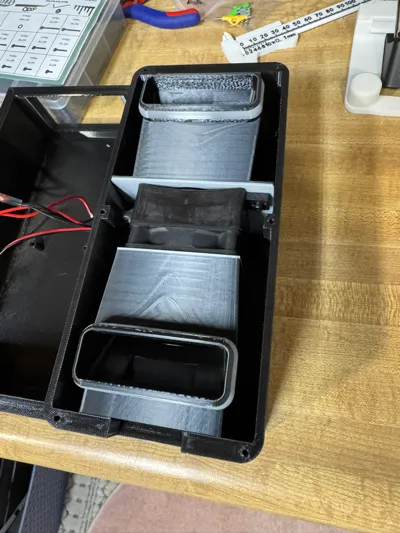
- Added in a desiccant basket with a built in roller for the cereal box version (only for cereal boxes since the PolyMaker box has one already). THE ROLLERS USE 608 BEARINGS!
-Added pictures for the cereal box version (My apologies! I somehow messed up and only posted pictures of the PolyMaker box)
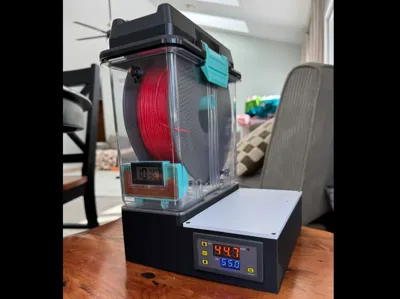
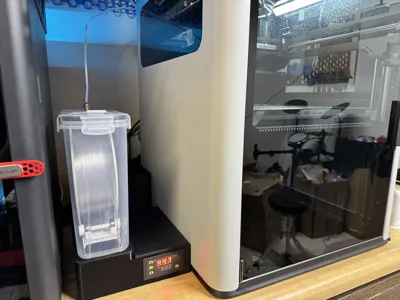
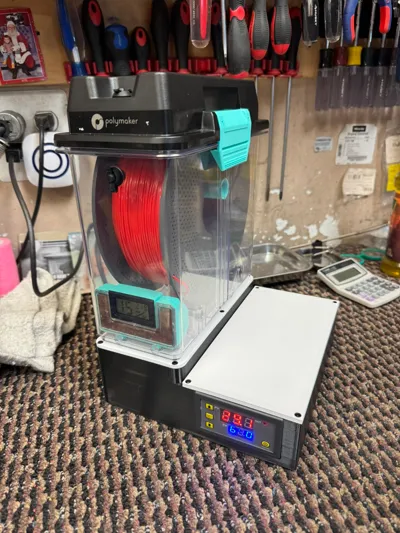
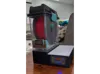
Are you in the same boat as me where you purchased the PolyMaker Drybox without the heater, just to find out later you cannot buy the heater separately (and don't want to spend another $80 just to get it)? Or have you ever wished you could use your cereal drybox along with a heater? Well, we finally have a cost effective solution!
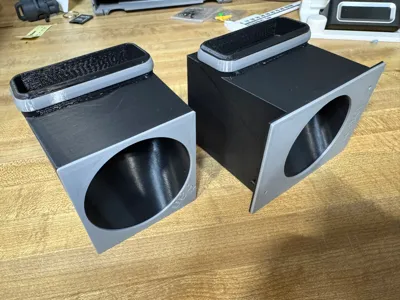
PLEASE NOTE there are TWO PROFILES! One is for the PolyMaker DryBox and the other is for Cereal Dry Boxes! THE DUCT OPENING SIZES ARE DIFFERENT. MAKE SURE YOU PRINT THE PROPER ONE!
I have thoroughly tested for hours, across MULTIPLE redesigns and finally nailed down the perfect functioning design. I made this for a few reasons;
- I think it is BS you can't purchase the PolyMaker dryer seperately from the box, even though they sell only the box.
- I have multiple cereal storage boxes as well that I figured I would see if I could convert
- I LOVE printing specialty filaments like PA6-CF that cannot be run through an AMS, but still require an enclosure AND heat.
- I have heard that the PolyMaker dryer only reaches about 40-45C which is honestly pathetic and makes it near useless. This setup can push 55C and beyond (though I wouldn't recommend going much higher than 55 due to the storage containers themselves having the potential to warp or melt)
- Because I love torturing myself and ended up spending more money on this design and multiple test parts than I would have if I just bought the PolyMaker with the heater. But I did it for YOU! And because I have an insatiable itch to see things through.
All in all, the supplies for this cost roughly $25 USD (much better than $80 for the PolyMaker, AND functions better).
There is a full assembly guide linked below, as well as the B.O.M. The only thing you need other than the supplies listed in the B.O.M. are;
- 16x M3x6 bolts
- Either a 7/32" or 5.5mm drill bit to drill a hole in the drybox for the thermostat sensor
***DISCLAIMER***
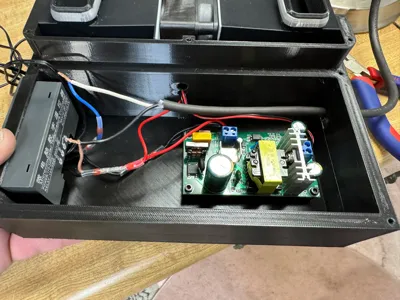
IF YOU ARE NOT FAMILIAR WITH ELECTRICAL WORK, PLEASE BE VERY CAREFUL HERE. I AM NOT RESPONSIBLE FOR ANY MISTAKES, DAMAGE OR FAULTS THAT MAY ARISE WITH THE PROJECT. I have included a (Microsoft Paint-esc) wiring diagram for you to follow. It is very easy to understand and follow. If you are unsure of how to read it, this may not be the project for you.
B.O.M.:
PTC Heater with Fan:
https://a.aliexpress.com/_mPKGX7V (MAKE SURE YOU SELECT THE 24V 80W UNIT!)
PCB (AC/DC Converter):
https://a.aliexpress.com/_mLY9Czd (MAKE SURE YOU SELECT THE 24V 6A UNIT)
110/220V Thermostat:
https://a.aliexpress.com/_mOVdmVz (MAKE SURE TO SELECT THE AC110-220V UNIT)

Documentation (1)
License
You may create derivative works based on this object, provided that all such derivative works are published exclusively on the MakerWorld platform and include proper attribution to the original creator. You may not share, upload, host, distribute, or publish this object—or any derivative work of this object—on any other digital platform, marketplace, or distribution channel. Commercial use of this object and any derivative works is strictly prohibited. This includes, but is not limited to, selling, renting, sublicensing, or using the object in any context in which you receive monetary compensation or other financial benefits.
Comment & Rating (43)