Search models, users, collections, and posts
IKEA Skadis Desktop Stand V3
IP Report


Print Profile(8)

240mm Pegboard V3
Designer
4 h
1 plate

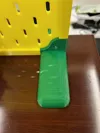
Rear base mount G-clamp
Designer
2.2 h
1 plate
V3 dedicated accessories
Designer
5.9 h
4 plates

A1 mini V3 dedicated accessories
Designer
5.5 h
4 plates
Click to see more
Open in Bambu Studio
Boost
280
813
20
19
223
94
Released
Bill of Materials
Maker's Supply Kits and Parts
Select all


Description
Content has been automatically translated.
For three or more layers, which are prone to bending, an aluminum profile desktop fixing solution can be used.https://makerworld.com/zh/models/1815571
Model Introduction:
- This model provides a solution for using a pegboard on suspended desktops or when walls cannot be damaged.It aims for maximum sturdiness, but do not have overly high expectations for overall strength, as it is a compromise due to environmental limitations.
- The bottom support feet come with G-clamps for enhanced fixation.
- Bridge accessories are provided, allowing space in the middle for other uses.
- Frames are provided all around to slightly improve stability.
- The number of holes has been increased compared to the V2 pegboard.
Version Description:
- The V3 pegboard (this model) can be assembled using both V3 dedicated accessories and universal accessories. The difference with V3 dedicated accessories is that the bottom supports and middle connectors have closed off unusable holes.
- Those already using the V2 version can also upgrade by replacing accessories, without reprinting the pegboard, only missing the intersecting holes at the edges. Both versions can also be mixed and matched; make sure to place the same versions together to increase the number of holes.
Printing Instructions:
The 240mm pegboard does not support mobile printing; you need to remove the printer's unprintable area in the software to print it:

- Default print layer height is 0.2mm, connectors 3 walls, others 2 walls. The top remains consistent with the overall design; if you change the layer height for printing, please modify the thickness accordingly:

- Some accessories have minimal supports manually added; you can also modify them yourself if there is a better printing orientation.
- If printing is prone to warping, please add an outer brim in the print settings; it is not set by default.
- Please calculate the number of accessories needed for printing to avoid waste.
Installation Instructions:
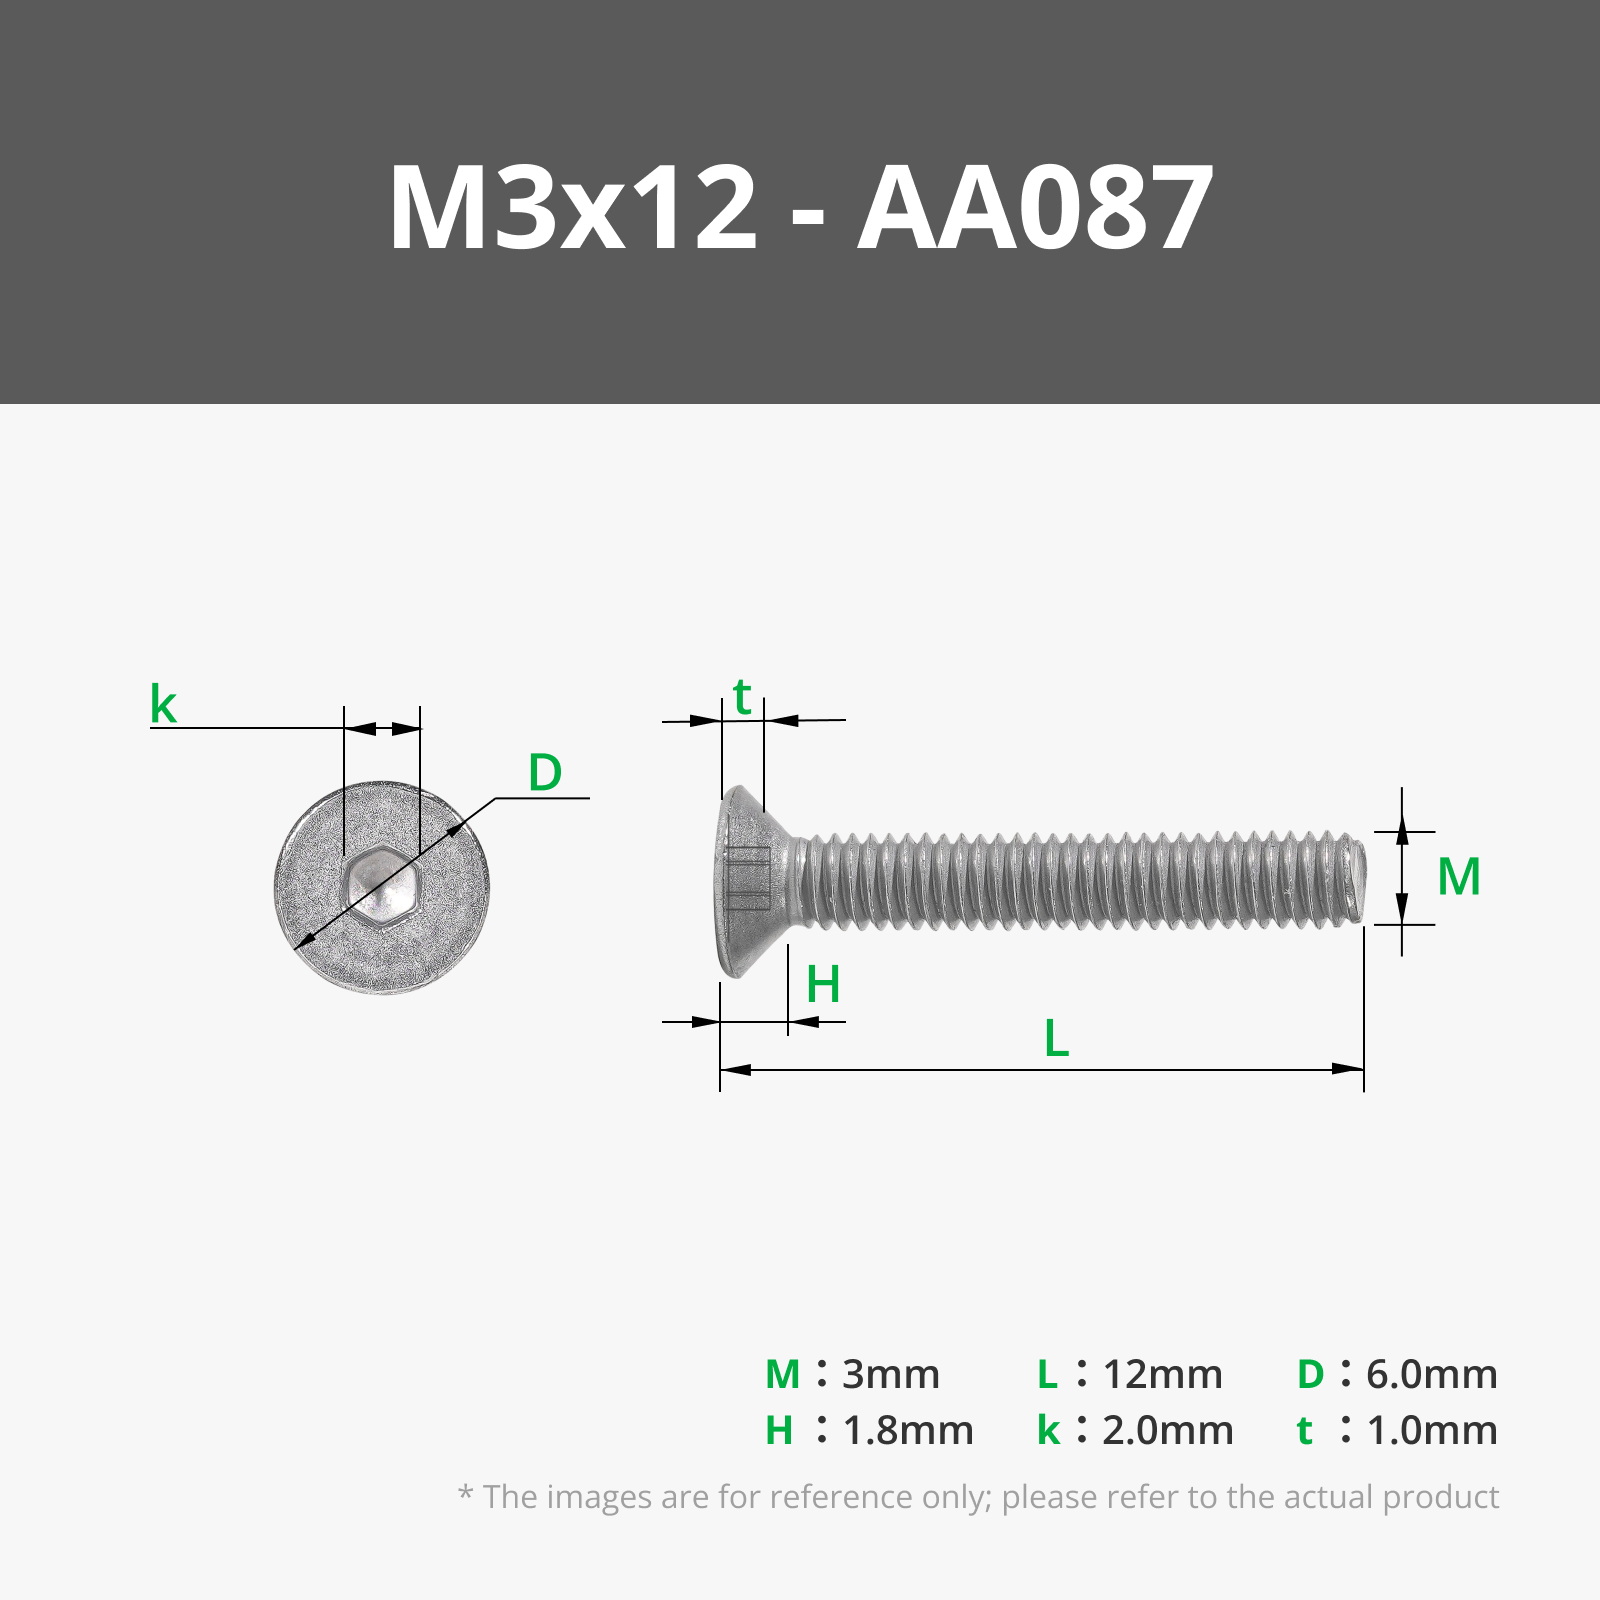
- Screws and nuts are required (PS. Between the two screw options, the shorter one will not protrude in appearance, while the longer one is easier to install, especially when there are printing deviations, making it easier for the nut to align, but it will protrude slightly):
- V3 pegboard four-side fasteners m3*12 or m3*14 ; between middle pegboards m3*8 or m3*10 ;
- V2 pegboard four-side fasteners m3*12 or m3*14 ; between middle pegboards m3*10 ;
- Choose round head or countersunk screws; both require m3 nuts for fastening.
- Installation from top to bottom is more convenient; the upper frame needs to be inserted and secured on both sides, and tightening the top will be more difficult to install.
- Check the model's edges for any sharp edges left by printing; trim them before installation to prevent injury.
- The rear G-clamp can grip distances from 0 to 5cm.
- Try to use power tools for installation; tightening screws by hand too much can be tiring.
- Do not hang heavy items on three or more layers.
Boost Me (for free)
License
This user content is licensed under a Standard Digital File License.
You shall not share, sub-license, sell, rent, host, transfer, or distribute in any way the digital or 3D printed versions of this object, nor any other derivative work of this object in its digital or physical format (including - but not limited to - remixes of this object, and hosting on other digital platforms). The objects may not be used without permission in any way whatsoever in which you charge money, or collect fees.
Comment & Rating (20)