Locking Blade Saber (Collapsible, Modular #8)


Print Profile(9)


Bill of Materials


Description
In this iteration of the design, I have developed a new locking mechanism that continues to improve from what I learned from each of the previous locking mechanisms. This mechanism is much sturdier and easier to install!
This version continues to have an option for a light module or connector cap that can join two sabers.
The saber completely assembled with the light module and extended light cap is about 118cm extended! And about 36cm collapsed. In its shortest configuration it is only around 28cm collapsed and around 110cm extended. If you combined the sabers, it would be about 56cm collapsed and over 2m extended. So please be careful.
While designing this saber, I was playing with the new TPU for AMS and fell in love with the stuff! I highly recommend using it create parts of your handle to greatly increase durability!
About This Saber

This customizable collapsible saber is the eighth (8th) collection of many different designs.
The sections screw together and are meant to be interchangeable with all the parts in these collections.
Here is a link to the whole collection: https://makerworld.com/en/@bill.m.davis/collections/713533
With this design I am including a light module (designed for a pen flashlight) and an end cap that can be joined (or not). I hope to add both these options to all my designs in the future, so there is more variety in the options for these.
To make the options easier to understand I have created separate print profile for each one, so you don't accidently print a part you didn't need for the configuration you wanted.
Inspirations for this model

Inspired from the movie “Star Wars: The Force Awakens” and the video games that followed it.
I loved how Kylo Ren's saber had a hilt, making it unique from the other sabers. And the lore about how he ripped open the saber to bleed the crystal to alter the blade color.
I am working on adding spring loaded hilt blades that will release when the saber is unlocked. [Future update!]
The mid section has shielding over it that has a section ripped away because of the lore of Kylo Ren's saber.
Assembly instructions
Most of the parts simply screw together and are printed all in one color (making them easier to print and with less waste).
Locking Head Assembly

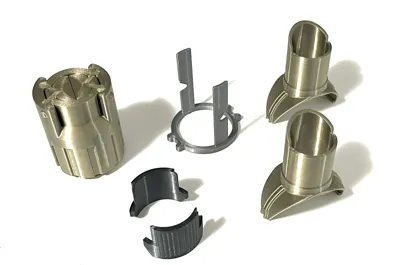
But the locking is more complicated. It consists of several parts, most of which are optional (the heat shields and the side hilts). The only parts required are the head itself and the locking mechanism.
Note: After printing the head, sometimes the doors get “stuck”, so you might need to push them out to open them the first time.
The optional heat shields (in black in the picture to the right) slide into the top of the head.


The optional side hilts (in bronze in the picture of parts, up and the right) slide on the head from the bottom. There are several grooves so you can customize the angle that they attach.
These are entirely decorative until I get the spring loaded mechanism working. So they can be considered optional unless you just really like the aesthetic of them. My plan is to update this model once I have those working.
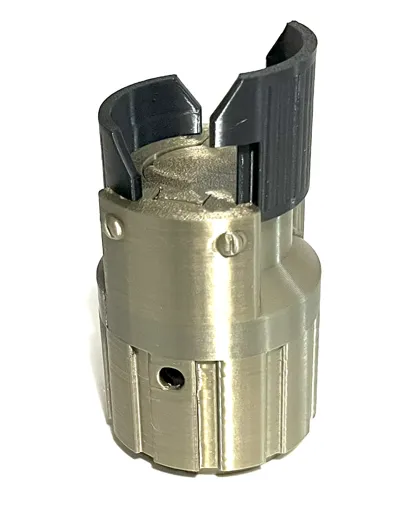
The locking mechanism simply slides into the slots in the bottom of the head. This is the easiest installed locking mechanism to date!

When the switch is to the right, it is locked. When the switch is to the left, it is unlocked.
Mid Section Assembly
The Mid Cover simply slides over the Mid section.

Light Module Assembly
These are the flashlights I use with this design (Non-affiliated links):
- US: (3.5 inch - short pen lights) https://www.amazon.com/dp/B097MKQ8MG
- US: (5.2 inch - long pen lights) https://www.amazon.com/dp/B09H2MNB65
- UK: (3.5 inch - short pen lights) https://www.amazon.co.uk/dp/B07LC6YPTC
- FR: (3.5 inch - short pen lights) https://www.amazon.fr/dp/B0BX3T43VC

The inner light holder (pictured in bronze above) comes together to close around the pen-light. It is then inserted into the light module (pictured in black above), and held in by screwing in the light cap (pictured in maroon above). The button on the bottom of the light pokes out end, allowing you turn it on and off while assembled.
Update 6/16/2025:
The long awaited Side Blades…
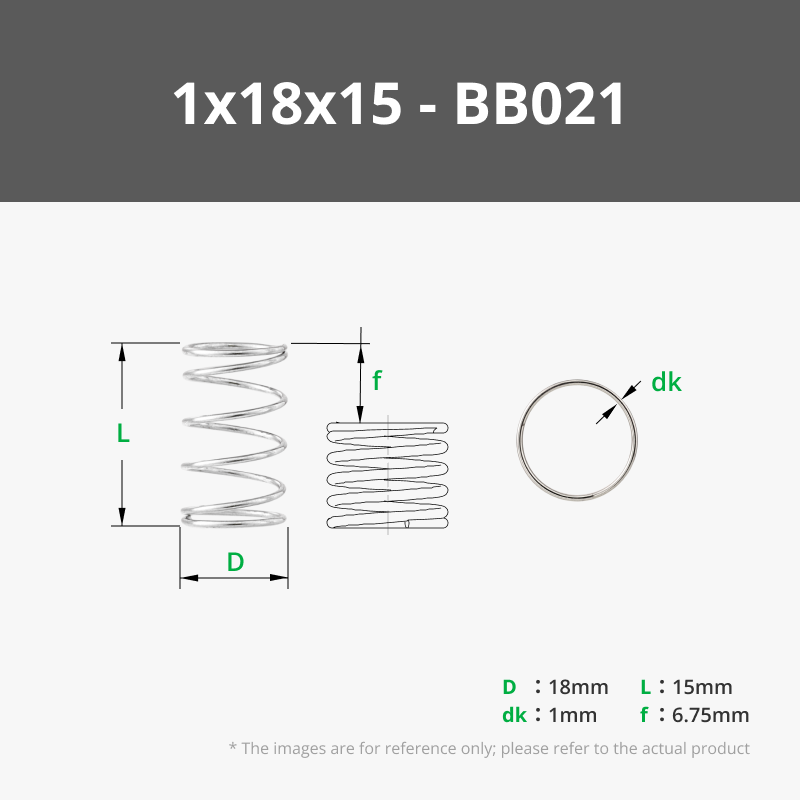
For automatic extension after releasing lock, Maker Supply springs are used (1x18x15mm Helical Compression Spring (2PCS) - BB021).
This is optional and can be used without the springs, but they are cool (when they work).
Step 1: Print the side blade pieces.


Step 2: Flip over the blade tip and insert the catch so that the hooks point away from the tip.
Glue is recommended for this, but not required.
Step 3: Insert the tip into the next section and install the cap.
Again, glue is recommended, but if you use it do be careful not to glue the sections to one another.
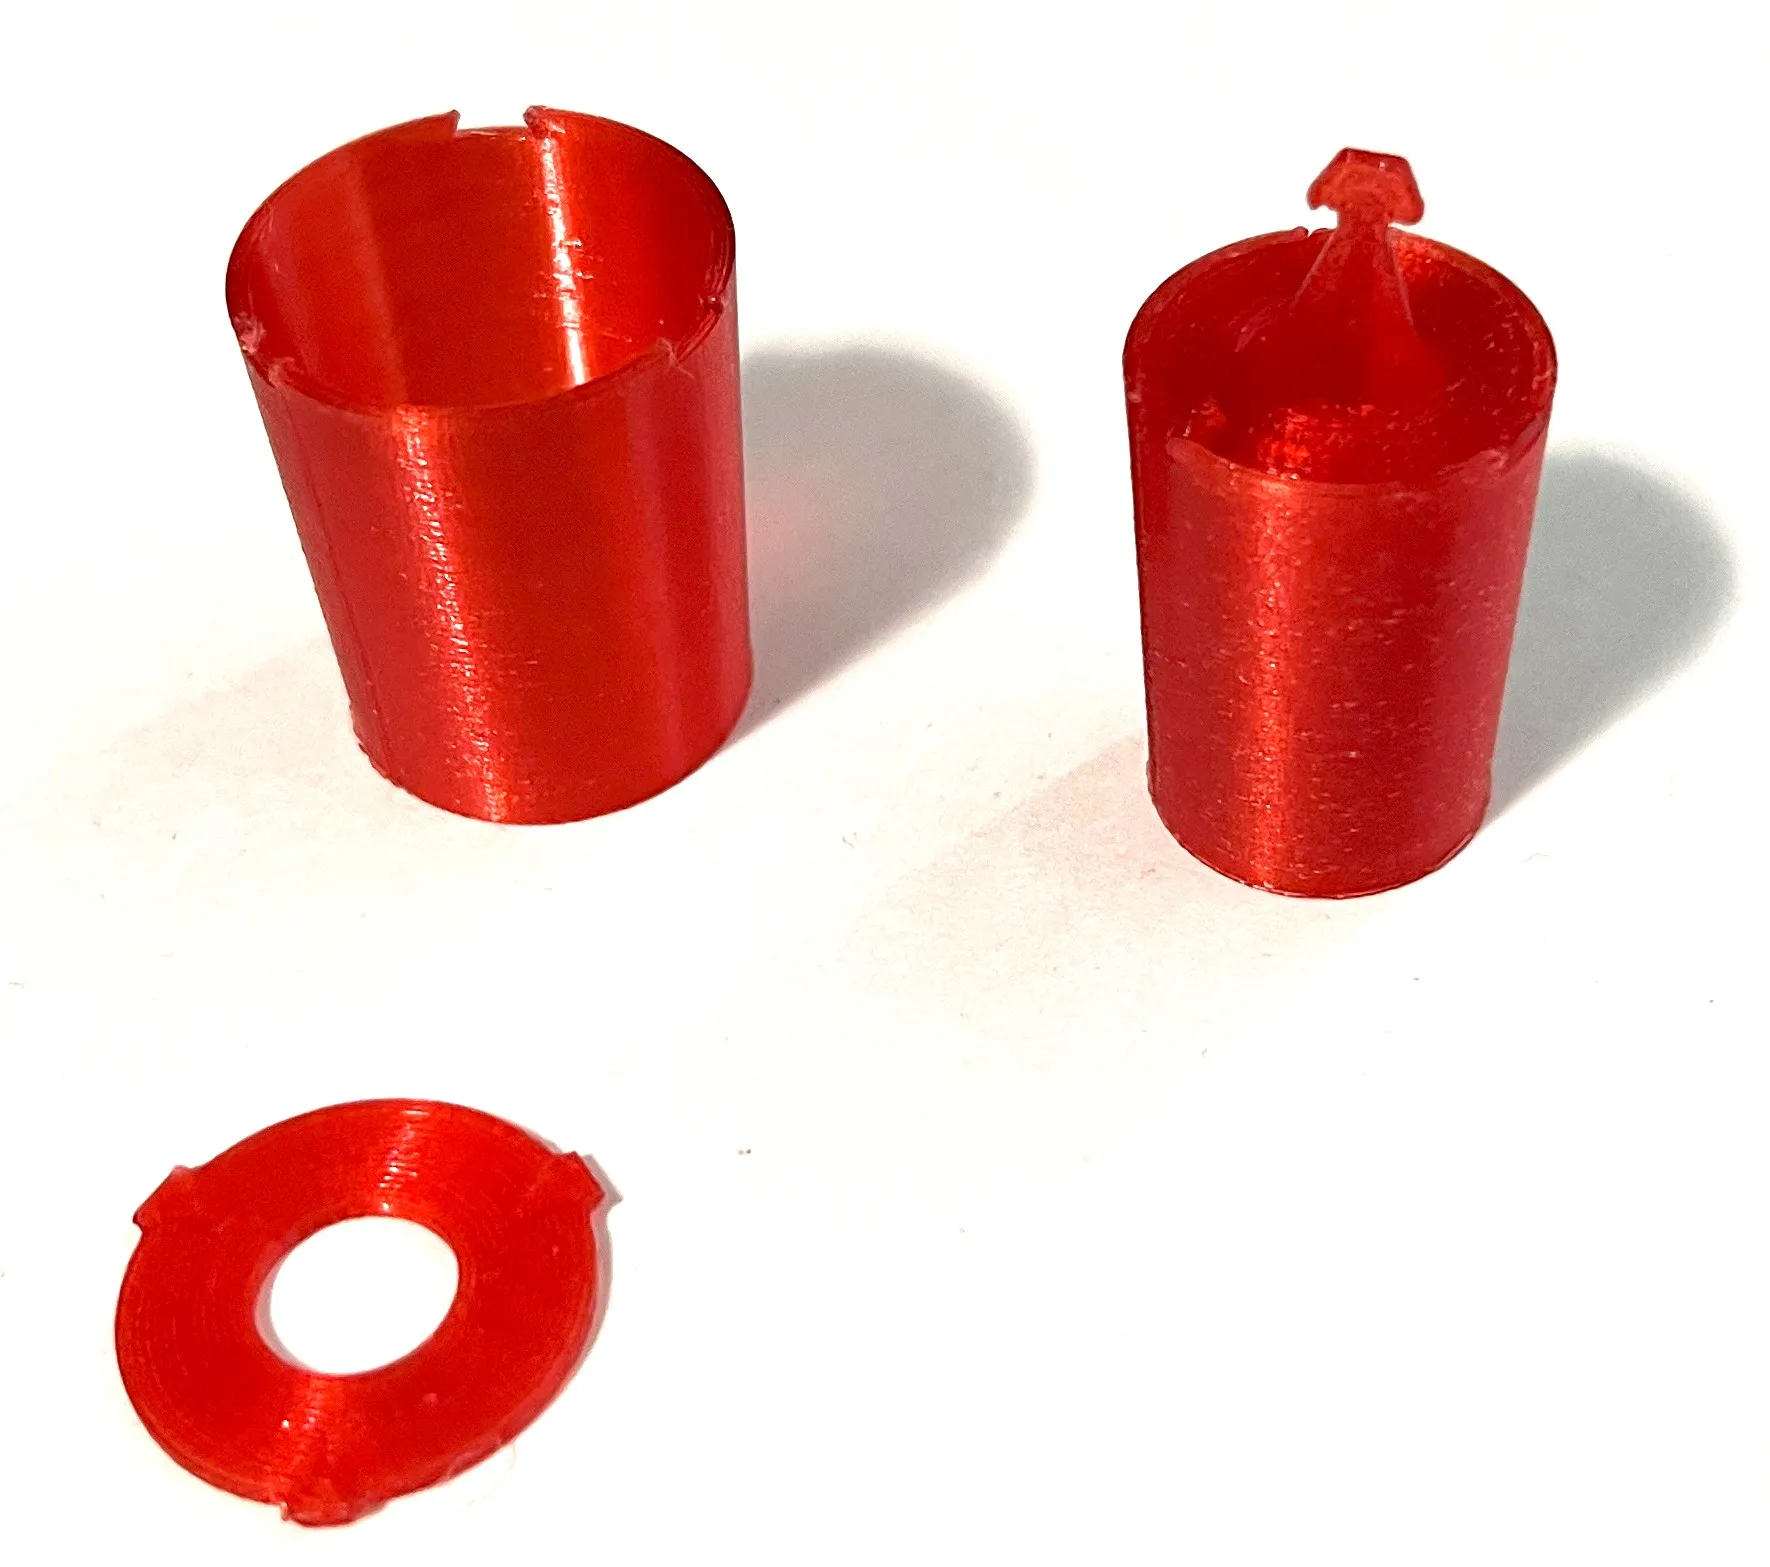

Step 4: Insert the blade sections into the last piece and install the cap.
Again, glue is recommended, but if you use it do be careful not to glue the sections to one another.
Step 5: Install the assembled side blade into the side hilt section, followed by the spring.
Then install the hilt section on the saber head.

Note: If you aren't using the spring you don't really need the catch and caps, unless you still want to lock the side blade in.

Known issues:
There are still some known issues with these side blades.
- The springs can get sideways in the hilt, requiring disassembly to fix
- The side blades sometimes need to turn a little to properly lock into the head
- The side hilt section can slide down when trying to lock the blades in place
These issues were the cause of the delay of the release of these side blades. But I released them due to many others asking for them. I will update this design if I find any resolutions to my liking for these issues.
Request for feedback
Please give me feedback in the comments. I am always looking to improve my designs and have several ideas in the works already, but I am always looking to improve things!
Boost Me (for free)
I am constantly iterating on my designs. Let me know which designs you like, so I know which direction to keep going!
It lets me know that all the effort that goes into each one is worth it, and encourages me to keep working on the next one!
© 2025 bill.m.davis. All rights reserved. No part of this content may be reproduced without permission.
License
You shall not share, sub-license, sell, rent, host, transfer, or distribute in any way the digital or 3D printed versions of this object, nor any other derivative work of this object in its digital or physical format (including - but not limited to - remixes of this object, and hosting on other digital platforms). The objects may not be used without permission in any way whatsoever in which you charge money, or collect fees.
Comment & Rating (375)