90 Degree Laser Smoke Hood Adapter for H2D


Print Profile(6)


Bill of Materials


Description
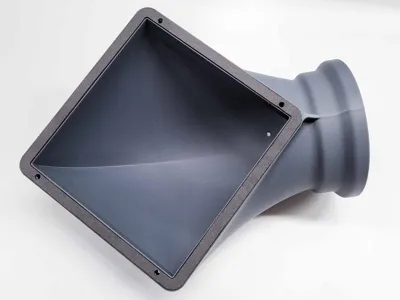
This is a 90-degree smoke hood for the H2D that allows the printer to be placed closer to a wall while still allowing the smoke absorber filter to be attached. It has a twist-lock quick disconnect adapter that allows it to be disconnected for 3D printing, so the hose and filter will not become a bottleneck for chamber cooling.
The twist-lock quick-disconnect adapter has an integrated TPU gasket, and is printable as a single part on the H2D, using Bambu Lab TPU 90A in the right nozzle and PETG-CF in the left.
I recommend printing the hood itself in PLA-CF, because the screw holes are tight and spacing is critical for proper fit. Other materials--even PETG-CF move enough during the printing process to cause fit problems when installing.
I have also included a DXF file to cut out a cork or foam gasket using the laser, and a sheet of 3M 468MP transfer adhesive to attach it. The adhesive isn't strictly necessary. The gasket will stay in place on the screws without it.
NOTE: This hood attaches using the same screws provided for the stock hood. Note that one of the screw ends up inside the hood. Place this screw into the hood before installing, and you can reach it with the wrench in the tool kit through the small hole in the back of the hood.
Comment & Rating (571)