G1 Optimus Prime Multifunctional Tissue Box (with storage, no AMS required)


Print Profile(3)


Description
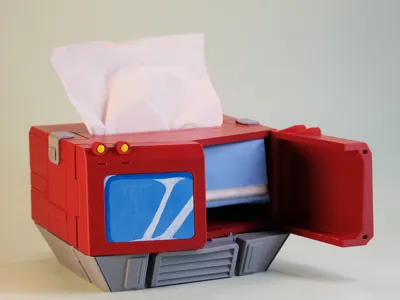
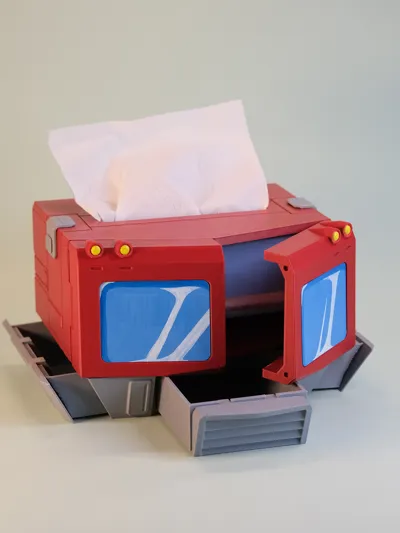
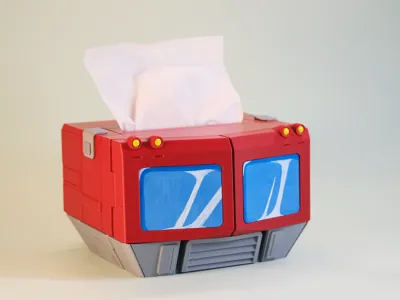
This is a multi-functional tissue box inspired by the 1984 G1 Optimus Prime from the Transformers franchise. Optimus Prime's chest compartment opens and closes, serving as the tissue dispenser. The waist features three small drawers, providing convenient desktop storage for small items.No AMSrequired! Single-color printing suffices.
Boost Me (for free)
Your support would be invaluable to me, thank you sincerely!
Your encouragement and feedback fuel my creative endeavors
2025.04.16 Update:
Responding to community requests for a larger version, I've scaled up the design by 112%, ensuring compatibility with most tissue box sizes.
Due to the increased dimensions exceeding the A1 mini's printing capacity, this enlarged version is incompatible with the A1 mini.
For users requiring alternative dimensions, simply scale all components proportionally. All existing versions support this scaling.
2025.04.03 Update:
My previously ordered magnets have arrived. Specifications: 3mm diameter, 2mm thickness, four magnets required. Please ensure correct magnetic polarity during installation.
This update includes an image illustrating magnet installation. Simply press the magnets into the designated recesses; an interference fit eliminates the need for adhesive. Magnet installation enhances the stability of the window components.

2025.03.30 Update:
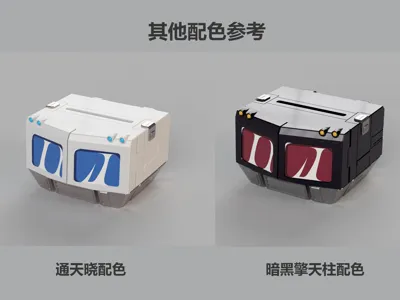
Two new color schemes are presented for printing reference: a white Ultra Magnus theme and a dark Optimus Prime theme. Feel free to adapt these color profiles to your available filaments and preferences. The glass effect has been separated in the multi-color AMS version; these renderings offer a color reference for customization; no other adjustments are required.

2025.03.29 Update:
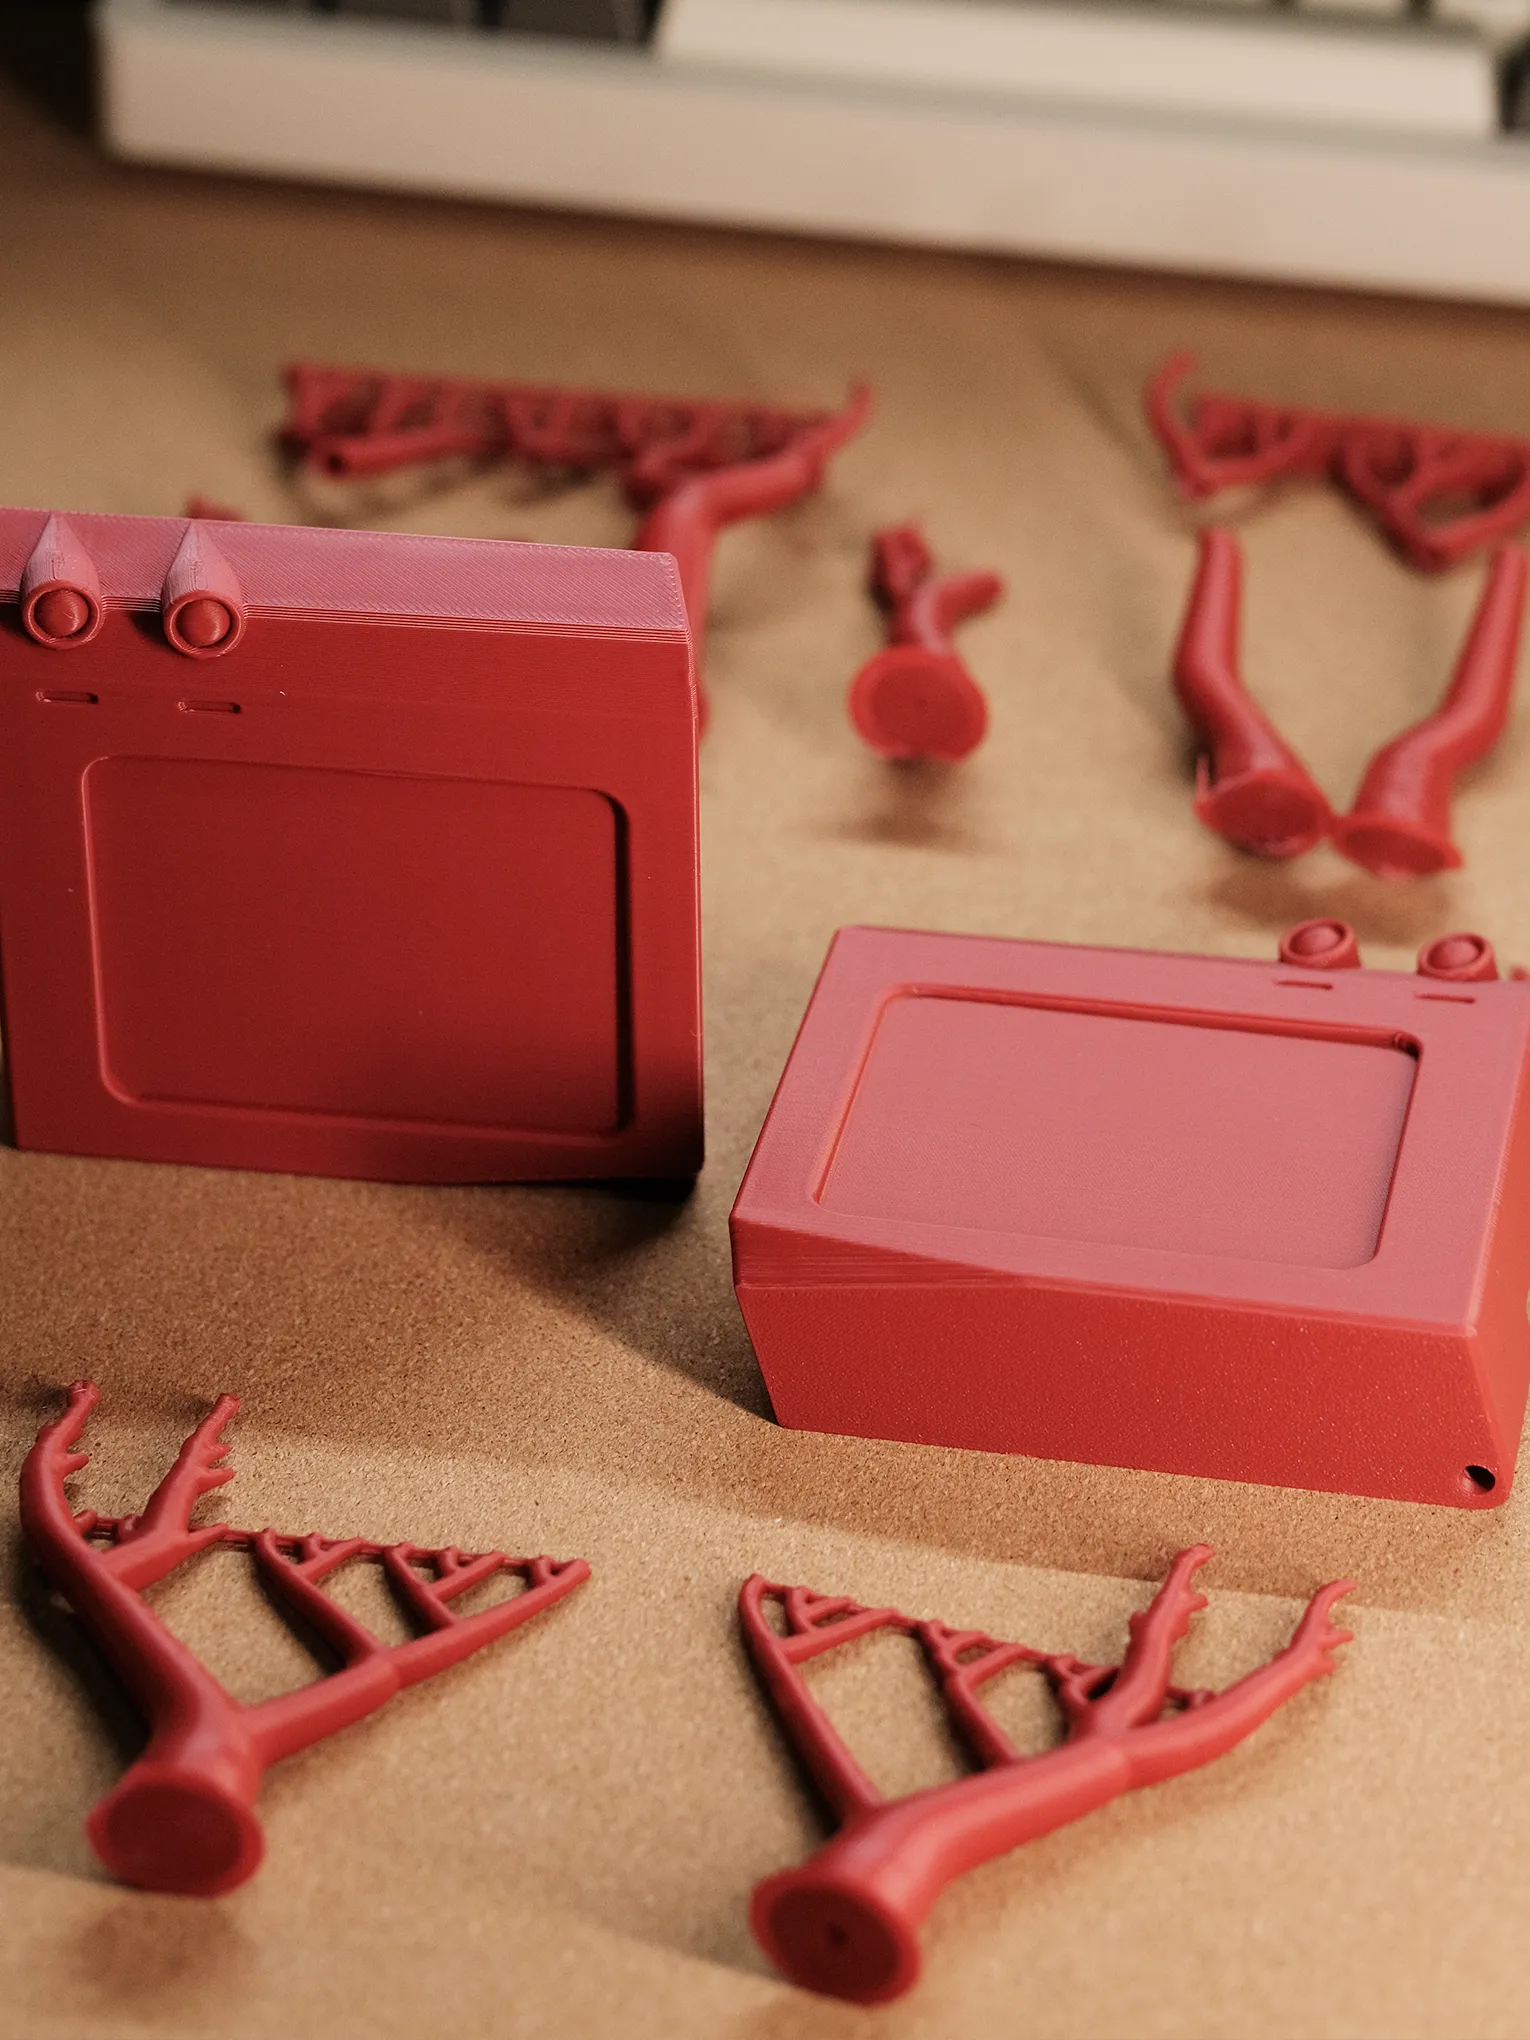
In response to community feedback, a disassembled, color-separated version has been added. This version separates the window components, creating independent headlights. The windows have been redesigned for multi-color AMS printing to mimic the hand-painted effect. This enhances the printing experience for those less comfortable with post-processing. Refer to the images below for details.

Headlight Component Separation

All components after color separation of the glass. If you do not have an AMS, simply delete the glass separation version for standard printing, then hand-paint the glass after printing.

Given my A1 mini printer's limitations, the internal dimensions of the tissue box are as follows; please consult these before printing:
15cm*13cm*9cm
My tissue box comfortably accommodates my current tissue supply. My tissue specifications:
3-ply, 100-count, 133mm*190mm,
Tissue box dimensions: 13cm*9.5cm*5.5cm
If your tissue dimensions exceed mine, proportionally scale all components.
The filaments I used are all from Bambu Lab, as detailed below:
Red: PLA Basic China Red 10205
Gray: PLA Matte Rock Gray 11102
This red shade is deeper, matching Optimus Prime's color; other reds tend to be brighter and less accurate.
I lacked metallic silver; substituting metallic silver for gray would likely yield a superior aesthetic.
Additional Note: Four magnet recesses are included in the window area. Magnet specifications are as follows:

Previous magnet supplies were exhausted, and replacements are pending; therefore, the image shows an installation without magnets. However, magnet installation is optional; the window hinges provide sufficient tension to keep the windows closed. Add magnets according to your preference. If installing magnets, please pay close attention to magnetic polarity.
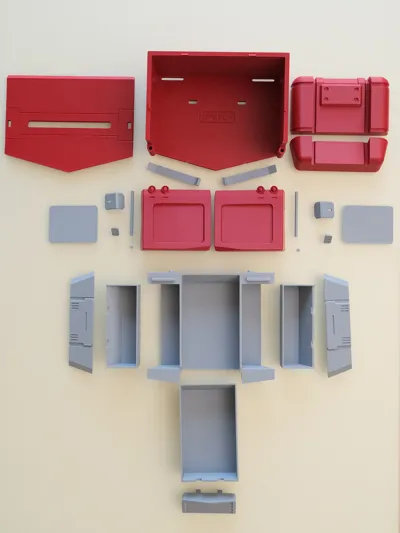
Below are images showcasing all components. 90% of the supports are easily removed by hand; only a few minor supports may require tools.


My build plate is standard and untreated. To prevent warping, I added small circular supports to some components; these are easily removed and do not affect the model's integrity. If your build plate uses adhesive, these supports may be deleted. As shown, larger components near the edge are more prone to warping; these added supports mitigate this risk.

Below are all the print plates; the arrangement follows the assembly order. After printing, removing supports, you may commence assembly:

The assembly process is illustrated below; numbered images correspond to the listed steps. Parenthetical instructions are optional; bold, red text highlights crucial steps:

Begin with the base assembly:
- Attach the right side panel to the right drawer slot (optional adhesion)
- Attach the left side panel to the left drawer slot (optional adhesion)
- Attach the intake panel to the center drawer slot (optional adhesion)
- Insert the assembled drawers into the base
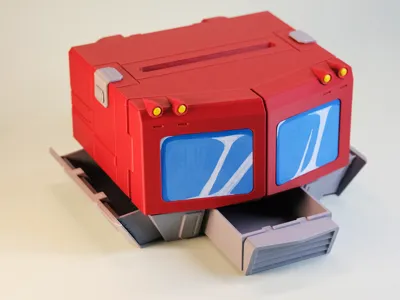
7. Base assembly complete. Assemble the tissue box component before final assembly.

Next, assemble the tissue box component; follow the numbered steps and arrow directions:
- Align the tissue box body and the front window pivots; insert the pivots through the bottom of the windows, through the box body, and through the window. Crucially: Before pivot installation, it is recommended to practice inserting the pivots multiple times to ensure smooth movement before assembly. This facilitates assembly, mitigating potential issues from variations in filament shrinkage. Pay close attention to this step!!! This prevents pivot insertion difficulties.
- After installing the side window pivots, attach the pivot end caps to the bottom of the windows; press firmly.
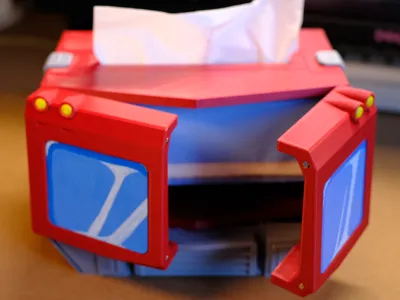
- Install the side glass panes using adhesive (hand painting is recommended for a superior finish; see my image for reference. For direct printing, silk blue filament is suggested). If you have magnets, install them into the four recesses in the center of the windows; pay attention to magnetic polarity.
- Install the two tissue retainers into the base, inserting them into the corresponding recesses.
- Insert the tissue box lid into the body, aligning the recesses.
- Attach the side latches to the lid.
- Insert the side latch hooks into the lid's locking recesses. This completes tissue box assembly.
- Attach the tissue box to the base, aligning the recesses (optional adhesion; only to the aligned recesses). Main body assembly is complete.
- Insert the upper and lower back packs into their corresponding recesses. Installation is complete.
License
You shall not share, sub-license, sell, rent, host, transfer, or distribute in any way the digital or 3D printed versions of this object, nor any other derivative work of this object in its digital or physical format (including - but not limited to - remixes of this object, and hosting on other digital platforms). The objects may not be used without permission in any way whatsoever in which you charge money, or collect fees.
Comment & Rating (9)