Diamond Painting Garage Version 3 - All Sizes


Print Profile(2)


Description
17.12.2025 → new print profile added! The 2nd print profile is only for my “DP Tray with Sliding Lid”! The tray spacing between the trays has been increased from 20mm to 23mm!
For all my normal trays, please use the first print profile :-)
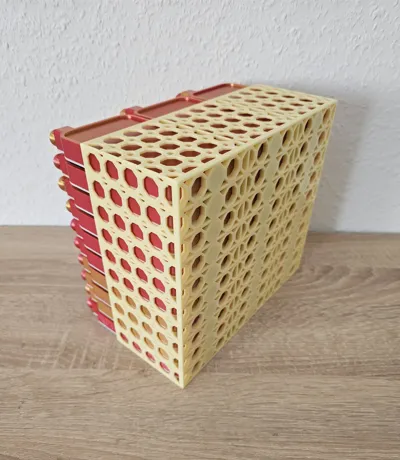
Diamond Painting Garages with Magnet Insert (all sizes in one file)
Version 3 - with Webs
Since I saw potential for improvement in my previous versions (Version 1 and Version 2), I am presenting my newest version here. :)
With this Version 3, I am now more than satisfied and think it will be the final version of the garages. :)
Compared to Version 1 and Version 2, Garage Version 3 now has a new shape with a new design motif. Furthermore, I have reduced the compartment floors and replaced them with webs. This results in a slight reduction in material and a slight time saving. Not groundbreaking, but still. ;-)
Function, dimensions, and magnet inserts have remained and are identical compared to Version 1 and Version 2.
This time I have summarized all sizes in one file, and 5 plates with 5 sizes are available.
- Plate 1: 5-slot Garage
- Plate 2: 10-slot Garage
- Plate 3: 15-slot Garage
- Plate 4: 20-slot Garage
- Plate 5: 30-slot Garage
Note for printing: I have adjusted the overhang speed and bridge speed and set them slower. To create an optimal bridge/overhang.
Suitable dimensions for trays that fit into the garage:
- Width 70 mm
- Height 17 mm
You can also find my Diamond Painting trays on my page or directly here via the link:
In the garage there are recesses for magnets for the following magnets:
- Max. 10mm in diameter (the recesses are square with dimensions 10.3 x 10.3 mm)
- Thickness Max. 2mm (also with corresponding tolerance)
- Magnets should be Neodymium and have at least "N42" classification to ensure proper hold.
For example, I currently use these: https://www.amazon.de/dp/B06X977K8L
A pause should be inserted in the slicer at layer number 19 to allow the magnets to be inserted. In the slicer, it appears that the holes are already closed, but the pause is made at the beginning of layer number 19, and the holes are only closed at the end of layer number 19.
If you have any suggestions, please feel free to let me know :)
Boost Me (for free)
If you want to support me and like my work, I would appreciate Boosts :)
License
You shall not share, sub-license, sell, rent, host, transfer, or distribute in any way the digital or 3D printed versions of this object, nor any other derivative work of this object in its digital or physical format (including - but not limited to - remixes of this object, and hosting on other digital platforms). The objects may not be used without permission in any way whatsoever in which you charge money, or collect fees.
Comment & Rating (17)