


Print Profile(2)

Bill of Materials

Description
Boost Me (for free)
I usually don’t ask for this, but I’ve noticed that many creators actively encourage it on other platforms—and it makes sense, as it helps increase visibility. So, if you can follow me, it would make difference. It’s a great way to support my work and show appreciation. For more insight subscribe my blog at: https://designrepcom.com/ This design is freely available for the community, but if you enjoy my work and would like to show your support, you can boost this project. Thanks!
Membership
This model is available for personal use. To obtain a commercial license, please check the available options.
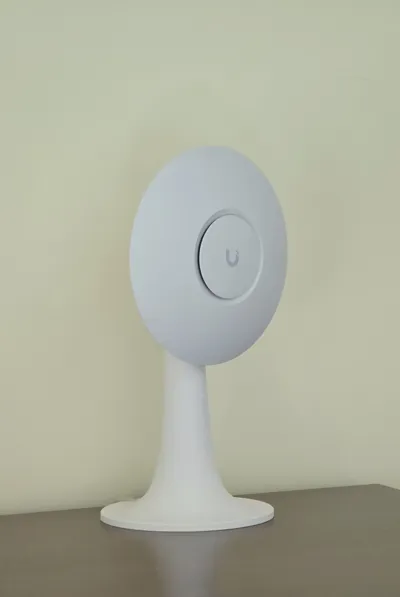
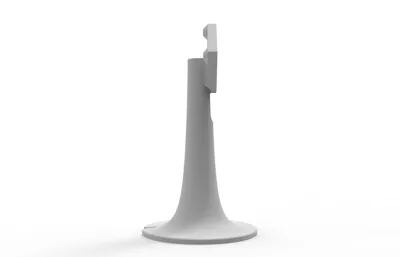
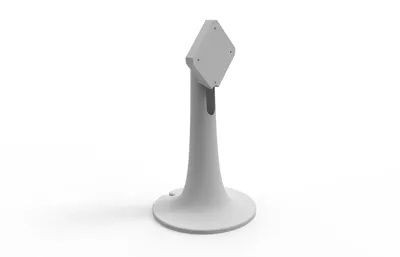
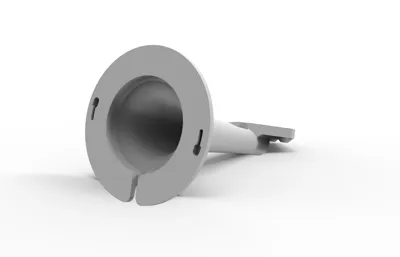
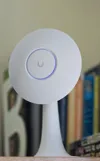
I designed a stand for the Ubiquiti Access Point, model U6+, but it should be compatible with several other models, as they appear to share the same mounting dimensions. Be sure to check the mounting measurements of your device to confirm compatibility.
This model features a fuzzy skin texture, which suits my space, but this option can be disabled if preferred. I printed it in matte PLA to match the wall color, which is also very similar to the device itself. For more details, check the materials list above.

 |  |
Assembly Instructions:
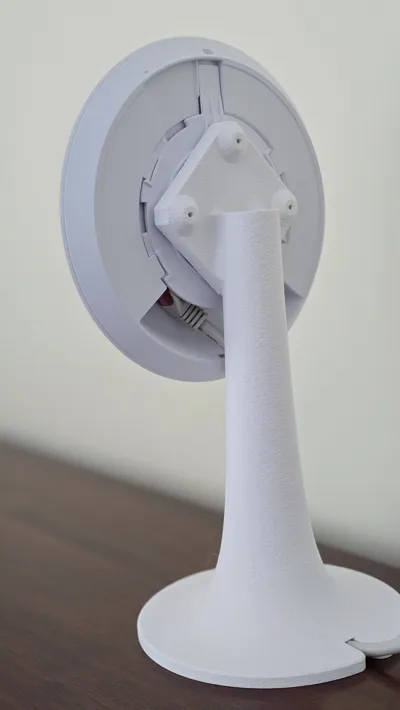
Use the same screws provided with the Access Point. They should fit into the stand without any issues, as the mounting holes have been reinforced to accommodate this type of screw. Avoid using brittle materials like PETG, as the wall may crack when inserting the screws.
Before securing the adapter that comes with the AP, insert the cable and leave some slack. Make sure to connect the cable to the RJ45 port before mounting the AP, as this will make installation easier.
You don’t need to use the metal mounting plate—it can be kept for another use.

You can find this variation following these instructions:
- Sometimes I update or add more print profiles, they can be found under the section “Download STL/CAD Files”

Change Log
- At the request of some of you, I created a variant that can be mounted on the wall, keeping the AP horizontal. I haven’t tested its functionality, and I don’t have the means to do so; the screws shouldn’t be too large, with a diameter of about 3mm, and the screw head should have a maximum diameter of 5.5mm.
If anyone opts for this variant, please test it first to ensure the mount can support the AP’s weight without falling

- Added a profile for the A1 mini, it's a shorter version.
Curious About My Tools? Check This Out!
For those of you who often ask about the tools I use to bring ideas to life, this article, The Journey From Idea To Object (Part I), offers some insights into the initial stages. It highlights the use of various tools, including software like Autodesk Fusion for CAD design, Blender for render and Bambu Studio for 3D printing preparation, and other... So, if you're curious about the software and hardware too, that I've incorporate in my workflow, take a look at the link for more details!" – Visit https://designrepcom.com/ for much more.
Documentation (3)


License
You shall not share, sub-license, sell, rent, host, transfer, or distribute in any way the digital or 3D printed versions of this object, nor any other derivative work of this object in its digital or physical format (including - but not limited to - remixes of this object, and hosting on other digital platforms). The objects may not be used without permission in any way whatsoever in which you charge money, or collect fees.
Comment & Rating (263)