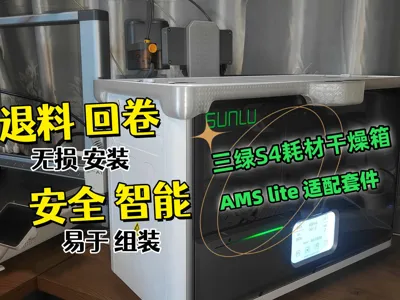
Three Green SUNLU S4 Filament Dryer AMS Lite Adapter Kit with Filament Rewind


Print Profile(1)

Description
Correction 2025.01.18: The BOM lists an incorrect screw size for the mounting rail; it should be M2.5*5 (M2.5*6 is also acceptable), not M2*5. This was an oversight on my part. Thank you to @user_2605302254 for pointing out the error. Those who purchased the incorrect screws can join the group using the number in the BOM and contact @非凡 to receive a VIP membership to my community. My sincerest apologies.
Functional Demonstration Video
Kit Assembly Video
Description
Click the link to view more of my intriguing designs
Safety is paramount; it transcends all else. Reject so-called inexpensive substitutes.
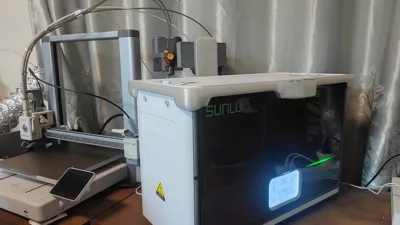
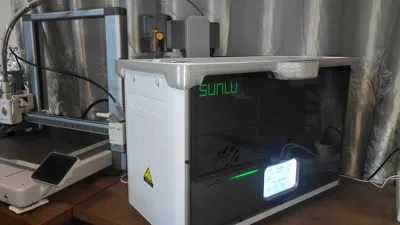
This kit utilizes the safe, intelligent, and aesthetically pleasing SUNLU S4 filament dryer from SANLU as the drying mechanism. Assembly complexity and print difficulty have been minimized (A1 mini version currently undergoing testing), allowing for seamless compatibility between the SANLU S4 filament dryer and the Bambu Lab AMS Lite multi-color system. The kit employs a mechanical telescopic design; without modifying or removing any of the dryer's components, it eliminates the need to rewind filament during AMS Lite filament changes, thereby preventing tangling.

PETG filament is recommended; print settings have been thoroughly tested.
The necessary hardware for this kit is listed in the BOM below, along with purchase links.
Installation is non-destructive, however, it requires disassembly and reassembly of the AMS Lite's control board and feeder components. Refer to the following Bambu Lab official tutorial videos for guidance.
Click here to view the official Bambu Lab AMS Lite disassembly and assembly tutorial
AMS Lite Feeder Component Installation Demonstration
① Install the AMS Lite feeder components, routing the feeder component wiring through the 3D printed model to the control board enclosure (the animation does not fully depict this process; the following image is borrowed from the original author).
Note: The feeder component bracket's flush side must face upwards. In the image, the white and blue wired components on the left are feeders 3 and 4, and the red and black wired components on the right are feeders 1 and 2. Each feeder component is secured with two M2.5*8 pan head screws.
Note: The feeder component bracket's flush side must face upwards. In the image, the white and blue wired components on the left are feeders 3 and 4, and the red and black wired components on the right are feeders 1 and 2; note their crisscross arrangement. The blue and white wired assembly exits the control board enclosure on the right, and the red and black wired assembly exits on the left—pay close attention to this detail. Secure the feeder component brackets with two M3*10 self-tapping screws.
Install the control board into the enclosure using three M2*5 pan head screws, as shown below. Connect the feeder components according to the diagram below; carefully check the markings made with a marker pen during disassembly to ensure correct installation.
Control board installation animation:

Animated demonstration: After completing the above two steps, insert the upper and lower component brackets into the control board enclosure and secure them with five M3*12 self-tapping screws.

After completing the above three steps, install the bottom plate of the control board enclosure using four M3*12 self-tapping screws. Ensure the arrow on the bottom plate points upwards, aligning with the flush side of the feeder component brackets. Refer to the animation.

After completing the above four steps, mount the assembled unit onto the dryer's feeder bracket using four M3*12 self-tapping screws.

Special thanks to:
The AMS Lite inlet protector model used within the dryer draws inspiration from Syxiaolu94's AMS Lite feeder guard pneumatic fitting model. Original model address:AMS Lite Feeder Guard Pneumatic Fitting - Secondary Creation by Syxiaolu94 - MakerWorldMy gratitude to Syxiaolu94!
Documentation (1)
License
You shall not share, sub-license, sell, rent, host, transfer, or distribute in any way the digital or 3D printed versions of this object, nor any other derivative work of this object in its digital or physical format (including - but not limited to - remixes of this object, and hosting on other digital platforms). The objects may not be used without permission in any way whatsoever in which you charge money, or collect fees.
Comment & Rating (22)