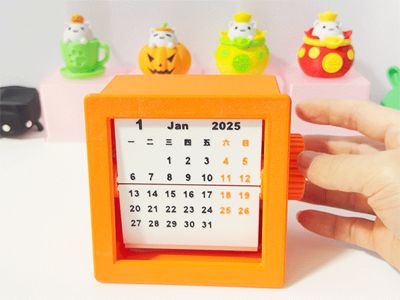
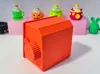
2027 flippable calendar - (2027 calendar updated) practical, stress-relieving, and fun, can be single-color printed


Print Profile(12)


Description
Boost Me (for free)
Time flies. Wishing you a new year filled with laughter, smooth sailing in all endeavors, and a bright future
2027 Flippable Calendar
Pure 3D print, no other accessories needed, snap-fit assembly, no glue required


2026.06.09 Update: Added 2027 calendar pages. Friends who want to give gifts can start printing now!
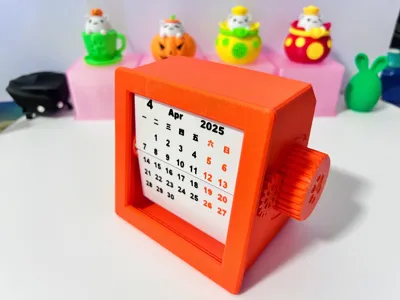
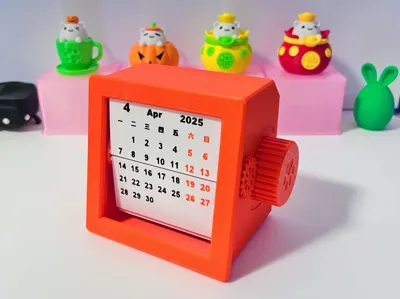
2025.04.06 Update: Added 2026 calendar pages. Friends who want to give gifts can start printing now!


2025.04.04 Update: The front cover's installation gap has been reduced for a tighter fit. If you downloaded the old version, please re-download and print the front cover


Installation Tutorial:
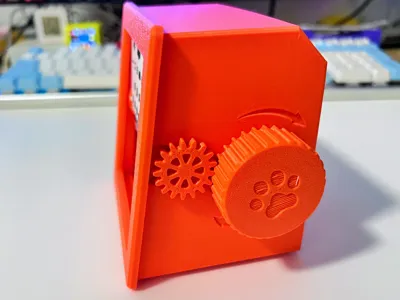
1. Install the large gear and the internal snap-fit wheel onto the main body (for a secure rotation, the snap-fit is designed to be tight, press it in with a finger on each side)


2. Assemble the following parts as shown in the diagram. The small gear on the far right is snap-fit installed


3. Install the assembled small gear component onto the front cover (Note: the side with the gear faces the small notch on the front cover)

4. Install the calendar animation pages (Installation order is explained at the end)


5. Install the anti-reverse spring tab into the notch on the front cover, with the beveled side facing inwards


6. Snap the front cover assembly onto the box


Animation Page Installation Order:
Flip the front cover over, with the gear facing to the right, then insert the 1-12 month pages in the following numerical order
(For example: the lower half of January is installed in hole #1, the upper half of January is installed in hole #2
Then the lower half of February is installed in hole #2, the upper half of February is installed in hole #3
Repeat this order to install the remaining months)


Membership

License
You shall not share, sub-license, sell, rent, host, transfer, or distribute in any way the digital or 3D printed versions of this object, nor any other derivative work of this object in its digital or physical format (including - but not limited to - remixes of this object, and hosting on other digital platforms). The objects may not be used without permission in any way whatsoever in which you charge money, or collect fees.
Comment & Rating (46)