Spring-Loaded Hex Bit Case Box


Print Profile(2)


Description
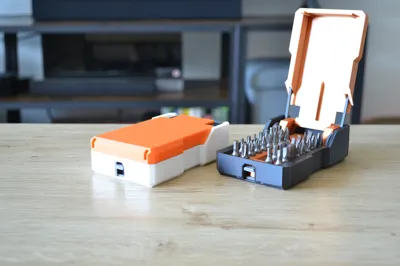
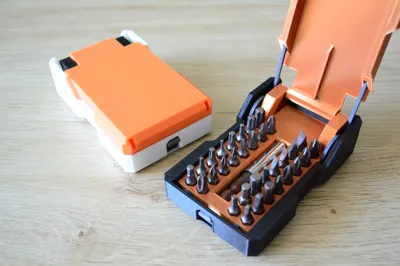
Hey everyone, Bear here! I was never really satisfied with the flimsy case my hex bit set came in, so I took matters into my own hands and designed my own! What started as a simple storage solution evolved into a fun, fully 3D-printable, spring-loaded case!
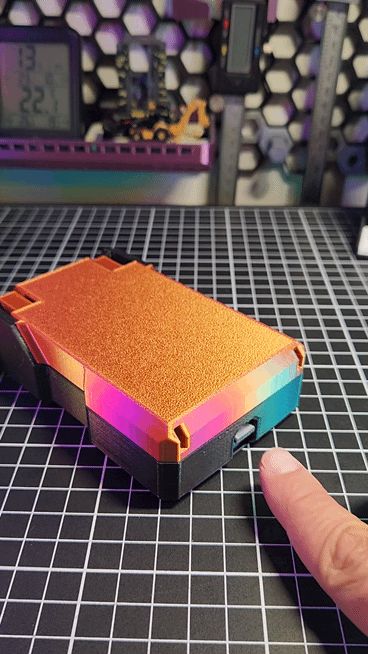
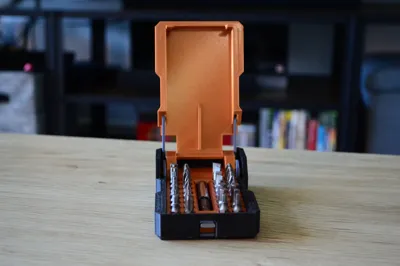
No extra hardware needed! Well, maybe some glue xD The springs are 3D printed too. With a simple push of a button, the lid pops open automatically. It's a satisfying little mechanism that adds a bit of joy to tool organization. This case can hold up to 32 hex bits and even has a dedicated space for an extension.

The model consists of 8 easy-to-print parts, none of which require supports:
- Outer Shell - [HexbitOuterShell.stl]
- Lid - [HexbitSpringLidV3.stl]
- Container Grid - [HexbitContainerGridV4.stl]
- Release lock mechanism - [HexbitReleaseLockV5.stl]
- Hexagonal Pins (x2) - [HexbitHexagonalPin.stl]
- Lid springs (x2) - [HexbitLidSpringV1.stl]
Updates
Update! 05/05/2025: Just uploaded a STP file for you to customize the grid part :D So you can make it fit your needs! The file is HexBitContainerBaseBlank.stp Have fun!
Assembly
Assembly is straightforward but needs to follow this order:
- Push the release lock mechanism firmly into its designated slot in the Outer Shell. Set this aside.
- Attach the lid springs to the Container grid using the hexagonal pins.
- Insert the lid into the assembled springs and Container grid. Secure the lid by inserting a small piece of filament (1.75mm diameter) through the designated holes, cutting it flush inside the Container grid.
- Carefully insert the completed lid, spring, and Container grid assembly into the Outer Shell (with the locking mechanism already installed). I suggest adding some glue between the Container Grid and the Outer Shell.

Once assembled, you can start loading your hex bits! I really enjoyed designing this project and hope you have just as much fun printing and using it!
Comment & Rating (77)