Easy-Peasy Customizable Drawer Dividers v2


Print Profile(2)

Description
Boost Me (for free)
thanks if you feel compelled to boost. much appreciated.
This generator divides a drawer or box into evenly sized cells or sections. You set the drawer dimensions, grid layout (rows, columns, optional special cell), divider thickness, decorative pattern, and print-size limits. Dividers automatically split into smaller sections depending on max print length, aligned with dovetail joints for easy assembly.
To further subdivide a section, just treat it like a new drawer and run the generator again with the smaller dimensions.
I wanted to make drawer dividers that print in one job with minimal filament. Also I wanted the layout to be shown in the customizer. Using these dividers gives the illusion of organization without the effort/planning other bin or divider systems require (no hate on Gridfinity). Just export the STL, split into objects, rearrange, and print.
V2 Updates:
- Horizontal dividers can still split automatically when they exceed the printable X length.
- Vertical dividers can now also split automatically when they exceed the printable Y length.
- X and Y print limits are now controlled separately with max_print_length_x and max_print_length_y.
- New decorative patterns were added: diamond ◆ and slots ▥.
- The slots pattern can be rotated with slot_angle, so it can look like straight jail bars or diagonal slats.
- Some internal cleanup/refactoring was done to make the OpenSCAD easier to maintain.
Inputs Overview:
Drawer/Divider Parameters:
- drawer_width, drawer_length, drawer_depth: internal size of the drawer.
- divider_thickness: thickness of each divider wall.
- max_print_length_x: max printable X length before horizontal dividers split.
- max_print_length_y: max printable Y length before vertical dividers split.
Grid Layout:
- columns, rows: number of cells across X and Y.
- colspan, rowspan: size of the special cell (starting at top-left).
Pattern Options:
- pattern: choose between none 🛇, honeycomb 🐝, pill 💊, diamond ◆, or slots ▥.
- pattern_border_thickness: how much solid area to leave around patterns.
Honeycomb Pattern Settings:
- cell_radius: size of each hexagon.
- cell_gap: spacing between them.
Pill Pattern Settings:
- pill_height, pill_radius: pill shape dimensions.
- pill_horizontal_gap, pill_vertical_gap: spacing between pills.
- pill_offset: stagger offset for alternating rows.
Diamond Pattern Settings:
- diamond_width, diamond_height: size of each diamond cutout.
- diamond_horizontal_gap, diamond_vertical_gap: spacing between diamond cutouts.
- diamond_offset: horizontal stagger between alternate diamond rows.
- diamond_vertical_offset: vertical overlap between diamond rows.
Slots Pattern Settings:
- slot_width: width of each slot cutout.
- slot_horizontal_gap: spacing between adjacent slot columns.
- slot_angle: angle of the slot cutouts. Use 0 for straight vertical bars or positive/negative values for diagonal slats.
Junction Settings:
- junction_width, junction_thickness, junction_height: size of dovetail junction blocks.
- dovetail_clearence: clearance added to the male joint.
Things to Note:
- Honeycomb and diamond patterns tend to take longer than no pattern or slots.
- If your max_print_length_x is smaller than the drawer width, the horizontal dividers will be split with an extra dovetail joint in the middle.
- If your max_print_length_y is smaller than the drawer length/vertical divider segment, vertical dividers will also split with extra dovetail joints.
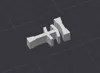
- Run the dovetail test example first to dial in your dovetail_clearence. I like a super tight fit that you tap in with a hammer, but "loose as a goose" also works fine.
- I'm no SCAD wizard, so things might break at the extremes. If the min/max ranges for parameters don't suit you, just modify the values at the top of the file directly.
- If you want the dividers to be more fixed in the drawers, leave a little room in the dimension for a thin strip of double sided tape.
Print Settings:
- No Pattern: Use 1 wall and 5% infill to save time and filament.
- The fit is looser this way (even with 0 tolerance). If that bugs you, you can increase the flow ratio slightly to tighten things up.
- With Pattern: Use at least 2 walls to avoid sloppy overhangs and weak pattern edges.
- Honeycomb especially benefits from at least 2 walls.
- I use a 0.28mm Extra Draft preset on my Bambu P1S.
- I also add mouse ears or a brim to help with bed adhesion, especially useful for tall dividers.
License
You shall not share, sub-license, sell, rent, host, transfer, or distribute in any way the digital or 3D printed versions of this object, nor any other derivative work of this object in its digital or physical format (including - but not limited to - remixes of this object, and hosting on other digital platforms). The objects may not be used without permission in any way whatsoever in which you charge money, or collect fees.
Comment & Rating (117)