


Print Profile(1)

Description
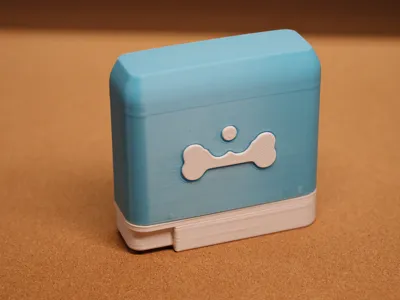
This is a compact treat dispenser suitable for training both canine and feline companions, also serving as a miniature feeder. Its diminutive size ensures effortless portability. A simple press of the button dispenses treats automatically.
It accommodates various treats, including kibble, freeze-dried food, and jerky, provided the dimensions are less than 14mm x 14mm. Ideal for outdoor training sessions, its convenience extends to home use as well, enabling swift reward delivery with a single press.
Boost Me (for free)
Your support is invaluable to me; thank you sincerely! Your encouragement and feedback fuel my creative endeavors.

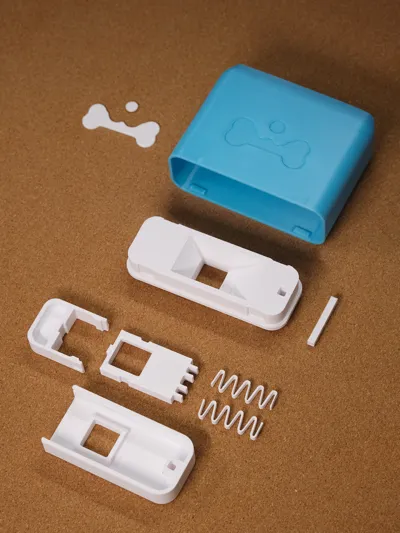
All components are 3D printed. PETG or PETG-HF is recommended for optimal results. The print requires only 50 grams of filament, and assembly typically necessitates minimal or no adhesive, following the illustrated instructions.
Single-plate printing is feasible without color changes.
05.01 Updated Print Files
The previous version featured an outdated spring clasp design. The current print files represent the latest iteration. For those with prior prints, only the button insert and slider (parts 1 and 2) need replacement. New prints require no such adjustments.

Assembly video tutorial: Assembly is straightforward, taking only one minute.
Component diagram shown below, followed by detailed instructions.

Detailed assembly instructions:
1. Insert the button into the base.

2. Attach the slider to the button (aligning the three clasps).

3. Insert the two springs into the corresponding slots on the slider.

4. Secure the base to the housing.

5. Insert the locking posts into the corresponding square holes in the housing and base (pre-inserting the posts several times into their respective holes is recommended for smoother installation).

6. Adhere the dog bone and nose embellishments to the top cover. Once the adhesive on the top cover is dry, attach it to the base using the corresponding clasps.

7. Completed assembly.

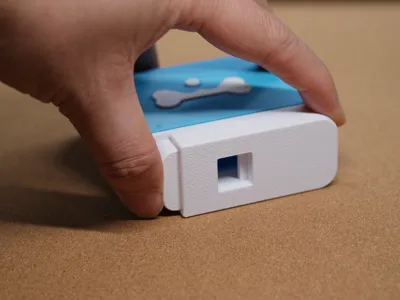
8. Pressing the slider releases treats from the bottom.

License
You shall not share, sub-license, sell, rent, host, transfer, or distribute in any way the digital or 3D printed versions of this object, nor any other derivative work of this object in its digital or physical format (including - but not limited to - remixes of this object, and hosting on other digital platforms). The objects may not be used without permission in any way whatsoever in which you charge money, or collect fees.
Comment & Rating (41)