Vortex Fantasy


Print Profile(4)


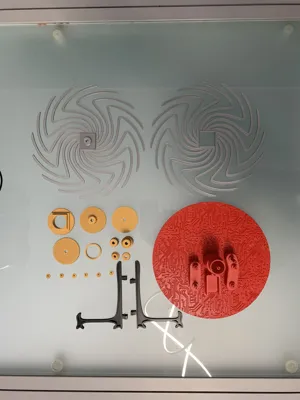
Bill of Materials


Description
Update 05/22/2026
Version 3
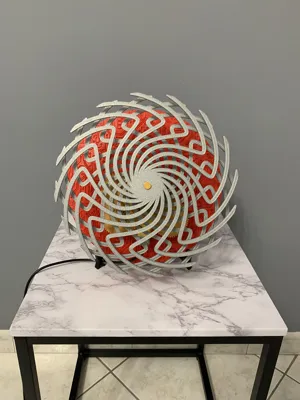
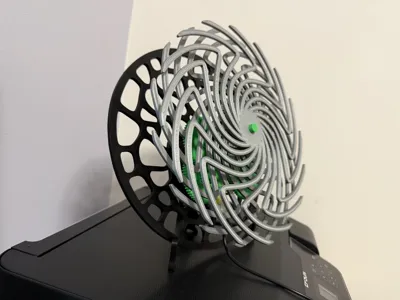
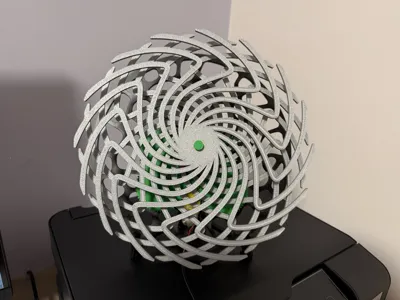
This is the final version. I reviewed all the tolerances with my H2S after calibrating with the Vision Encoder platter. I added a threaded part above each pin containing the gear so I don't have to use glue to hold the gear in place. Now all you have to do is insert the cap, screw it in, and that's it. Finally, I redesigned the base in a Voronoi style to achieve greater depth. I highly recommend downloading this final version!
Version 2
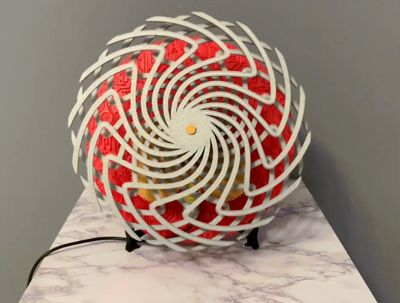
increased the plate to have a greater psychedelic effect, so now the plate and the pinwheels occupy almost the entire plate, the effect is now much greater than the previous version, I leave both versions so you can decide which one to print, if you want version 2 print or download the profile with "Version 2" written while if you want to print version 1 print or download the profile with "Version 1" written
Project born in 3 days, several tests until getting the most out of the starting TT Motor present in the Bambulab store (I leave you the link of the used motor in the list), I decided to use these colors to make sure they are clearly visible from each other, red for the base, black for all the gears and caps and silver for the two pinwheels, all Bambulab filaments, if you want to change colors as you like. I chose to leave the gears exposed and not close them intentionally because I find them so beautiful to see while they turn and make it clear how they work, I added two bases in addition to the existing one, a generic one without any kind of texture, and another one with a wood-like texture. I leave you a video for the assembly:
https://youtu.be/kCmo8yV2Gl8?feature=shared
ATTENTION: small modification to the caps, they are no longer interlocking because they had too little play to be modified, so I gave them a tolerance to make them fit more easily, put a dot of glue inside the hole where they are to be placed, I put for example the super attak loctite, but only a tiny tip, be careful not to let the glue go over the gears. You can also honestly not put the caps on, because even if you set up the mechanism, no piece will come out of its place.
Happy Printing!
License
You shall not share, sub-license, sell, rent, host, transfer, or distribute in any way the digital or 3D printed versions of this object, nor any other derivative work of this object in its digital or physical format (including - but not limited to - remixes of this object, and hosting on other digital platforms). The objects may not be used without permission in any way whatsoever in which you charge money, or collect fees.
Comment & Rating (28)