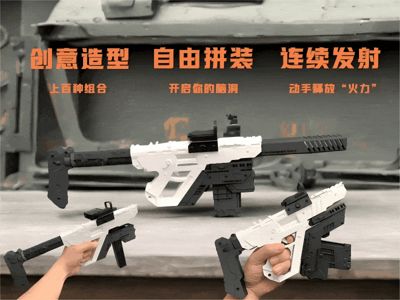
Versatile Shape Creative Combination Rubber Band Shooter—Mini can be played, assembled at will, no hardware required, no AMS needed


Print Profile(3)


Description
Boost Me (for free)
Follow the author, who often updates all sorts of weird and wonderful models~
See if you like any of the author's other little toys ~Click the image to enter:

Update Notes: The main principle of this model's firing mechanism is the combination of the rubber band's tension and the friction generated by the rotation of the firing gear. If your rubber band and firing gear do not work well together, in addition to the solutions in the installation instructions, you can also try reversing the orientation of the firing gear (Thanks to netizen dog.2018 for the suggestion)
Update: According to feedback from some netizens, for unknown reasons (indeed, I don't know why, the author and many friends can print it directly without any issues), but some machines printing the cylindrical part of the gun stock shown in the image below might experience spaghetti, so a separate print profile with a detached cylinder has been newly uploaded for this gun stock. If you encounter problems printing this part, you can print this part separately and then glue the cylinder into the reserved hole (July 19)

Update: Some edges have been chamfered according to netizen suggestions (July 03)
Model Introduction:
This is a toy the author owned as a child, but back then it was made of wood and very crude. Now, using my imagination, I have remade it with 3D printing for my child
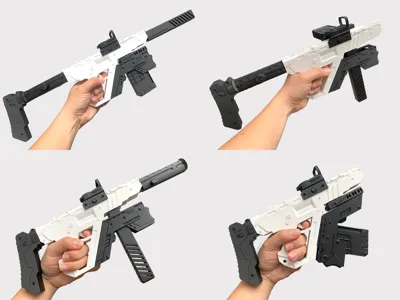
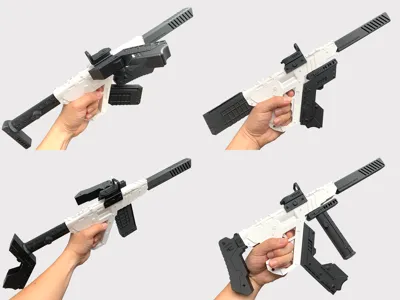
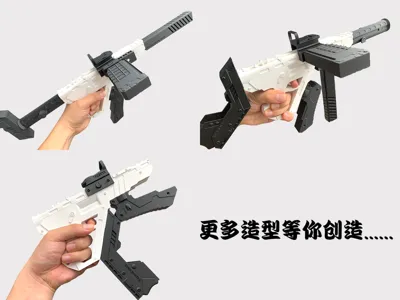
The gameplay is to let children use their imagination to assemble a launcher of their favorite style, be it modern, sci-fi, quirky, or fantastical! Theoretically, hundreds of configurations can be combined. And it can continuously fire rubber bands, has certain power and range. Crucially, it causes almost no harm to people, so children can play with peace of mind. It both sparks their imagination and trains their practical skills: assemble! shoot! educational and fun! What boy can refuse to assemble his own unique and cool weapon (The author uses official PLA Lite filament)
(Note: Regarding model size, the model is designed for children to play with. The hand in the pictures is the author's own hand holding it (the author is not tall, an adult of 174CM), and the author can play with it normally. But if you are a "big friend" with larger hands or wish to print a larger size, you might need to enlarge all parts proportionally and re-plate them for printing. The main model's length is about 51CM, and the hole at the trigger is about 1.5X3CM)
If you decide to print, please read the following instructions carefully:
① Recommended rubber band size: Diameter 4CM-6CM Note: If the rubber band is too tight, when loading multiple shots, continuous firing might occur due to excessive tension. If the rubber band is too loose, it lacks tension, resulting in weak shots and possibly not providing enough elasticity to drive the mechanism. The support burrs on the inner wall and top surface of the pinholes must be thoroughly removed (3 pins correspond to three holes) to prevent over-tightening after installation, ensuring the mechanism operates smoothly (even when only one rubber band is loaded, it can fire normally) and does not affect smooth firing (as shown in Figure 1)
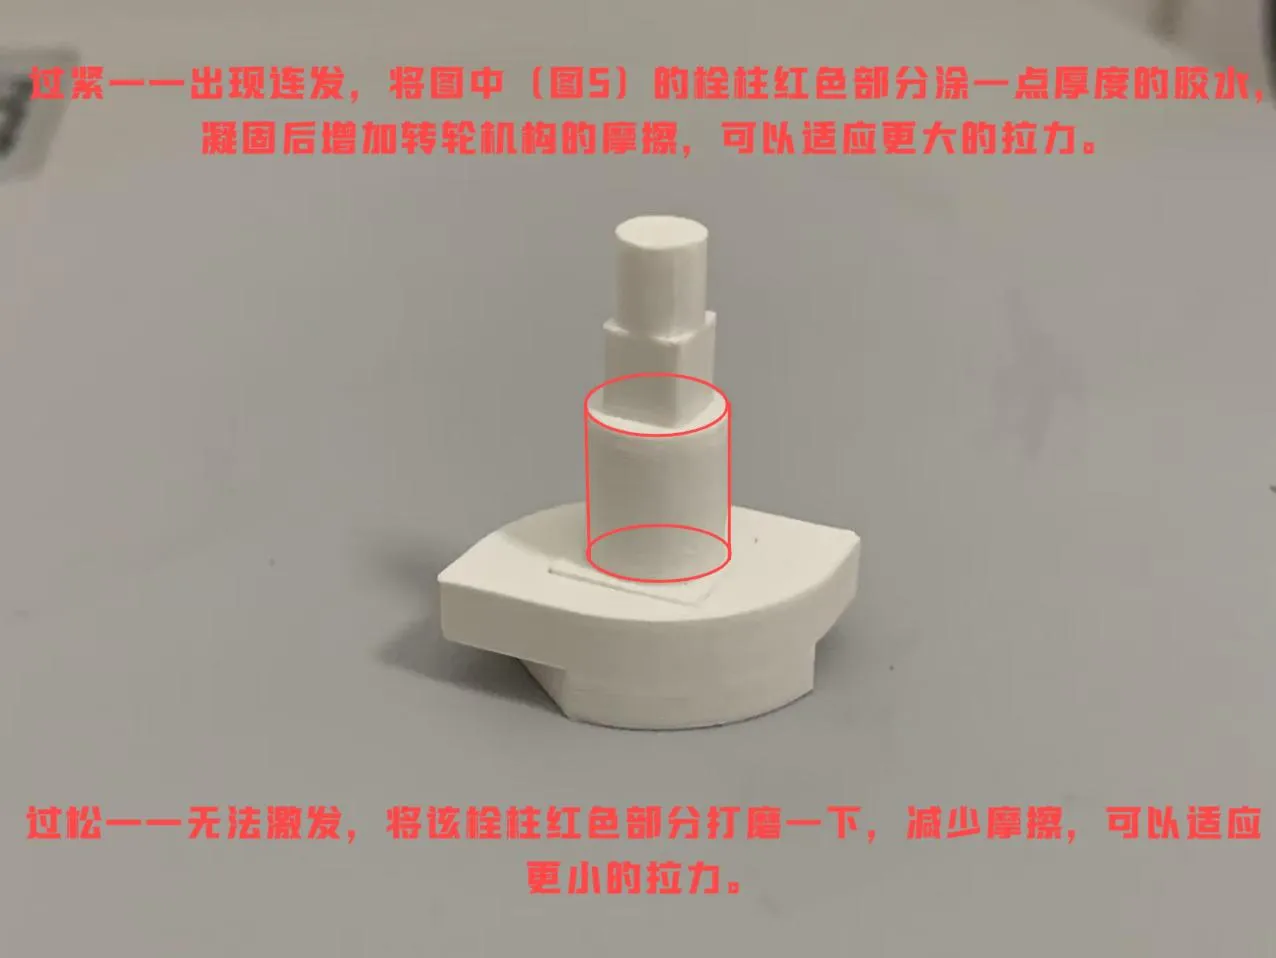
②Solutions when your rubber bands are not suitable: Too tight — results in continuous firing. Apply a thin layer of glue to the red part of the pin in the image (Figure 5). After solidification, this increases the friction of the rotary mechanism, allowing it to accommodate greater tension (the author successfully adapted 3CM diameter rubber bands with this method, which can be fired very far). Too loose — unable to trigger. Sand down the red part of the pin to reduce friction, allowing it to accommodate smaller tension
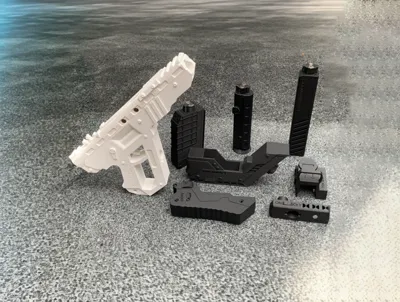
③The launcher body can be used alone without any accessories. The style expansion pack uses 6X2MM magnets. A total of 38 pieces are needed for a full setup. Official strong magnets are recommended, low-quality magnets may not provide sufficient magnetic force. Attention! The orientation of the magnets for the main body and extension parts must be confirmed before gluing them in place!!! It is best to mark the positive and negative sides of the magnets with a marker to avoid mistakes! Only with correct orientation will the extension parts be able to change positions freely. If there is a tolerance between the magnet mounting holes and your magnets, please sand them slightly before gluing. Friends without magnets can also directly glue the parts after choosing a style
④Magnet installation tip: Use any extension accessory as a "magnet installation pen." After inserting a magnet into its hole, then attach the magnet to be installed onto its magnet, sand the corresponding hole clean, apply glue, and directly insert the accessory. The magnet for the corresponding hole will be installed. This is both simple and prevents incorrect orientation (as shown in Figure 3)
⑤Single shot technique: Pulling the trigger is like clicking a mouse or keyboard. Click once and quickly release your finger; the rubber band will fire a single shot crisply. If the action is sluggish (similar to a double-click or long press of a mouse) it may result in continuous firing. You will master it after a few tries
⑥Loading rubber bands: After loading 1 shot, turn the LOAD knob once to load the 2nd shot, and so on. At the muzzle, the 2nd shot presses on top of the 1st shot, and so on. Make sure to arrange the rear part of the rubber band into the firing slot. It is not recommended to load too many rubber bands at once (as shown in Figure 4)
Please be sure to read the installation and usage instructions below


Boost Me (for free)
If you are satisfied, you can give me a boost~
License
You shall not share, sub-license, sell, rent, host, transfer, or distribute in any way the digital or 3D printed versions of this object, nor any other derivative work of this object in its digital or physical format (including - but not limited to - remixes of this object, and hosting on other digital platforms). The objects may not be used without permission in any way whatsoever in which you charge money, or collect fees.
Comment & Rating (15)