


Print Profile(1)

Bill of Materials
- Wood Screw x 1: for centering the cleaner block on the back of the landroid so it does not move arround
Description
Overview
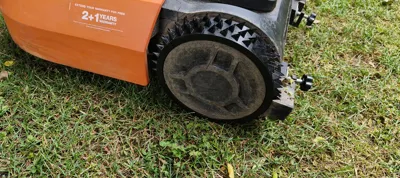
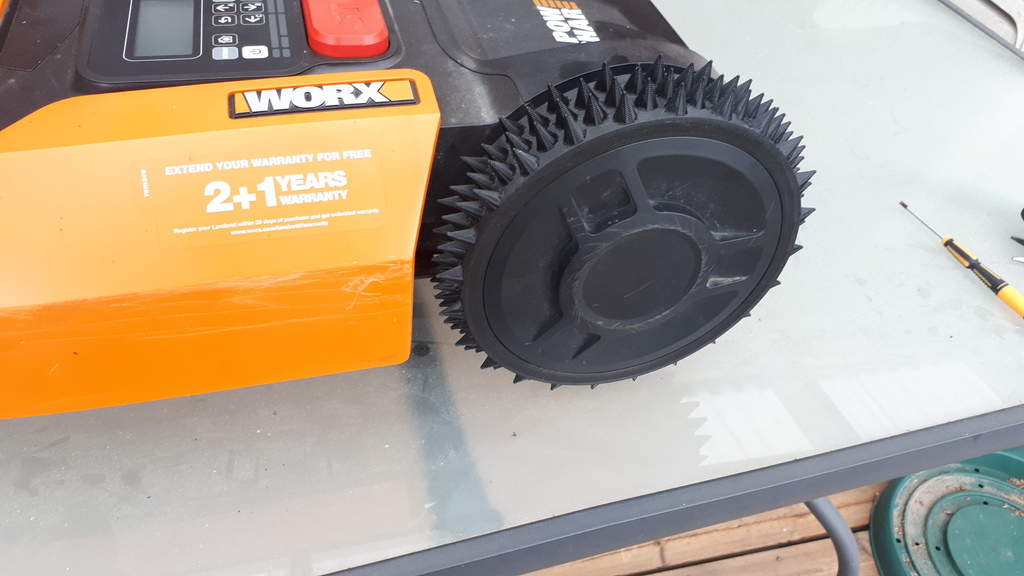
This model is an enhanced tire set designed for the Landroid M Plus, aimed at improving grip on lawns while minimizing debris build-up. The design is a modified version of an original model from Thingiverse (linked above), with adjustments made to the tire spikes to address common issues like mud and debris accumulation. The spikes now feature a clean block that acts like a comb, helping to remove dirt from the tires.
Included Files
- .3MF File: Optimized for Bambulab X1C
- .STL Files: Standard 3D model files compatible with most slicers
- .SLDPRT Files: SolidWorks files for those who want to modify or remix the model
Design Challenges
Material Resistance
3D printing materials are not typically robust for outdoor use. After some informal material testing, I found that:
- TPU: Best for the tires due to its flexibility and durability.
- PETG or ABS: Recommended for the cleaning blocks for their hardness and weather resistance. I had the best durability with PETG after testing a whole season.
However, expect some wear and tear, likely requiring reprinting each season.
Mounting Issues
Initially, I tried to secure the cleaning blocks with screws directly into the Landroid body, but they eventually pulled out under stress. I switched to using clamps, modified to fit the design (link to the clamps provided above). To prevent the blocks from sliding, I combined a screw for positioning with clamps for pressure.
Installation Guide
Wheels
- Remove the wheel from your Landroid.
- Remove the old tire.
- Install the new tire—this can be challenging with TPU A95, but it’s doable with some effort.
- Reattach the wheel to the Landroid.
Cleaning Blocks
- Position the cleaning block centered on the mounted wheel to minimize friction.
- Insert the centering screw to secure the block.
- Modify the clamps as shown in the pictures, then use them to apply pressure on the block.
Commissioning
After installation, your Landroid might drive slower or stop occasionally due to increased friction. This should improve over time as the system breaks in. A little assistance at the start might be needed.
Open for Remixing
I acknowledge that this model isn’t perfect, but it has reduced the instances of my Landroid getting stuck. If you have ideas on how to improve durability or functionality, please feel free to remix and share your versions!
Comment & Rating (0)