Interconnected Mechanical Seven-Segment Display Score Counter


Print Profile(5)


Description
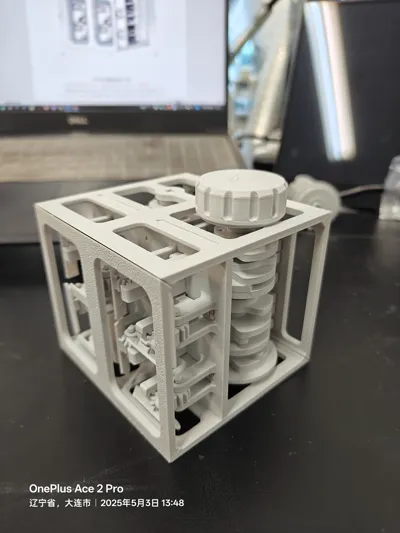
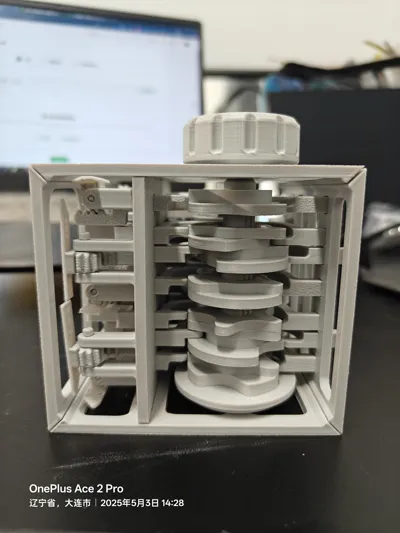
May 6, 2025: Added a magnetic top plate in PLA.
May 5, 2025: Added a ten-digit display configuration (0-9), 3D printed in PLA. Requires replacing the original 0-5 ten-digit camshaft, 0-9 camshaft gear, and base plate.
Do not mix PETG and PLA versions. Individual part dimensions differ, resulting in variations in assembly clearances. The two materials also exhibit different shrinkage rates; avoid intermixing!
If the magnetic attachment is not needed for enhanced tactile feedback, the hardware components can be omitted (magnetic adhesion is limited).
Installation instructions are included in the attachments. This project comprises numerous parts and is relatively complex to assemble. Please contact me if you encounter any issues or require the source files. Thank you.
Boost Me (for free)
Thank you all
Several years ago, I discovered a YouTuber, @karakurist, who created a mechanical seven-segment display. At the time, Karakurist only released blueprints for a single-digit seven-segment display, designed for wooden construction, unsuitable for 3D printing. Based on Karakurist's published designs and video demonstrations, I redesigned the mechanical digital display and released blueprints for a single-digit version on Bilibili on April 26, 2024: Bilibili. Lacking a 3D printer at the time, I outsourced production of a stereolithography version through JLCPCB. Subsequently, Tcho-Tcho (https://makerworld.com.cn/@Tcho_Tcho) modified the source files for FDM printing. I extend my sincere gratitude.
The modified single-digit mechanical seven-segment display blueprints by Tcho-Tcho:
Link: https://pan.baidu.com/s/1tgN-M7HkKpYRtoRPYlxchw?pwd=dahh
Extraction code: dahh
My single-digit seven-segment display blueprints (released on Bilibili):
Link:https://pan.baidu.com/s/1W5t_mvdArxZEAxZ2JjVd-A
Extraction code: dr78
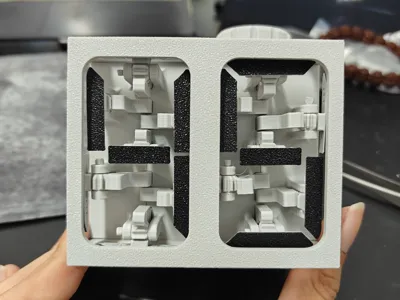
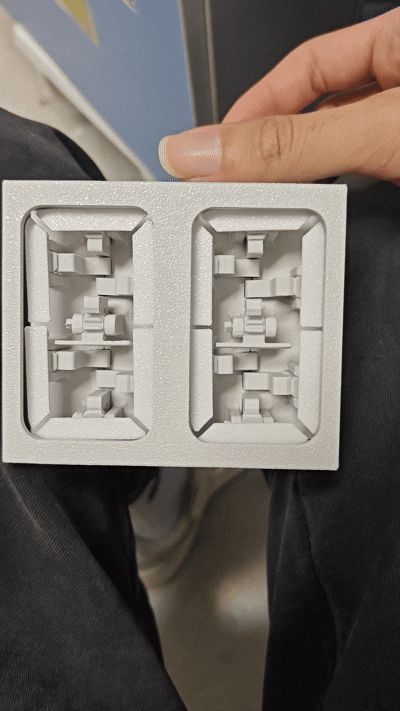
Karakurist later released a clock featuring a mechanical seven-segment display, employing an interlocking mechanism for carry-over functionality. However, Karakurist did not publicly share the blueprints. Therefore, building upon the aforementioned project and Karakurist's video, I designed an interlocking digital display. Utilizing a gear with missing teeth to implement carry-over, it can display numbers from 00 to 59. I hope to eventually replicate Karakurist's mechanical seven-segment clock.
Having acquired my 3D printer in April of this year, and being a 3D printing novice with limited knowledge of 3D printing design principles, I only completed the initial design of this project. The initial version was complex to assemble, requiring hardware components for connection. Tcho-Tcho revised the blueprints, replacing screw connections with mortise and tenon joints and modifying several parts to simplify assembly and calibration. The PETG version is a result of Tcho-Tcho's invaluable assistance. I further refined the PETG version, increasing assembly clearances and adjusting the gear and rack dimensions to mitigate jamming, resulting in the PLA version.
Some files differ between the two versions; it is recommended to choose one version for printing and avoid intermixing. Do not mix versions! 2x2mm magnets can be installed for enhanced tactile feedback.
If you encounter any binding during rotation, examine the clearance between the digit segment and the lateral supports, as shown in the image below. Check each digit segment; if it is too tight, use sandpaper to slightly reduce contact between the gear and support.

Documentation (1)
License
You shall not share, sub-license, sell, rent, host, transfer, or distribute in any way the digital or 3D printed versions of this object, nor any other derivative work of this object in its digital or physical format (including - but not limited to - remixes of this object, and hosting on other digital platforms). The objects may not be used without permission in any way whatsoever in which you charge money, or collect fees.
Comment & Rating (5)