Star Wars Brick-Built Logo Stand / Display 75407


Print Profile(6)


Description
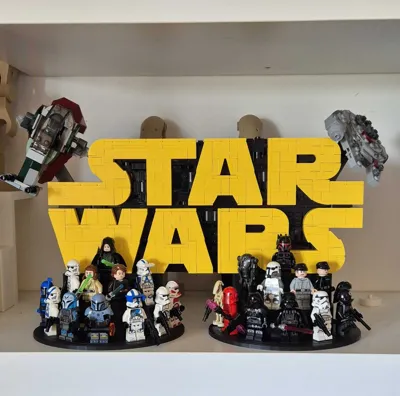
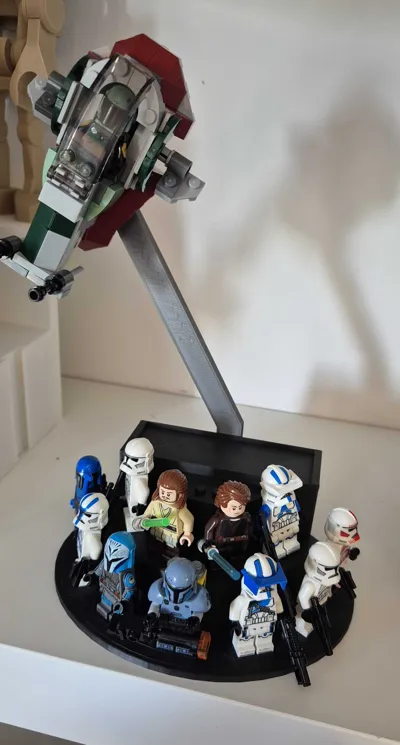
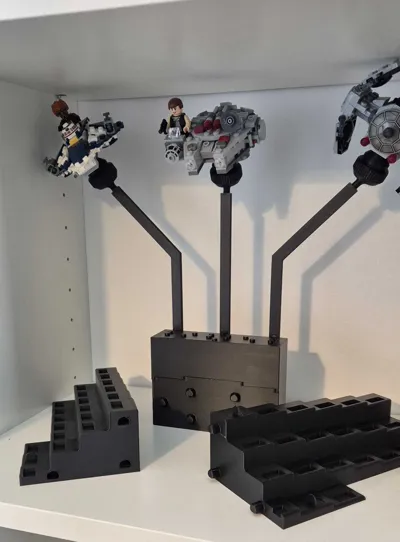
Want a way to display your Star Wars Brick Built Logo (Set 75407) with some minifigures and Microfighters to make a nice display, well here it is!
Few options for the print on this one (update 30/07/25 Billy Bookcase version added):
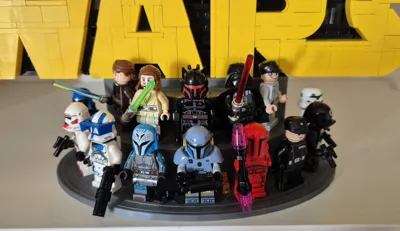
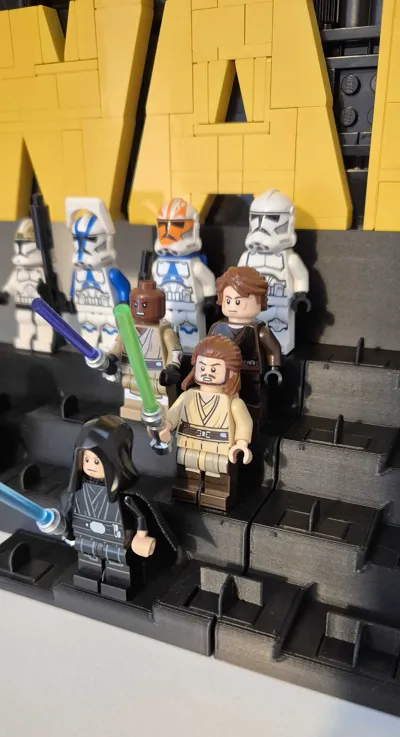
- Print the wide version and mount in the center, holding 15 minifigures and two Microfighters with the included Y arm.
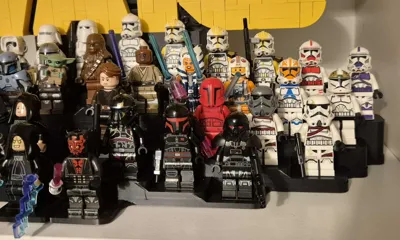
- Print 2 of the narrow versions and have one both sides holding 24 minifigures total (12 each side) and two Microfighters with the included arms.
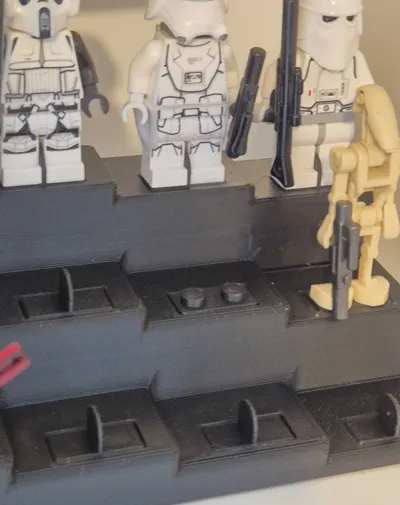
- 2x1 plates with 2 or 1 studs, use 1 stud version if you want to rotate your figures instead of being fixed around the base, (I used a mix on mine). (Print one or two first to check for fit!)
- 4 profiles included for the narrow and wide version, for the A1 Mini and A1/P/X/H series printers with the larger beds.
- Ikea billy Bookcase version added and now updated v3 (12/10/25), to make use of the space in a narrow (40cm, 36cm inside width) Ikea Billy Bookcase, this profile has re designed Micro fighter holders, new minifig base plates to help prevent the legs/feet cracking, space to display up to 42 minifigures, new connectors and more optimised print profile for minimal support waste and it all fits on an A1 Mini without joining connectors! (If you have printed this already and want the new design just re print the base, the rest of the parts will fit this)
Update 15/08/25 - All other profiles have now been updated with the newly designed Micro fighter holder and include the newer options for holding the minifigures.
The mini figure base plates are printed separately so you can make small adjustments if they don't fit well, scale up or down 1 or half a % as you need, then a dab of ca glue to fix them in place.
The top 11x4 plate (17x4 for the wide), should fit just nice but same as above, adjust/scale a small amount if needed before gluing down.
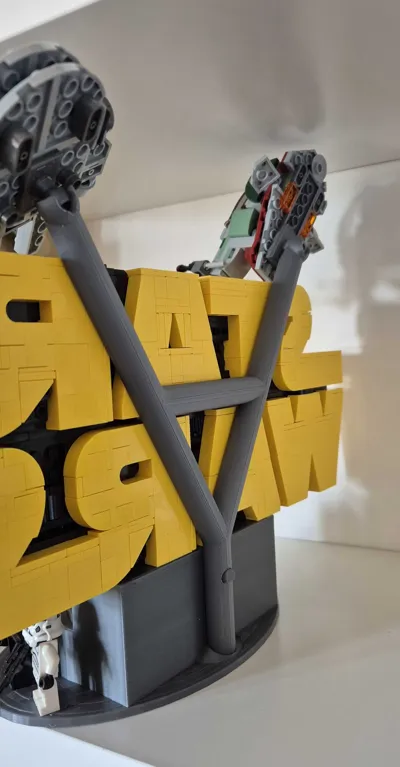
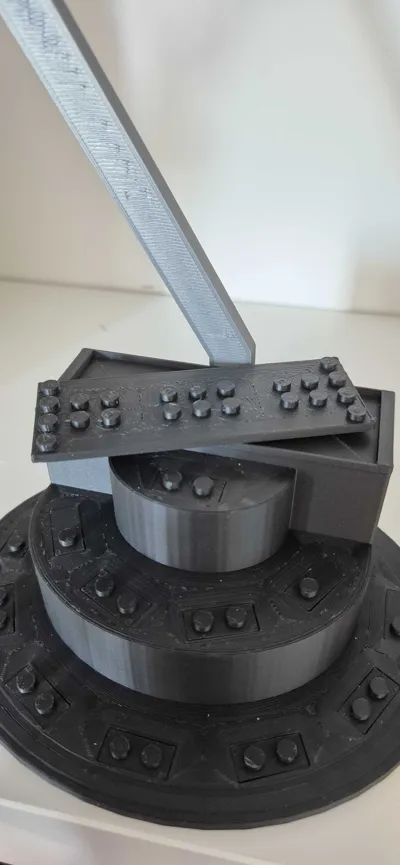
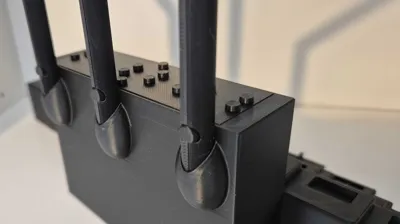
The rear Micro fighter arms sits in the recess at the back of the base and the dowel with the flat bottom pushes snugly through to hold it in place, I have not glued mine and it doesn't move at all.
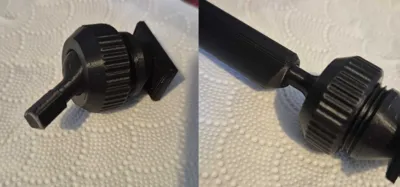
The ball socket allows them to be rotated, to assemble this put the ball through the threaded part, then screw the bit with the plate on and then push fit this into the arm, it should be a snug fit to avoid the need for glue, so may need a tiny bit of clean up post print to get it to go in.
Hope you like this, any feedback and suggestions for improvements are welcome, drop a like and a boost if you can and share some images of your displays after printing would be great!
All printable on the A1 mini, the larger center holder has been split so will have to glue it together with dowels.
Boost Me (for free)
Send a boost if you liked this model!
License
You shall not share, sub-license, sell, rent, host, transfer, or distribute in any way the digital or 3D printed versions of this object, nor any other derivative work of this object in its digital or physical format (including - but not limited to - remixes of this object, and hosting on other digital platforms). The objects may not be used without permission in any way whatsoever in which you charge money, or collect fees.
Comment & Rating (31)