


Print Profile(7)


Description
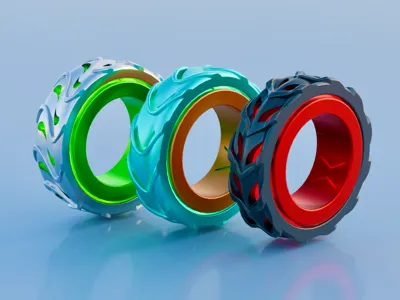
Introducing the SNAP Fidget Rings
SNAP Fidget Rings are set of 3 unique designs that snap/click loudly as you turn them. These rings are optimized to deliver a single very loud snap/click.
Don't believe there really that loud? Print and see for yourself!
Filament Requirements
- Since this is a mechanical design there are filament limitations.
- Recommended: PETG, PLA Basic, PLA Metal, etc.
- Not Recommended: PLA Silk (brittle), PLA Matte (deforms under stress)
Ring Adjusters
- Those with smaller hands will likely need some adjustments.
- Print Profile labeled “Ring Adjusters” contains a set of Softer Spring and Ring Desizer.
- Ring Desizer will shrink the internal diameter from 20mm to 17mm.
- These two items will likely go together, but you can print one or the other by selecting objects in the print profile.
Printing
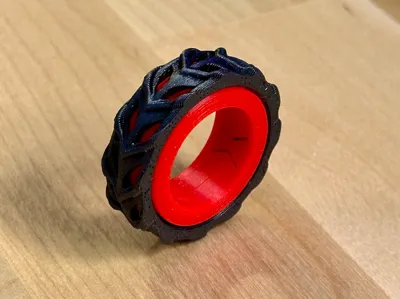
- Print Profiles attached each contain one ring with two color zones.
- Create your own colorway by matching different filament to each color group.
- Print by object is used to save filament + time.
- Print Profiles requires AMS to achieve two color.
- Can be made single color or two/three color by printing parts on separate plates.
- Designed to be printed at a 0.16mm layer height with a 0.4mm nozzle.
- Printing times are around 40 Minutes total (0.16mm layer height/0.4mm nozzle).
- No Supports, Small Brim on the spring piece.
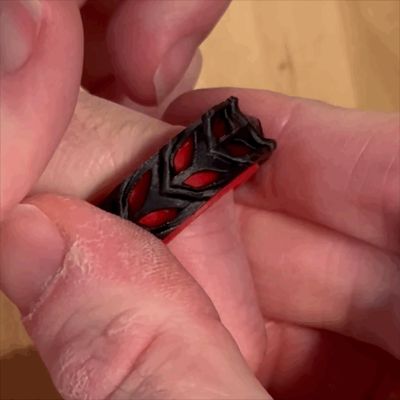
Assembly
Place the Spring inside the Outer Ring. It will probably look stuck at first, like it can't fit, but you can bend the spring flaps inward one at a time to get it to go in. This is where you will determine the spin direction, so face the flaps opposite the direction of motion.


Align The Inner Ring tabs with that of the spring and push to insert them. You may want to introduce a slight angle and insert/align one side and then push the other. It should snap in.

- Repeat step two with the other side of the Inner Ring.
License
You shall not share, sub-license, sell, rent, host, transfer, or distribute in any way the digital or 3D printed versions of this object, nor any other derivative work of this object in its digital or physical format (including - but not limited to - remixes of this object, and hosting on other digital platforms). The objects may not be used without permission in any way whatsoever in which you charge money, or collect fees.
Comment & Rating (34)