Bambu Lab PETG Filament Glass Profile - Ice Driver


Print Profile(1)

Bill of Materials

Description
YOU ARE REQUIRED TO READ THIS DESCRIPTION
→→→ SCROLL DOWN TO THE RULES AND READ THEM ←←←
IT IS THE SAME RULES AS MY IC3D PROFILE, BUT SLIGHTLY ALTERED
All tested on an X1C with hardened steel 0.4mm nozzle and all values ported over to the other printers, so if something doesnt work out right please let me know and ill update the profile with working values for said printer!
OOO
This profile is built for BAMBU LAB Translucent PETG filament!
A few key points to remember:
SET A K VALUE FOR BAMBU LAB TRANSLUCENT FILAMENT AND USE IT IF YOU DONT WANT TO CALIBRATE: 0.050
If you have a good K value or need to calibrate your filament flow dynamics, use that value instead. But dont calibrate your filament flow rate. Use the flow already set in the filament profiles or alter those numbers as you need for the quality you want.
This is a work in progress, consider it a BETA
There are problems with smaller models being over extruded and larger models being under extruded with the same values so there are 2 filament profiles
Ive been able to create process profiles with different speeds, but just remember - faster speeds = lower quality. Slow is the normal speed
Dont be afraid to alter the filament flow value if you have issues, the filament profiles are happy spots for what they are
You can mix the slow process with the large filament profile, I found it helps with some models
USE A PEY STYLE BED OR SIMILAR, NO GLUE FOR THIS STYLE BED, THIS WILL PREVENT “FOGGY BOTTOMS”
The “Refined” process has a tighter line width and is a test profile!
Using sandpaper from 180 grit - 10,000 grit will make the outer layer as clear as glass!
If you end up getting uneven air gaps in your models, uncheck “print infill first” in the process tab, this should fix it. But note: turning that off might cause other issues in quality! What can I say, 3d printers are hard to deal with XD
CHANGE THE “PRINTER” TO ONE OF THE “PROJECT” GLASS PROFILES
CHANGE THE “PROJECT FILAMENTS” TO ONE OF THE “PROJECT” GLASS PROFILES
CHANGE THE “PROCESS” TO ONE OF THE “PROJECT” GLASS PROFILES
Everything is built into one profile for ease of use!
READ THE RULES BELOW
OOO
SPECIAL THANKS TO:
@IntingCat
For your research into the “Foggy Bottom” Bambu Filament issues!
@sputnik
For EXTREMELY useful values from the research you tested and found for Bambu Lab Filament!
SPECIAL SHOUT OUT TO:
@cyphermind
Check out his model which is in the Crown Contest!
https://makerworld.com/en/models/1418367-the-shardlight-crown#profileId-1473246
OOO
If you give a low rating, please explain why, what you changed (if anything), list the printer youre using (X1C, P1S, H2D, A1, A1mini), the filament youre using (Manufacturer name, filament type, color), if you dried it, and how you started the print (Bambu Studio ONLY), and post pictures so I can help you.
Dont leave a 1-2 star review with no explanation. I do respond to everyone. If you do leave a 1-2 star review without listing the info in the above bold outline, I will report your review for removal.
TO BE 100% CLEAR, if you leave a low rating and IF I ask for more info and you actually work with me but it still fails, I will NOT report your low rating. But also understand that this profile is MEANT FOR “BAMBU LAB TRANSPARENT PETG FILAMENT” but CAN work on other manufactures filaments, USE TRANSPARENT PETG ONLY!
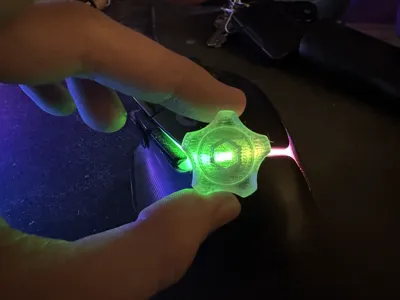
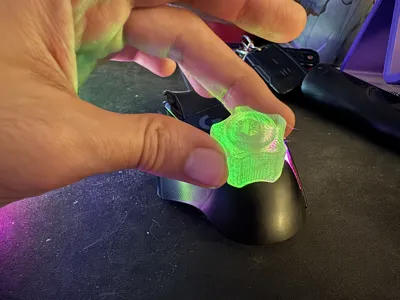
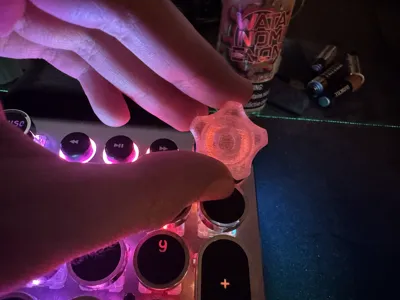
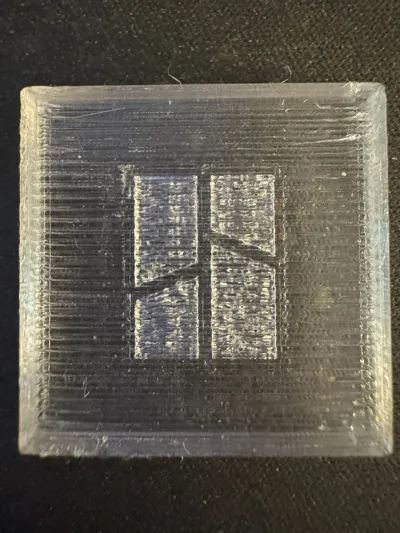
The other models in the pictures are not my models, I used them to test out transparency!
Good for stained glass prints!
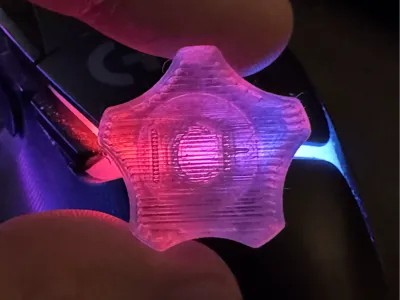
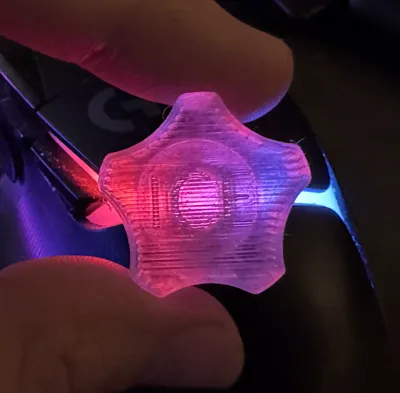
You ever wanted to print glass? Well its not glass but its close enough.
With this profile, you can print ICE cubes with Bambu Lab filament, you can also use this profile to print very transparent 3D models, but theres some rules you HAVE to follow, see below.
P.S. You can try using transparent colored filament as well. It wont look as transparent as clear but you can do some stuff with it. For non Bambu printers, copy the values from Bambu Studio on this profile to your slicer, or if your using Bambu Studio with a non Bambu printer, just copy all settings over using 2 windows.
OOO
READ ALL OF THE RULES BEFORE PRINTING! OR ELSE YOU WILL HAVE A CLOG OR WORSE!
RULES 1, 10, AND 21 ARE A WARNING, NOT A SUGGESTION!
I AM NOT RESPONSIBLE FOR CLOGS OR DAMAGE TO YOUR TOOLHEAD, USE AT YOUR OWN RISK!
ALL PROFILES ARE SET FOR USE WITH A HARDENED STEEL 0.4 MM NOZZLE IN MIND. IF YOU DONT HAVE HARDENED STEEL, YOU MAY NOT GET THE EXPECTED RESULTS! TWEAKING THE FILAMENT FLOW MAY BE REQUIRED IF YOU DONT HAVE WHAT ITS SET UP FOR!
OOO
If anyone is having issues with a problem we named “Foggy Bottom” (first layer fogs up after removal from plate), @IntingCat did a lot of work trying to fix it and found a solution! Thank you for your work and dedication to fix your issue and thank you for sharing your fix! It may be a chemical stress problem with Bambu Lab PETG filament!
OOO
OOO------------------------------- RULES -------------------------------OOO
|
|
V
WARNING: DO NOT RUN THIS PROFILE OFF THE BAMBU HANDY APP ON YOUR PHONE. ONLY USE BAMBU STUDIO. The Bambu Handy app cannot read custom profiles.
- Restart your printer (power off for 5-10 seconds and power back on) before using this profile, ive had weird issues with the X1C deciding to put lines through the x and y axis on each layer as if the extrusion multiplier kept dropping as I continued to reprint for testing purposes even though it was set properly.
- Leave ALL settings alone unless you know what youre doing. I mean this in the most literal way. I dont want you changing settings then complaining that it didnt work or it clogged on you, because the problem is on you at that point.
- All Printers have configurations in this project including the H2D.
- There are multiple filament profiles available to use.
- SAVE THE PRINTER PROFILE, PRINT PROFILE, AND THE FILAMENT PROFILE as soon as you open it so you have them for later. You can name them all “BBL ICE Profile” or “BBL Glass Profile” or whatever you feel.
- THIS IS TUNED FOR A HARDENED STEEL .4 MM NOZZLE. If youre using stainless or brass, youll have to tune your extrusion multiplier yourself to get the results you want. You may also have to tune your hot end temp as well if youre not using hardened steel.
- Super tiny prints like tiny screws or tiny bolts or extremely small printable areas just will not work with this profile. You have been warned.
- Other filament brands may not work with the exact extrusion multiplier that I have set. Again, no complaining if youre not using the same filament or hardware. Different filament brands and different nozzles require different settings.
WARNING: Keep your chamber around 38C. Theres room for movement with this, but for the love of Bambu, DO NOT let your chamber get over 42C. The extruder motor gets insanely hot under normal conditions to the point it burns you if you touch it. 42C+ and hot extruder motor = melted filament inside the extruder body. Your extruder WILL CLOG if you dont follow this rule! Ask me how I know. Open your top glass or take it off, AMS risers are great for this purpose. Leave the exhaust fan at 40% or turn it up, thats your choice. But leave it on 40% or up. And keep your front door closed to your printer. For other printers, there cant be a draft around your print.
- 260C - 270C on the hotend, anything above or below this temp have lower quality transparency.
- 80C bed to ensure the layers melt together properly and to keep the print sealed to the bed during the whole printing process. This is necessary.
- DRY YOUR FILAMENT IN A FILAMENT DRYER AND KEEP IT DRY! I cant stress this enough. If your filament is cloudy or low quality, its one of two things. Either your filament is wet (you didnt dry it for long enough or its not in a dryer while youre printing), or you turned on the toolhead fan too high.
- DONT RUN THE TOOLHEAD FAN TOO HIGH. This will cause the filament to cool rapidly before the next layer goes on, making each layer cloudy. Currently 0% for layer times passed 15 seconds, 30% for 5 second layer times, 30% for outer walls/overhangs.
- 0.1mm layer height, leave this alone for top to bottom transparency. I DONT ADVISE THIS BUT If youre brave enough to drop it to .08mm layer height, experiment around with it. But just know that .08mm layer height clogged my extruder a couple times because the filament wasnt moving through the extruder fast enough which caused the heat from the extruder motor to melt the filament inside the extruder body. Im pretty sure I also had a nozzle clog at .08mm layer height as well. A butane torch and Allen head tool was able to get me out of that bind.
- 25-30mm/s. This speed is the optimal speed for perfect transparency. There are faster speeds available but faster = less quality.
- PEI smooth beds, or PEY or any other smooth PE style beds should work fine for glass like bottoms, dont use glue on these beds for this profile. If youre using a textured bed and complain that you cant see through it, thats your fault. Youll see through the model but not through the textured bottom. If youre using an engineering plate or a cool plate, just dont. If you do, use glue. Youll thank me later. Again if you cant see through it and you used glue, thats on you. If you for some reason are using a glass bed in these printers, which im sure is very possible, use glue. Yea the glass bed would be perfect for a glass bottom finish, but probably a good idea to use glue for a glass bed for easy part removal.
- 100% infill for the best results.
- NO BRIMS. these are hard enough to remove from the models as it is. With an 80C bed, brims arent necessary. Unless you have a model with the tiniest base ever, id leave brims off. Or you can use a raft which I have not set up for easy raft-to-object removal.
- ALIGNED RECTILINEAR for all layer patterns is the best way for the layers to mend together properly and for the best transparency! Normal rectilinear gives you a crosshatched pattern through every single layer and you will see it. The extrusion multiplier will fill in the gaps automatically to where you wont see any pattern lines through the object youre printing.
DO NOT USE FLOW DYNAMICS CALIBRATION WHEN STARTING THE PRINT! This overrides the K value thats set.
- Supports are off by default, but if youre printing something with a large overhang or bridge, turn it on. I recommend you use pla as support material if you plan on using supports, the pla peels right off of the model. Make sure the pla support material is at a 0 distance from the model so it lays the petg right on top of the pla! If its spaced away using pla as support material, the pla and petg will warp and cause problems.
- If you do see lines between each layer in the x and y axis, lightly step your extrusion multiplier up by .002 and do some test prints till you get it dialed in. Not every printer will work perfect because of how the extruder motors are wound up in the factory.
- For the H2D, I sadly dont have one. The values are a copy/paste from the other printers so if you have a bad time with the H2D, let me know and ill try my best to help or try to fix it.
License
You shall not share, sub-license, sell, rent, host, transfer, or distribute in any way the digital or 3D printed versions of this object, nor any other derivative work of this object in its digital or physical format (including - but not limited to - remixes of this object, and hosting on other digital platforms). The objects may not be used without permission in any way whatsoever in which you charge money, or collect fees.
Comment & Rating (118)