Wheel Fitment Tool


Print Profile(1)

Bill of Materials


- Threaded Inserts x 1: https://a.co/d/0amcwKJ
- Magnets x 1: https://a.co/d/6ckKD4j
Description
UPDATE!
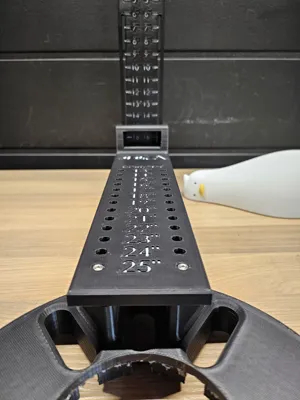
I fixed my mistake of having the width measurement read half the size it actually was, and was able to add an even higher range of measurements for the width piece (now it supports 6-21 inches in width!). I also went ahead and made some improvements to certain parts of the design to make them stronger and easier to adjust. All pieces except the “Wheel Size” part have been modified so if you have already printed the tool it might be a good idea to reprint those 3 pieces. Sorry for the previous error and I hope y'all enjoy the revised model!
About
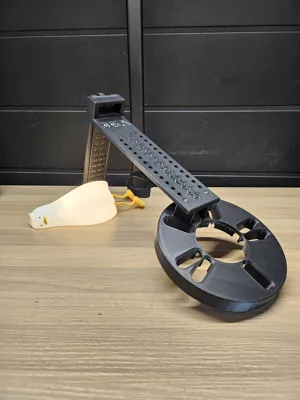
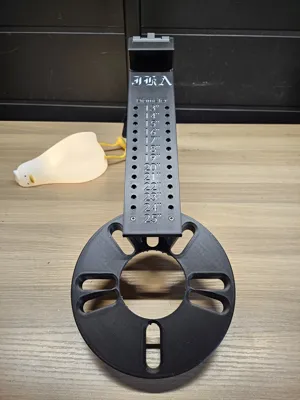
I designed this tool after seeing several others on the internet selling similar models for rather high prices. I also tried to make it a bit on the sturdy side as a common complaint was that they were too flimsy. The model utilizes heat press fittings to make it much easier to use as well as makes the design have a much more refined look and feel. The tool has two holes to glue magnets into that way you do not have to screw the lug nuts on to it in order to hold it in place.
I am open to any suggestions if anybody has any recommendations on how I could improve the design :)
Boost Me (for free)
Boosts are greatly appreciated :)
Specifications
This tool supports wheels that are
- 4-5 lugs
- 13-25 inches in diameter
- 6-21 inches in width
+/- 65mm offset
Printing recommendations
- Any sturdy filament should work fine (I just used some PLA I had lying around)
- I would recommend using a smaller nozzle for the “inner railing” piece as that has some smaller text and fine details (I printed it with a standard 0.4 nozzle and the numbers weren't the most legible, but the measurement markings were fine)
- A AMS will definitely help with making the measurement markings more visible as well as making the tool look a lot cleaner
- Supports are only necessary for the “base” and “Wheel size” pieces
Parts Required
- 5 M3-0.5 threaded inserts
- 2 M3-8mm socket head screws
- 2 M3-10mm socket head screws
- 1 M3-6mm socket head screw
- 2 29.55mm-2.75mm magnets
- superglue
link to the threaded inserts I used → https://a.co/d/0amcwKJ
link to the screw set I used → https://a.co/d/1nKdIoe
link to the magnets I used → https://a.co/d/6ckKD4j
Assembly
- Two threaded inserts are placed into the two 3mm holes located on the “base” piece
- Two threaded inserts are placed into the two 3mm holes located at the top end of the “wheel size” piece (inside the slot area)
- One threaded insert is placed into the 3mm hole at the center of the “Inner railing” piece (be careful with this one as you don't want to damage the other side of the piece when inserting the threads)
- The two M3-8mm socket head screws are used to attach the “wheel size” piece to the “base” piece
- The two M3-10mm socket head screws are used to attach the “inner railing” piece to the “wheel size” piece
- The single M3-6mm socket head screw is used to attach the “outer railing” piece to the “inner railing” piece
Be sure to use the pictures as a reference as to which direction the “outer railing" piece goes
I hope y'all enjoy the design and as always, happy printing! :)
License
You shall not share, sub-license, sell, rent, host, transfer, or distribute in any way the digital or 3D printed versions of this object, nor any other derivative work of this object in its digital or physical format (including - but not limited to - remixes of this object, and hosting on other digital platforms). The objects may not be used without permission in any way whatsoever in which you charge money, or collect fees.
Comment & Rating (105)