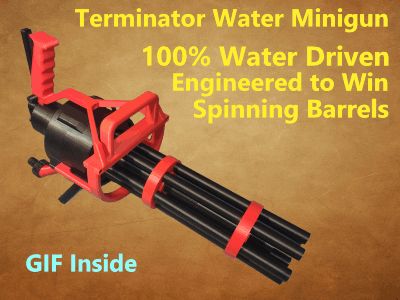
Terminator Water Minigun


Print Profile(2)


Bill of Materials


- M4 Socket head cap screw, 20 mm length x 4:
- M4 Socket head cap screw, 25 mm length x 2:
- M4 nuts x 6:
- Self-tapping screws Ø3 mm × 20 mm x 5:
- Self-tapping screws Ø3 mm × 12 mm x 2:
- Self-tapping screws Ø3.5 mm × 25 mm x 2:
- Springs: Ø9 mm × 35 mm, wire Ø0.7 mm (or similar) x 2:
- Spring: Ø7 mm × 12.5 mm, wire Ø0.5 mm (or similar) x 1:
- Garden hose adapter: click-on connector → 3/4" male thread x 1:
- P2000 sandpaper x 1: small piece
Description
Feel like the Terminator on the water battlefield.
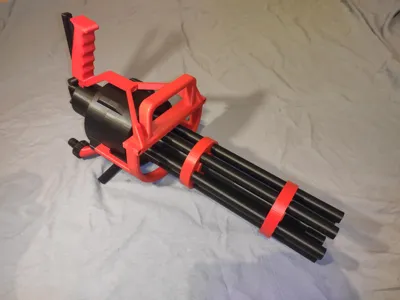
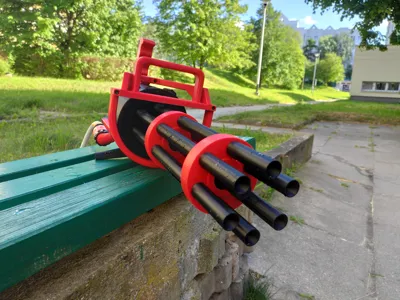
With spinning barrels, a relentless central jet, and side streams that simulate falling shell casings, this water minigun doesn’t just shoot — it intimidates. While others play with toy pistols, you’re wielding a cinematic powerhouse.
No electronics, no gimmicks — just pure water-powered action. Hook up a hose or a sprayer backpack, pull the trigger, and own the fight.
✅ Before You Start
- Always dry the filament before printing — precision is critical for the valve, bearings, and nozzle parts.
- Check the list of required hardware — screws, nuts, springs, and one garden hose adapter (see below).
- Read the Important Notes before Assembly — they contain essential tips for printing, fitting, and sealing.
- Use the Assembly Video Guide — it walks you through the full build process step by step.
- Read the FAQ if you're curious about how it works, how it was built, or what makes it special.
💧 Note: Minor leaks are present, but they are insignificant compared to the overall water consumption of the minigun.
The full assembly process, including testing and field demonstrations, is available in the video below.
Boost Me (for free)
Please support me if you like my models and want more unique designs.
Membership
The Commercial License lets you sell physical prints of any MakerWorld model I publish, for as long as your membership is active.
🔧 Key Features:
- 100% water-powered – no batteries, no electronics
- Rotating barrels powered by a hidden water turbine, simulating real minigun action
- Can be supplied by a garden hose (stationary) or a backpack sprayer (mobile)
- Water consumption: approx. 3 liters per minute
- Standard 3/4" thread – use with click-on hose connector via adapter
- Eye-catching look inspired by the M134 Minigun from Terminator 2
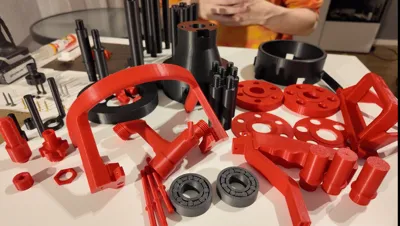
🧩 Required Components:
🔸 Purchased Hardware:
- 4× M4 Socket head cap screw, 20 mm length
- 2× M4 Socket head cap screw, 25 mm length
- 6× M4 nuts
- 5× Self-tapping screws Ø3 mm × 20 mm
- 2× Self-tapping screws Ø3 mm × 12 mm
- 2× Self-tapping screws Ø3.5 mm × 25 mm
- 2× Springs: Ø9 mm × 35 mm, wire Ø0.7 mm (or similar)
- 1× Spring: Ø7 mm × 12.5 mm, wire Ø0.5 mm (or similar)
- 1× Garden hose adapter: click-on connector → 3/4" male thread
🔸 Tools / Supplies:
- Screwdriver
- Silicone grease
- P2000 sandpaper
💡 Adapter Options
The minigun is designed for use with standard garden quick connectors (click-on).
To connect it to other water sources like a shower hose or a backpack sprayer, you can use these optional 3D-printable adapters:
These adapters are field-tested and confirmed to work with this minigun.
🛠️ Important Notes before Assembly
- Always dry the filament before printing — precision is critical for the valve, bearings, and nozzle parts.
- The bearing can be printed from PLA Basic or PETG-HF, and it prints well, but PETG-CF is recommended for durability and wear resistance.
- The bearing is printed with minimal clearances. Before use, spin it under a light load to ensure all rollers rotate freely. The parts do not fuse during printing — this has been tested.
- You can apply silicone grease to the bearing to reduce friction and improve rotation smoothness.
- Some part groups are joined by thin bridges to support vertical printing. Don’t break them by force — cut them carefully after printing.
- The valve stem is fragile. It can snap during assembly if accidentally hit while attaching the valve to the barrel or while sanding. That’s why the print profile includes three copies. Once installed, it works reliably.
- Sand the printing seam on the valve stem first, then polish around the perimeter. About 20-30 seconds with P2000 sandpaper in a drill is enough. This step is important not only for smooth movement, but also for achieving proper sealing and preventing leaks.
- Do not overtighten the valve cap:
Too much torque can deform the gasket, making the valve stem hard to move and reducing responsiveness.
If that happens, try loosening the cap just slightly — that’s usually enough to restore smooth movement. - After assembling the valve, rotate the valve stem during testing to find the position with the best seal and minimal leakage before final assembly.
- One of the weak points during assembly is the connection between the two halves of the middle barrel section. Tighten firmly but gently to avoid cracking. Once assembled, the joint is strong and secure — there’s no need to worry during use.
- Two gaskets look almost identical, but one is slightly thicker and goes between the barrel and the valve — don’t mix them up.
- Tighten the two nuts on the valve stem properly:
The first nut should be screwed flush against the lever adapter — the sliding part that links the trigger to the valve stem and ensures straight, horizontal movement. Do not tighten it further, or the valve will start to open. Then screw in the second nut to act as a locknut, preventing the first from loosening. - The print profile includes three interchangeable nozzles with different inner diameters. Even with dried filament, small deviations in print precision can affect flow rate. Test and choose the best nozzle for your water source.
- If your water source has very high pressure, the valve may not close properly if you release the trigger slowly. This happens because the water pressure deforms the skirt of the stem gasket, and a gentle release isn’t strong enough to overcome that deformation. Releasing the trigger quickly helps push the stem past the resistance and ensures the valve closes fully. You can also install a stiffer spring between the handle and the trigger. Do not reinforce the internal valve spring — the stem may fail under excessive tension.
- Main barrel parts are printed vertically to ensure proper thread shape, leak-free joints, and strong connections — that’s why they are designed with 100% infill.
- Parts that carry pressurized water are also preset to print with 100% infill — this improves sealing and prevents water from seeping through the printed layers over time.
- Do not test the minigun without proper water drainage. The rotational water exits through a side outlet and can create puddles — make sure it drains freely, or use it outdoors.
- Test the system step by step during assembly:
• First, fully assemble the valve and test its sealing independently.
• Next, attach the valve to the barrel and verify that the dummy barrels rotate freely under water flow.
• Finally, perform a full test of the assembled system to confirm that both the stream and rotation work correctly together.
💬FAQ
Q: How does the minigun work?
A: It runs only on water. You can connect it to a garden hose, a 12V pump, or a pressure sprayer. It works with any water supply if you have the right connector — tested with a household tap and a backpack sprayer.
Q: Is it safe for play?
A: Yes, but avoid aiming the water jet at the eyes, just like with any other toy blaster. Use common sense and supervise younger children.
Q: How much does it weigh?
A: 1090 grams. Despite its impressive size, the minigun is quite lightweight and can be easily held with one hand.
Q: What’s the best way to use this minigun?
A: My favorite scenario: gather a bunch of kids for a water battle — all against you. Don’t mention the minigun. Hide it in advance, and retreat under pressure like you're losing. Then pull out the minigun and let it rip. Trust me, the moment they see it, they’ll start running 😄
Q: What water sources has the minigun been tested with?
A: It’s been tested with:
- A backpack sprayer with a 12V pump — high pressure, low flow. Pressure drops slightly under sustained use, but performance remains great.
- A household water supply with strong pressure — ideal performance.
- A household tap with lower pressure — still works fine, just with slightly reduced power.
Q: The water that spins the turbine leaks not only from the side tube — is that normal?
A: Yes, this can happen when the barrels are spinning at high speed. It’s one of the areas planned for improvement. Changing the body geometry and enlarging the outlet tube would help improve drainage efficiency.
Q: How reliable is it?
A: My assembled minigun has run for about two hours in total without any issues. In fact, a few days after assembly, the main valve gasket slightly deformed and started sealing even better — water leakage was reduced over time.
Q: Why is the main barrel printed vertically? Won’t it break?
A: I originally printed it horizontally, but the thread quality was too poor. Switching to vertical orientation allowed for clean threads and better sealing. I also set it to 100% infill, which minimizes water leakage through layer lines under pressure. Testing showed no reliability issues — the part is strong enough.
Q: The barrels spin fast, but I want them even faster — is that possible?
A: With good pressure from a household water supply, the barrels already spin very fast. But if you want even more speed, improving the water drainage inside the body will help — excess water won’t build up and slow down the turbine.
Q: The water consumption seems really high — is that a problem?
A: The consumption matches its firepower — this minigun delivers a strong and continuous water stream. Like any minigun, it’s closer to a stationary weapon than a handheld squirt gun. With a 16-liter sprayer, you get around 6 minutes of operation. But if you connect it to a household tap, garden hose, or a pump drawing water from a lake, your ammo is unlimited.
Q: Did it take you long to make?
A: It took all my free time over three weeks. The first prototype was built in just a few days, but refining the design to minimize leaks required serious rework. Some connections and gaskets were redesigned multiple times. I also aimed to minimize post-processing — in the end, only the valve stem needs light sanding. The print profile is now in a true print-and-assemble state.
Q: Do I need to maintain it after use?
A: Maintenance is simple. Disconnect the hose, point the barrels downward, and press the trigger to let the remaining water drain. If you used dirty water (e.g. from a lake), flush the system with clean water. There are no electronics inside.
Boost Me (for free)
If you enjoy my work, I’d really appreciate your support.
A free boost, like, or comment helps a lot — thank you!
License
You shall not share, sub-license, sell, rent, host, transfer, or distribute in any way the digital or 3D printed versions of this object, nor any other derivative work of this object in its digital or physical format (including - but not limited to - remixes of this object, and hosting on other digital platforms). The objects may not be used without permission in any way whatsoever in which you charge money, or collect fees.
Comment & Rating (80)