Mini Train - Functional Swiss Diorama


Print Profile(3)
![[V1.0] 0.2mm layer, 2 walls, 15% infill](https://makerworld.bblmw.com/makerworld/model/USc3f4474ad9a478/316498528/instance/2025-06-01_9c3dc04ef85f28.png?x-oss-process=image%2Fresize%2Cw_100%2Fformat%2Cwebp)
![[individual Plates A1mini] 0.2mm layer, 2 walls, 15% infill](https://makerworld.bblmw.com/makerworld/model/USc3f4474ad9a478/318291744/instance/2025-06-03_8d180c63525938.webp?x-oss-process=image%2Fresize%2Cw_100%2Fformat%2Cwebp)

Bill of Materials


Description
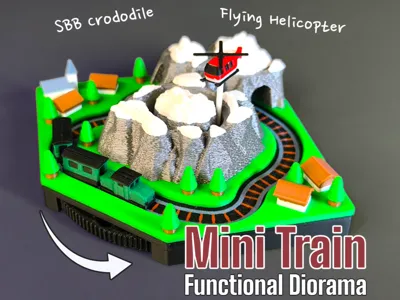
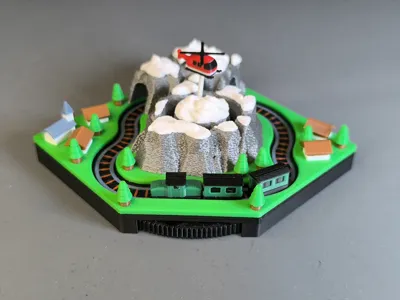
Mini Train - Functional Swiss Diorama
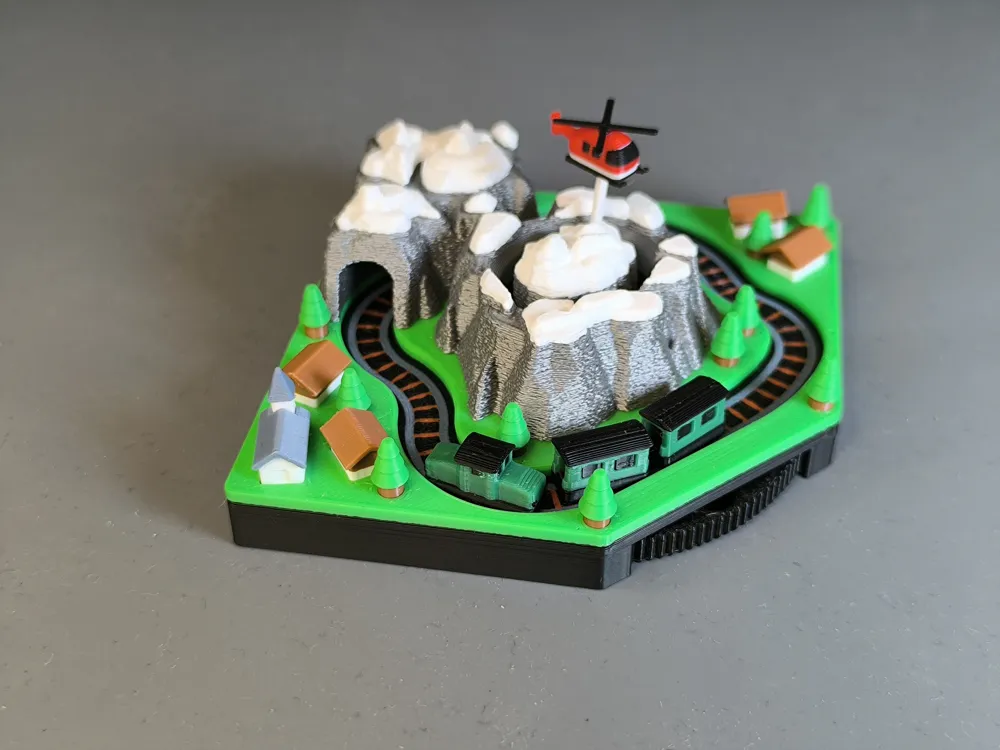
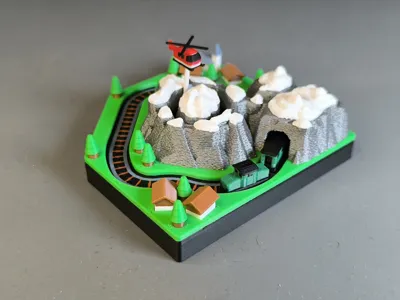
The Mini Train series continues after a #cyberbrick project with the eleventh Mini Train Diorama. This time, the mountains return—this time a bit taller. Inspired by the landscapes of Switzerland, this scene features the legendary SBB Crocodile locomotive traveling through the “Gotthard” Tunnel and passing by charming mountain villages.
High above the peaks, a small rescue helicopter circles the sky. For the first time in the series, we're moving beyond the rails and roads—taking motion to the air!
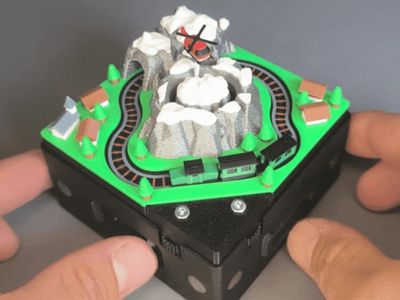
As with the previous dioramas, you can turn the hand-wheel on the outside to set both the little train and the helicopter in motion.
The new SBB Crocodile is compatible to the previous designs. (Mountain V1.2)
All printed parts are designed to get an good result with a 0,4 nozzle and with minimal color changes to reduce waste.
→ Have a look at the great Motorization solution!
More is coming… stay tuned….check the “Mini Train collection” and leave a follow👍

Boost Me (for free)
Printing:
Note that some parts are very small. Good adhesion is necessary!
Following PLA Basic Filaments are used
Silver
Brown
Black
White
Mistletoe Green
Bambu Green
Red
Other colors are possible of course, look what you have in stock.
I think it could be easy done with single color, if you want to color from hand.
I printed with a 0,4mm nozzle! Iam very pleased with the result but you can try a 0,2 nozzle as well.
Assembly:
You need 8pcs round 4x2 magnets magnets and a piece of Ø1,75 filament for assembly.
- Insert 3pcs Magnets in the train and wagon with same polarity and insert 1pcs in the “round slider”
- Insert 3pcs Magnets in the 3 pins all with same polarity but opposite direction than before! The Pins must attract the train!
- Cut a piece of filament ~25mm and insert one side in the “round slider”, push the other side into the helicopter and glue the propeller on top

Insert the 3 pins and use the train to hold them in place. Insert a single magnet to the inner track and place the “round slider” on the other side to hold in place.


- Arrange the pins and the single magnet, so that they are caught by the hand-wheel and press the hand-wheel into position


- Glue the inner mountain part in position

- Set the terrain over the helicopter and the inner mountain part
- Press trees and houses in the holes. You can add a bit of glue to combine.
- Place the train to the magnetic position and have fun 😀👍
I hope you like this little project.
If you want to support me, you can simply follow, boost & like the model.
You want to sell printed parts from my designs? Commercial license you get at my Makerworld profile or on Patreon:
https://www.patreon.com/BamBamDesign/
Membership
You want to sell printed objects from my designs or just support my work? Now you can subscribe on Makerworld! Thank you!
License
You shall not share, sub-license, sell, rent, host, transfer, or distribute in any way the digital or 3D printed versions of this object, nor any other derivative work of this object in its digital or physical format (including - but not limited to - remixes of this object, and hosting on other digital platforms). The objects may not be used without permission in any way whatsoever in which you charge money, or collect fees.
Comment & Rating (165)