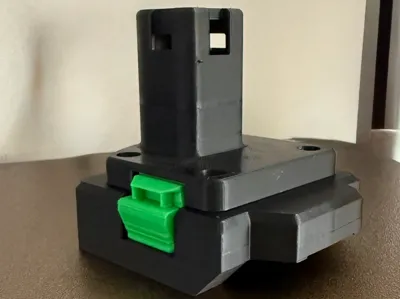
Ryobi 18v to Parkside 20v Battery Adapter


Print Profile(1)

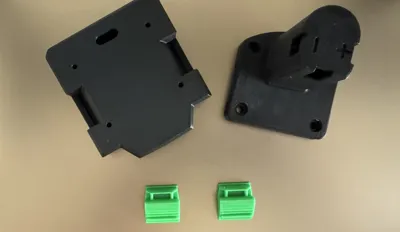
Bill of Materials


Description
Practical adapter to use 20v Parkside batteries with your 18v Ryobi tools!
This is because the 20v Parkside voltage is only nominal, while the actual voltage is 18V!
In addition to the printable parts, you will need the following materials for the project:
FOR CONNECTIONS:
- 4x 6.3mm male Faston connectors, "blue" (diameter 1.5 - 2.5 mm) without protective plastic
- 2x ~10cm cable (recommended diameter 2.5 mm)
- Quick-drying adhesive
- 1x small spring (those in pens work perfectly)
FOR CLOSURE:
(we have two solutions)
a) Clamping with screws
- 4x M3 screws
- 4x hot-melt M3 screw inserts (using a soldering iron)
- Alternatively, you can screw the screws directly into the plastic!
b) Clamping with adhesive
- Glue the two parts together (Watch the alignment!)
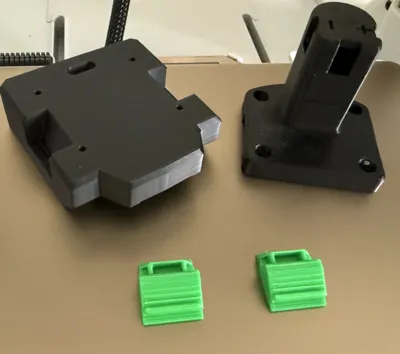
Feed the wires through the holes, crimp or solder the Fastons and glue them in place. If the holes are closed, use the tip of the soldering iron, but be careful. In 99% of cases it is not necessary to enlarge the holes, the print should be perfect ;-).
Connecting the two connectors on each side (+ & -) allows the device to function, but do not use the Ryobi charger!
Only charge the battery with the Parkside charger!
Boost Me (for free)
If you enjoyed my Remix, help me bring more content to our community with your Boost!

Comment & Rating (22)