Flower Coaster Set (magnet version)


Print Profile(1)

Bill of Materials
- Magnet 5 mm x 2,5 mm x 8: diameter = 5 mm, height = 2,5 mm
Description
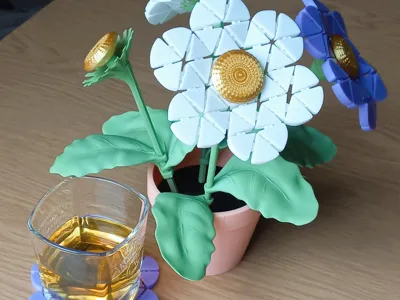
The flower-shaped coaster project is not only a practical solution, but also an eye-catching decoration that brings a touch of summer atmosphere into your interior. Each coaster consists of segments forming flexible petals, which not only effectively protect your table surface but also delight with their appearance. After use, the coaster can be easily placed on a special stem that serves as a stand—the whole set then looks like a bouquet of flowers in a pot, evoking sunny summer days and the ambiance of a garden in full bloom. This practical and decorative solution will remind you every day of the joy and lightness of summer. No multi-color printing system is required, which further simplifies the project.
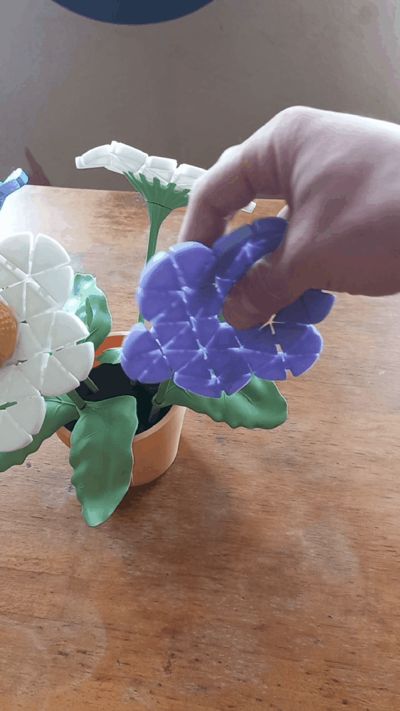
The segmented flower model is printed as a single piece, with only the stand requiring simple assembly. The optimal arrangement of leaves on the stem and flowers in the pot is shown in the photos below. Elements printed with a brim should first be carefully cleaned of any unwanted fragments. The stems should have edges prepared so that the leaves can be easily slid onto them. The thread in the pot must also be cleen. The flowerpot has a special compartment where you can hide something or, if necessary, add weight to the pot.
Assembling:
Magnet Installation Instructions:
Magnets used: diameter 5mm, height 2.5mm
Prepare the magnet and press it into the base as shown in the photo.


Remove any unwanted filament from the cap.


Connect the magnet to the other magnet located in the base, then use the base to press the magnet into the part


Remember to ensure that all magnets in the bases and caps are mounted in the same direction (so that the magnets attract, not repel, each other).
Stalk and leafs:
Elements printed with a brim should first be carefully cleaned of any unwanted fragments.
Connect stalk and base

The stems should have edges prepared so that the leaves can be easily slid onto them. Every leaf and stalk have one flat side, so put them in same way


The optimal arrangement:


License
You shall not share, sub-license, sell, rent, host, transfer, or distribute in any way the digital or 3D printed versions of this object, nor any other derivative work of this object in its digital or physical format (including - but not limited to - remixes of this object, and hosting on other digital platforms). The objects may not be used without permission in any way whatsoever in which you charge money, or collect fees.
Comment & Rating (3)