Search models, users, collections, and posts

Altimeter Desk Clock

IP Report

Print Profile(3)

All
A1
H2D Pro
P2S
H2D
X1
A1 mini
X1 Carbon
H2S
P1S
P1P
X1E
H2C
X2D
A2L

12 Hour face, Colorized, 0% infill.
Designer
3.2 h
5 plates
4.9(29)

Tighter Fit Pins
Tighter Fit Pins
Designer
16 min
1 plate
5.0(6)

New Updated Print Profile
Designer
6.1 h
5 plates
4.2(5)

Open in Bambu Studio
Boost
1022
2343
93
87
985
348
Released 

Bill of Materials

Maker's Supply Kits and Parts
Select all
Clock Components Kit (1pcs) - MH011
Bambu Filaments
Select all
Jade White (10100) / Refill / 1kg
Black (10101) / Refill / 1kg
Orange (10300) / Refill / 1kg
Yellow (10400) / Refill / 1kg
Red (10200) / Refill / 1kg

Description

Boost Me (for free)

Costs you absolutely nothing, but provides me with so much motivation! :) Have a nice day!

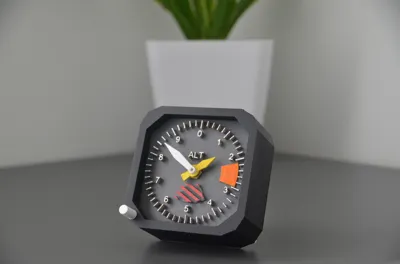
✈️ Altimeter Desk Clock
A desk clock styled like an aircraft altimeter — perfect for aviation fans and enthusiasts!
The numbers are arranged like a real altimeter dial, giving it an authentic cockpit feel.

Laboratory Contest: This model is related to the Lab Contest because it is inspired by precision instruments used in scientific and aerospace labs. The altimeter clock mimics the look of real lab gauges, reflecting the importance of measurement and data in experimental environments.

Print Time: 3 Hours

🛠️ COMPATIBLE WITH
Bambu Maker Supply Clock Kit: 011

📦 Includes 3D Printed Parts:

  • Altimeter Housing
  • Altimeter Faceplate
  • Altimeter Backplate
  • Altimeter Dial
  • Hour Hand
  • Minute Hand
  • Housing → Backplate Pins ×4
  • Dial → Housing Pin ×1

🧩 Assembly Instructions:

  1. Insert the Faceplate into the Housing.
    ➤ Make sure the dial hole is at the bottom right — that’s the correct orientation.
  2. Attach the Clock Mechanism through the center hole.
    ➤ Screw the gold nut (included with the clock kit) onto the front of the faceplate.
  3. Install the Hour and Minute Hands.
    ➤ Push them in firmly — it might take a bit of pressure.
  4. Insert a Battery and Set the Time.
    ➤ Need help? Watch this short tutorial.
  5. Attach the Backplate:
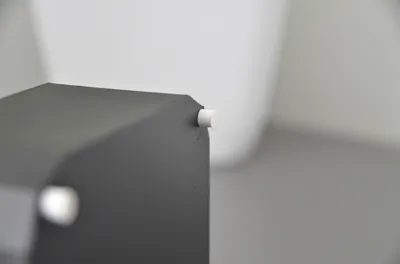
    ➤ Insert the 4 Housing → Backplate pins into the Backplate.
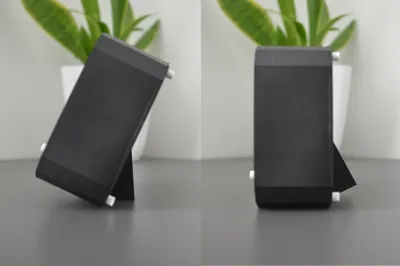
    ➤ Slide the Backplate onto the back of the Housing.
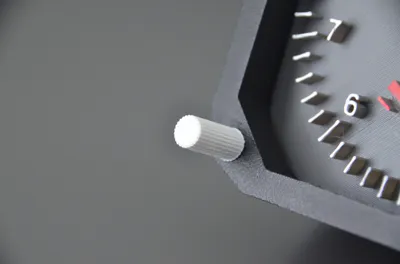
    ➤ Make sure the stand will sit in the correct position.
  6. Add the Dial:
    ➤ Insert the Dial → Housing Pin into the Housing. Use force if needed, or drill slightly if tolerances are tight.
    ➤ Place the Dial on top of the pin.

Done! You’ve built your own Altimeter Desk Clock!

💬 Enjoying the build?
Leave a rating and review!
Questions or problems? DM me or drop a comment — I respond quickly!

Comment & Rating (93)

(0/1000)

Boosted
Pinned by Designer
looks great! we printed it for my son’s grandfather. we had to use the larger pins and used a drill bit to shave the inner ring of the clock hands to get a fit on the clock dial. I was having issues with it not wanting to lean back on the back plate, but the creator sent me an improved back plate within no time.
(Edited)
The designer has replied
0
Reply
Hi, could you please send me a PM with a video of the rocking? I will take a look and alter the file.
1
Reply
Boosted
Replying to @shivamhegadi :
thank you so much for your quick response and support. greatly appreciated
1
Reply
isn't that just your dad?
0
Reply
Hi @shivamhegadi ! I made a slightly more detailed version. Can i upload as remix ? The front selector exists as well.
The designer has replied
5
Reply
Hi, you can send over the files to me in a private message. I will look over it and publish it for you!
1
Reply
Replying to @shivamhegadi :
OK
0
Reply
Replying to @fabiojspereira :
Hi, when will we see this one posted?
1
Reply
Print Profile
12 Hour face, Colorized, 0% infill.
Needed the pins with a tighter fit and the hands were a bit bendy, but apart from that it's a great model. Gifted it to a friend and he was ecstatic.
The profile uploader has replied
profile
2
Reply
Thank you! Glad he likes it! :)
0
Reply
Print Profile
12 Hour face, Colorized, 0% infill.
nice
The profile uploader has replied
1
Reply
Thank you so much!
0
Reply
Print Profile
New Updated Print Profile
not sure what the million pieces are for on the new print profile. some instructions would be good. bit of glue here and there and I cobbled it together. but the pins that hold the back plate on are very loose
The profile uploader has replied
0
Reply
Hi there, thank you for the rating. I understand the issue with the print profile that you faced. The extra clock hands were provided because it is a fragile part, and during testing, it was possible for it to bend. The smaller pins also had extras to compensate for a pin falling off on the print bed. I will be making this clearer in the description soon. Thank you for the feedback!
0
Reply
The print profile is no longer public
great print, my flight sim enthusias loves it
The profile uploader has replied
0
Reply
Thanks! The sim looks great!
0
Reply
Print Profile
12 Hour face, Colorized, 0% infill.
needs bit more refinement
(Edited)
The profile uploader has replied
0
Reply
Hi, I would like to help you diagnose the issue. Did you make any changes to the profile before printing? Has your printer faced any issues lately? Multiple people have successfully printed using the print profile. P
0
Reply
Boosted
Print Profile
12 Hour face, Colorized, 0% infill.
it is good! some things i needed to glue, but otherwise great!
The profile uploader has replied
0
Reply
Thanks very much! :)
(Edited)
1
Reply
Print Profile
Tighter Fit Pins
nice
The profile uploader has replied
0
Reply
Thanks!
0
Reply
Print Profile
12 Hour face, Colorized, 0% infill.
👌
0
Reply
Print Profile
12 Hour face, Colorized, 0% infill.
Very nice addition to my desk at work!
0
Reply

License

This user content is licensed under a Standard Digital File License.

You shall not share, sub-license, sell, rent, host, transfer, or distribute in any way the digital or 3D printed versions of this object, nor any other derivative work of this object in its digital or physical format (including - but not limited to - remixes of this object, and hosting on other digital platforms). The objects may not be used without permission in any way whatsoever in which you charge money, or collect fees.