Mini Skee-Ball


Print Profile(1)

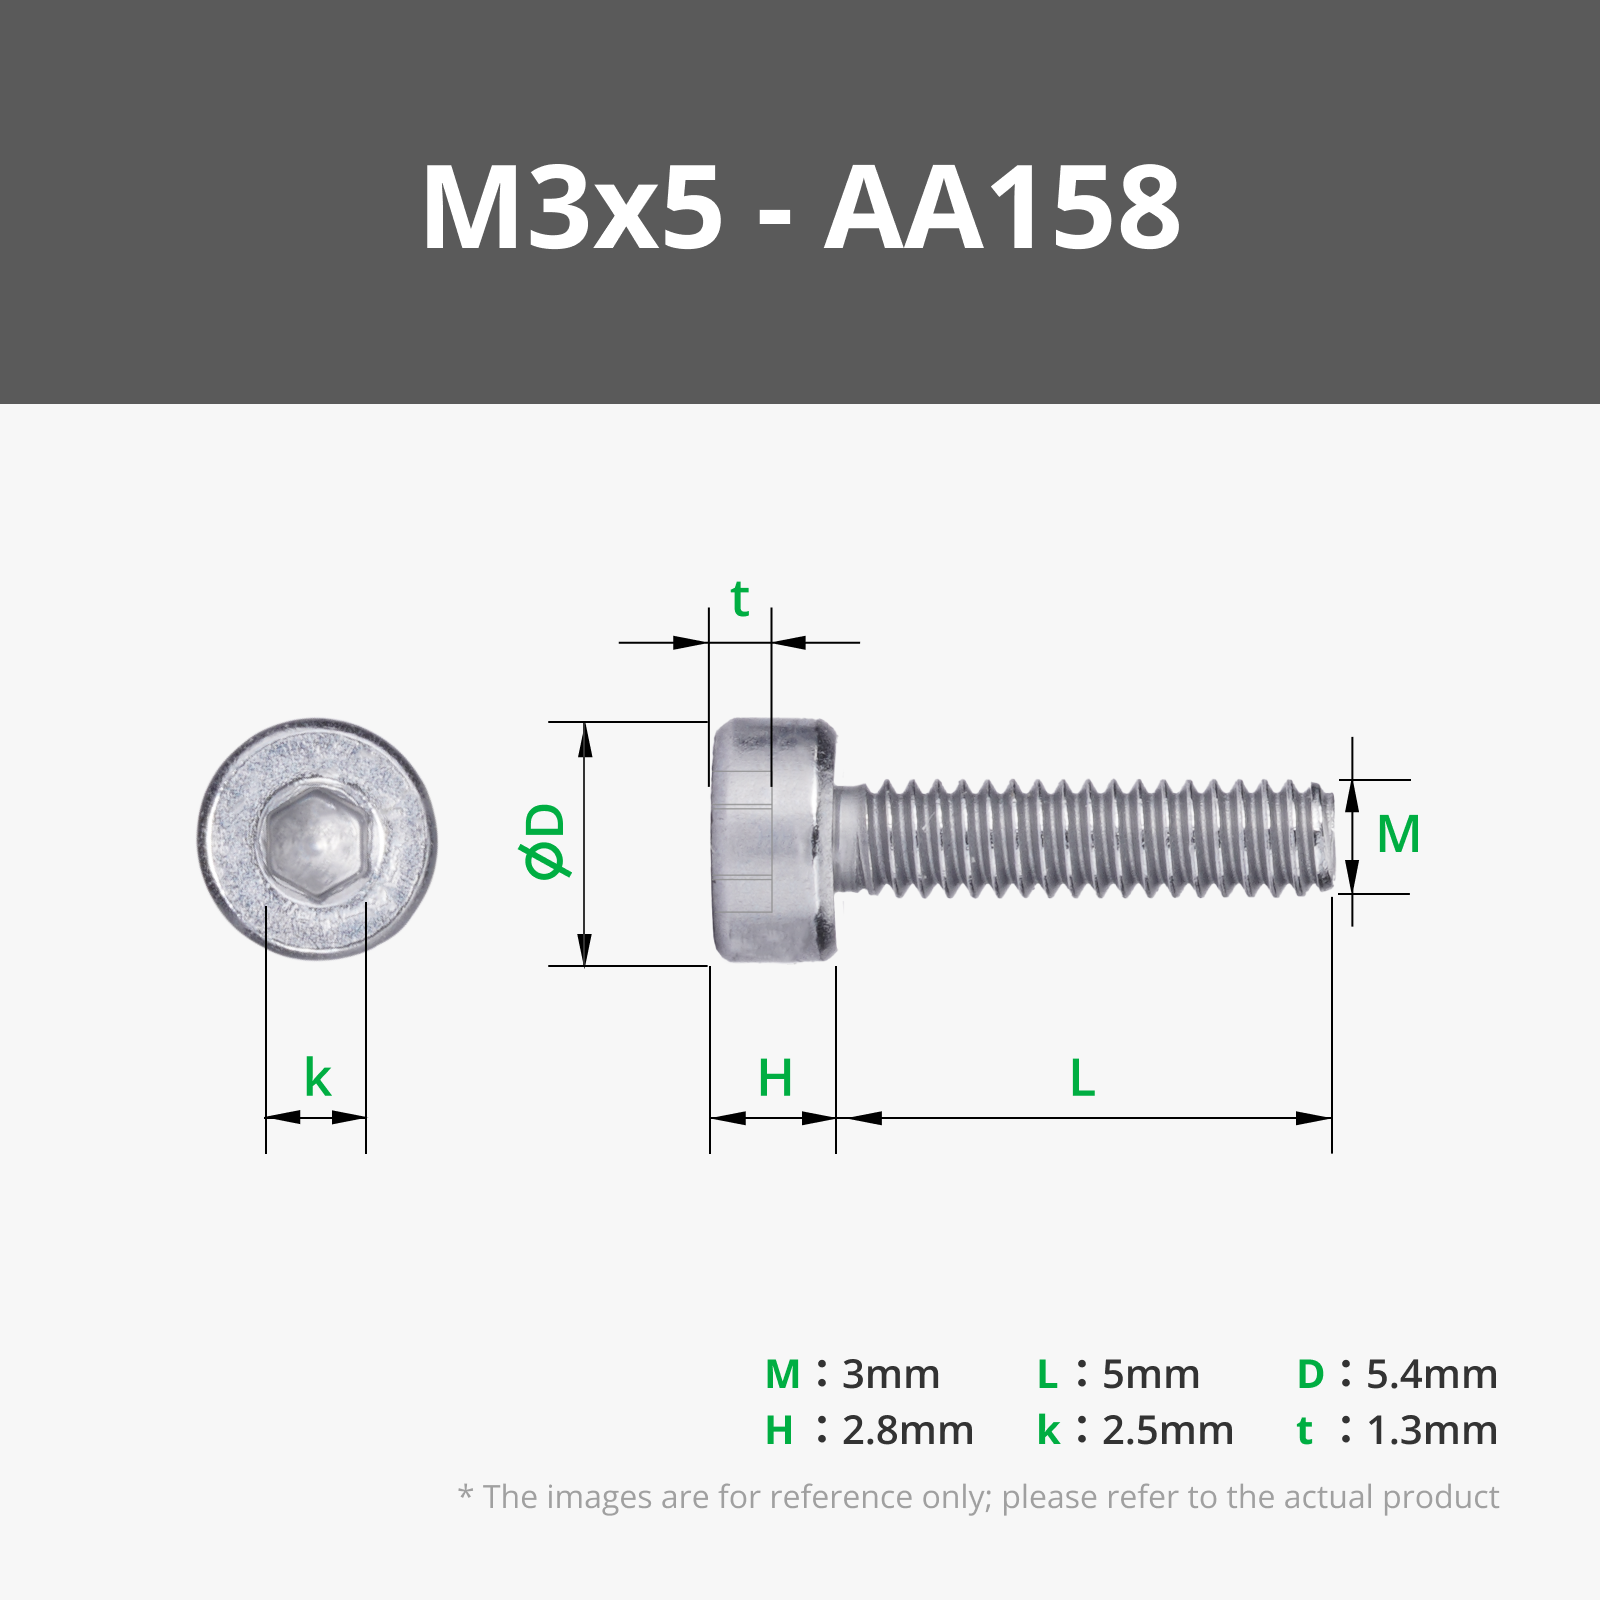
Bill of Materials


Description
Compact enough to fit on your desk, powerful enough to fuel your game-day dreams.
From coffee breaks to conference calls, the Mini Skee-Ball brings old-school fun wherever it rolls. With smooth ball return, satisfying scores, and addictive gameplay, this mini Skee-Ball machine turns any boring desk into a carnival-worthy showdown.
Whether you're procrastinating like a pro or challenging coworkers to high-score duels, this Mini Skee-Ball's got your back—one ball at a time.
Assembly Guide
Parts Needed :
- 3mm Screws x4
- 4mm Balls x5
- Small Hair Elastic x1
- Super Glue (optional)
Step 1
Parts Needed : Launcher, Loader and Small Hair Elastic
To assemble the shooting mechanism take the parts labeled launcher and loader and grab the small hair elastic.
Insert the hair elastic into the back side of the loader and place it into the grove. Then insert the launcher in through the back of the loader and place the elastic into the grove.
Step 2
Parts Needed: Ramp, Loader assembly and Locking Pin
Next Place the Loader around the rounded end of the ramp and align the holes. Once the holes are aligned insert the locking pin and push into place
Step 3
Parts Needed: Ramp and Launcher assembly, Left Side, Return Ramp, Score Board and Name Plate.
Now taking the Left Side place id flat on a surface with the designs facing down. Insert the ramp, return ramp, score board and name plate into their respective groves. Feel free to glue these parts in for a better bond.
Step 4
Parts Needed: Left Side assembly, Right Side, Front Support, Rear Support and 3mm screws x2
Taking the Right side align the ramp, return ramp, score board and name plate groves. Next place the front and rear supports in and insert the screws. Feel free to glue these parts in for a better bond.
Step 5
Parts needed: 3mm Screws x2 and 4mm balls
While maintaining pressure stand the mini skee-ball upright and insert the Left Side 3mm screws x2.
Your Mini Skee-Ball is now ready to play. Insert you balls into the loader pull back on the launcher and let the fun begin.
Boost Me (for free)
🚀 Hey MakersWorld fam!
I just dropped a fresh new design and it’s looking for some love 💖
If it made you smile, sparked an idea, or just looks cool to you —
Give it a BOOST! 🌟
Your boost helps it shine and reach more amazing makers like you 🙌
Let’s make creativity go viral — one boost at a time! 💡✨
License
You shall not share, sub-license, sell, rent, host, transfer, or distribute in any way the digital or 3D printed versions of this object, nor any other derivative work of this object in its digital or physical format (including - but not limited to - remixes of this object, and hosting on other digital platforms). The objects may not be used without permission in any way whatsoever in which you charge money, or collect fees.
Comment & Rating (42)