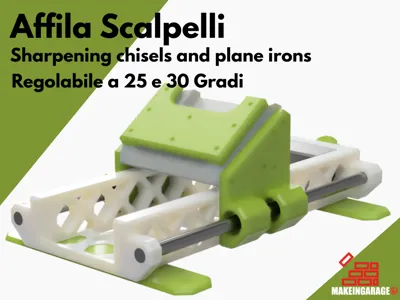
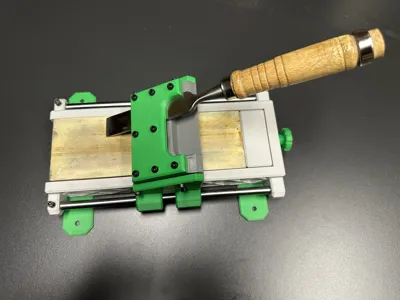
Sharpening Chisels 25° and 30°


Print Profile(1)


Description
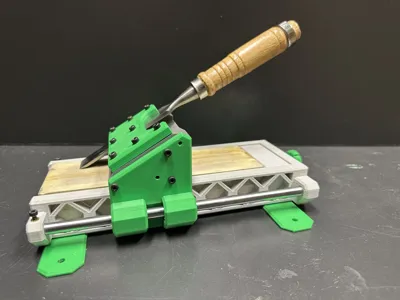
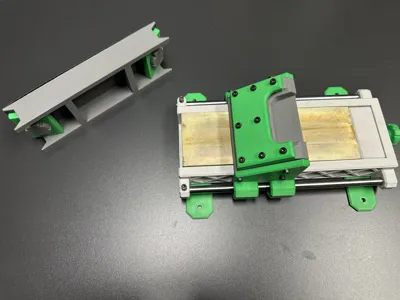
🔧 Sharpen Chisels with Linear Rails and Bearings – A 3D-Printed Project for Professional Precision 🔧
Tired of imprecise sharpening? This project is designed for those seeking superior chisel sharpening, utilizing a smooth, accurate, and stable system.
🧩 Key Features:
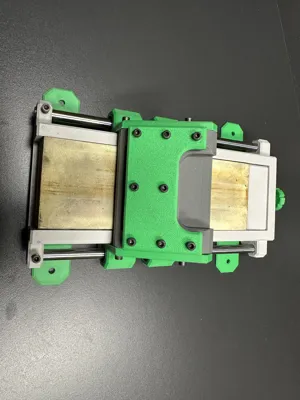
- Linear rail system with LM8UU linear bearings, ensuring fluid and controlled movement.
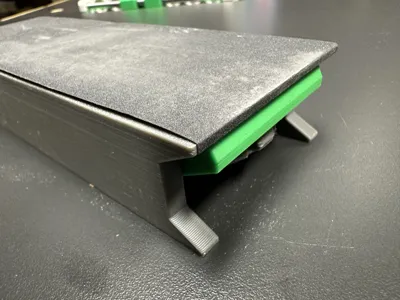
- Optimized 3D-printed structure, designed to minimize weight while maintaining rigidity.
- Simple and intuitive angle adjustment.
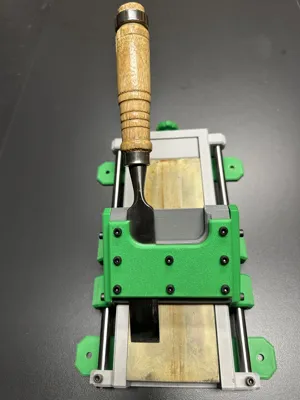
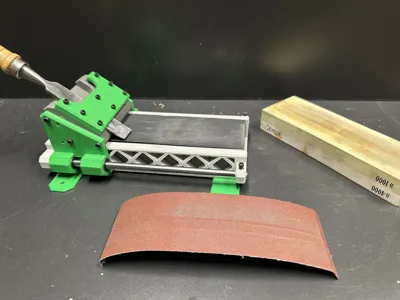
- Compatible with sharpening stones of various sizes.
- Engineered for consistent sharpening, even on small or heavily worn chisels.
- Includes sandpaper holder (paper dimensions must be 60x202 mm)
🛠️ Recommended Materials:
- PLA or PETG for rigidity and dimensional stability.
- 8 mm rods and LM8UU bearings.
- M3 screws and threaded inserts for robust assembly.
💡 Ideal for hobbyists and aficionados of perfect sharpening!
🔧 Required Materials:
- M3X10 screws: https://amzn.to/44ugiYp
- M3X12 screws: https://amzn.to/4l6bWOc
- Threaded inserts: https://amzn.to/4luTaj1
- Linear rails: https://amzn.to/3I3m4IS
- LM8UU bearings: https://amzn.to/4l5iGvu
🛠️ Assembly:
Insert the M3 threaded inserts using a soldering iron in all holes
present in the model.

Insert the M3 threaded inserts into the marked holes.

Insert the LM8UU linear bearings using a clamp.

Cut the linear rails to a length of 215 mm and partially insert them
into the indicated hole.

Take the two side parts and insert them into the rails, then
slide the rail all the way into the seat and secure everything
with two M3X8 screws in the provided inserts.
Now attach the central body to the side walls of the carriage.
The central body can be positioned in two different configurations;
refer to the image to determine the suitable one for you.

Now position the upper part of the carriage and screw in the M3X12 screws.
These screws will hold the chisel in place during sharpening.
Boost Me (for free)
Thank you!
If you like, support me with a boost.
License
You shall not share, sub-license, sell, rent, host, transfer, or distribute in any way the digital or 3D printed versions of this object, nor any other derivative work of this object in its digital or physical format (including - but not limited to - remixes of this object, and hosting on other digital platforms). The objects may not be used without permission in any way whatsoever in which you charge money, or collect fees.
Comment & Rating (13)