Army Painter Vallejo Dropper Bottle Paint Rack


Print Profile(10)


Description
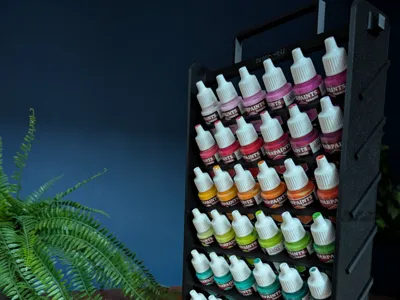
Introducing The Vertical Compact Paint Rack — the vertical space-saving solution for hobbyists and artists! This sleek, vertical paint rack is specially designed to hold up to 36 dropper-style paint bottles like those from Vallejo and Army Painter. With its minimal footprint and integrated handle, this rack is perfect for those with limited workspace who need easy access to their paint collection.
Whether you're painting miniatures, models, or art pieces, The Vertical Compact Paint Rack keeps your workspace organized without taking up valuable room. Its ergonomic handle makes it easy to move, allowing you to take your paints wherever inspiration strikes. Say goodbye to clutter and hello to a well-organized, compact workspace!
ATTENTION: This requires assembly. Said assembly is described below.
Keep in mind that the “Mandasquare” engraved isn't present in the profile print.
NEW : Now you can also print feets to increase the stability of the product!
Boost Me (for free)
Any boost is appreciated!
Size (with handle): H36.5cm -W21cm - D5.3cm
Size (without handle): 33.7Height - W19cm - D5.3cm
How to build The Vertical Compact Paint Rack
Here's what you get in a print:
The side currently up on all pieces is what I'll refer to as the textured side. Think about it like plenty of small little holes.
Don't worry, it doesn't weaken the structure, it's just for the printing.
Step 1: The Sides
Group the sides together so the notches are all going in the same direction
Choose a pair and put the triangular notches side by side, as such:
Take both pieces of a side and align them, pressing together until it clicks.
Then, place this flat on a surface and press down on the raised part until it's flat using the bottom shelf to apply pressure evenly.
Do it for the other side and... tada!
Part 2: Slide in the Shelves
Now take the bottom shelf, texture up, and slide it in the bottom of one of the sides (here I did the left side).
The bottom of the side is where you have the two little feet.
Now take the other side and slide in the other side of the bottom shelf.
All remaining shelves are the same.
Slide each one into the remaining slots in the same way as you just did. From the bottom to the top.
Part 3: The Handle
Take your handle and slide it in the square hole on one side, then the other.
Take one of the plugs (any direction) and put it in the little holes on each side of the handle. This is so you can stabilise the top and walk around with your paints.
Here's what it should look like once the plug is in.
Repeat the operation on the other side.
DONE!
You have your vertical paint rack.
Now, fill it up with your favourite paints and enjoy!
License
You shall not share, sub-license, sell, rent, host, transfer, or distribute in any way the digital or 3D printed versions of this object, nor any other derivative work of this object in its digital or physical format (including - but not limited to - remixes of this object, and hosting on other digital platforms). The objects may not be used without permission in any way whatsoever in which you charge money, or collect fees.
Comment & Rating (461)