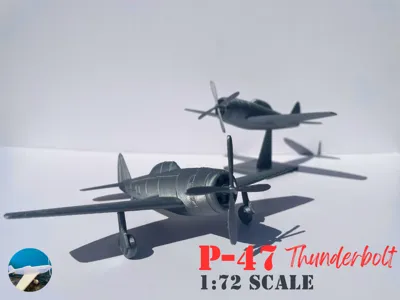
P-47 Thunderbolt [1:72 Scale]


Print Profile(1)

Description
Overview
The Republic P-47 Thunderbolt was a rugged, single-seat American fighter-bomber used extensively during World War II. Known as the “Jug”, it was powered by a massive Pratt & Whitney R-2800 Double Wasp radial engine, giving it excellent speed (up to 430 mph) and dive performance. It was heavily armed with eight .50 caliber machine guns and could carry bombs or rockets, making it a formidable ground-attack aircraft as well. The P-47 excelled in high-altitude escort roles and was renowned for its durability, with many pilots returning safely in heavily damaged aircraft. The most produced variant was the P-47D, with the long-range P-47N later optimized for Pacific operations. Though not as agile as lighter fighters, the Thunderbolt’s toughness, firepower, and versatility made it one of the most effective Allied fighters of the war.
Model features and assembly
This model features two display options, one for simulated flight with a large stand, and one without the stand for a parked display. both versions are in the print profile, the only difference between them being the stand.
Assembly: Remove all parts from supports being careful not to lose the tail wheel as it is VERY small. be careful removing supports especially from the propeller, in which I found it easiest to run a knife along the gap between the support and propeller, removing supports from one blade at a time, before proceeding on to the next blade. next, snap the tires onto the main landing gear struts. Refer to the images above for placement of the landing gear, and ensure the gear is oriented so the covers face out and the tires are inward, with the higher side of the cover facing forward for each side. Some force may be required to insert these fully into the wing, I found it helps to get it loosely in, and place the aircraft on a non-slippery surface, then push directly down on the top of the wing, forcing the gear to go in. Depending on the printer, its condition, and filament, you may need to use sandpaper or glue to compensate for dimensional inaccuracies. For this model, I was able to print it and not use either glue or sandpaper. Enjoy the model :)
Boost Me (for free)
These models are meticulously designed and tested, meaning they take a considerable amount of time to complete. If you enjoyed or appreciated this model, please consider leaving a boost, as it really helps development of future aircraft.
License
You shall not share, sub-license, sell, rent, host, transfer, or distribute in any way the digital or 3D printed versions of this object, nor any other derivative work of this object in its digital or physical format (including - but not limited to - remixes of this object, and hosting on other digital platforms). The objects may not be used without permission in any way whatsoever in which you charge money, or collect fees.
Comment & Rating (7)