C64 RetroPie Case for Raspberry Pi ZERO


Print Profile(1)
Description
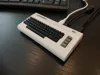
Commodore 64 RetroPie case for Raspberry Pi Zero 2W/H
Oh yea, I’ve seen few of them before. People were focusing on making them as small as posible, resulting in weird and deformed C64 look. Not what I wanted. It can be slightly bigger isn’t it?
I’ve made Commodore 64 kit card last year and after checking it dimensions, I was happy this exact size can hold Pi Zero 2W both with and without headers (and with some radiators too!), without any changes to Commmodore 64 geometry. Perfect! Quick and easy job, few holes and I got case for my Pi Zero 2W! Uhmmm… it took me 21 offset planes and 51 sketches to get there :) Redesigned I/O holes, board mounting points, ventilation to let this little beast breathe. Integrating keyboard with main body to get enough room for headers and radiator, finding solution to connect both peaces of this case together and look natural. Etc, etc... but it’s finally ready! :)
What do you need to build RetroPie gaming machine with this case
- Raspberry Pi ZERO. As all of them are the same size, it can be also Zero 2, 2W with or without the headers. I used ZERO 2W with headers,
- Power supply for your board,
- Mini HDMI to HDMI cable,
- USB OTG Hub or at least converter from MicroUSB to USB type A,
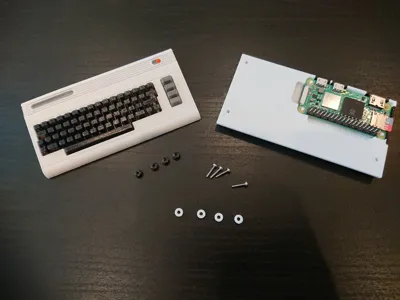
- 4x M2x10mm. I couldn’t use more popular M3 screws as the holes in Pi ZERO are smaller. M2.5x10 is fine, but it is even less popular than M2.
- Some gamepad or joystick,
- Around 130g of filament (for multicolor) and few hours of your printer time :)
How to print it
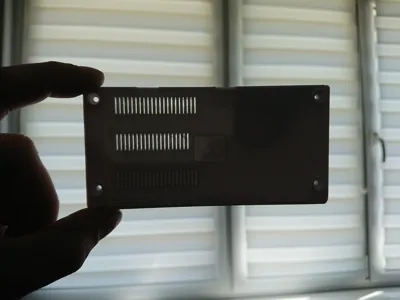
I do not recommend PLA for this project. Raspberry Pi Zero 2W can reach 80C in full stress so it may deform your case. I added ventilation holes in both top and bottom parts of the case but I’m not sure it will be enough to safely use PLA for it. PETG/ABS/ASA or high temp PLA (HT-PLA) required.
Due to the shape and details of Commodore 64 model need to be printed flat, with the top and the bottom of the model facing up. I printed mine with 0.16mm layer height but the lower the better. Mind the print time and amount of filament change when you go lower and print in color.
Supports are easy to remove but do it gently. Ventilation parts are thin. Also be carefull around Pi Zero mounting pins inside the bottom part of the case.
Assembly
Pretty straight forward job. See the attached pictures.


When you finished with assembly, it's time to install RetroPie! Go to https://retropie.org.uk/download/ and follow step by step instruction how to prepare RetroPie image and configure the sytem :)
I wish you will have fun playing great old arcade games packed in this little case :)
If you like the model and you want to give it thumbs up, please also consider downloading it. It cost you just one additional click and it’s very important to me. Also check my other models, maybe you will find something interesting :) Thank you!
Happy printing! :)
License
You shall not share, sub-license, sell, rent, host, transfer, or distribute in any way the digital or 3D printed versions of this object, nor any other derivative work of this object in its digital or physical format (including - but not limited to - remixes of this object, and hosting on other digital platforms). The objects may not be used without permission in any way whatsoever in which you charge money, or collect fees.
Comment & Rating (12)