Canopy for Mammotion LUBA 2 AWD (2025)/Luba 3


Print Profile(2)

Description
Membership
To use these files commercially, I also offer a commercial membership
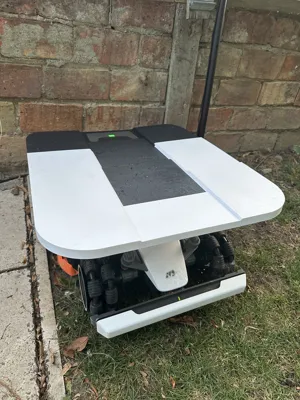
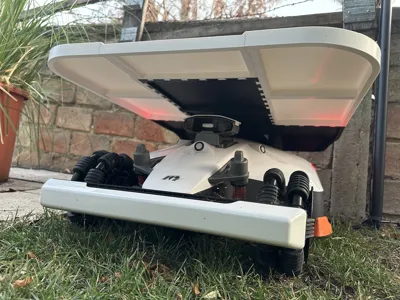
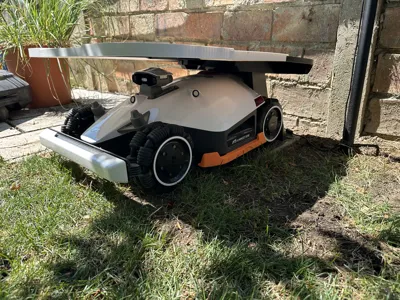
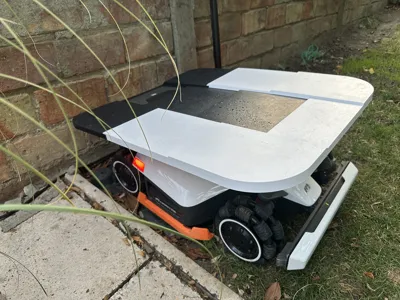
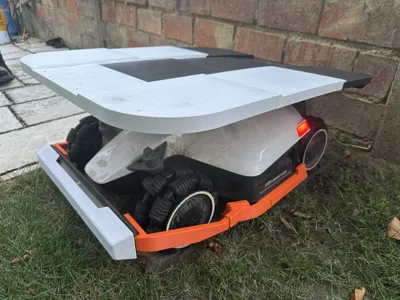
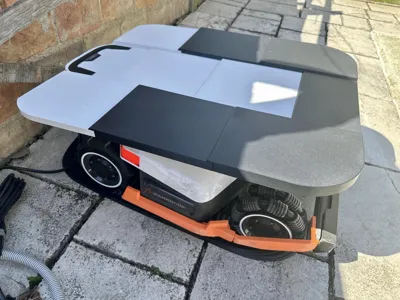
This project includes a canopy for a Mammotion LUBA 2 AWD (2025) robotic lawnmower, which is mounted directly to the robot's charging station
In my Etsy shop, I also offer a mounting plate for precise attachment to the charging station of the Luba 3 AWD (2026) and the Luba Mini. Print plates 2-10 from this model are compatible with the mounting plate for the Luba 3 AWD (2026)
https://schachdesign.etsy.com/listing/4485838199
Side protection parts can be purchased in my Etsy shop. I will not upload a file, as this canopy is already offered for sale on several sales platforms
https://schachdesign.etsy.com/listing/4360246932
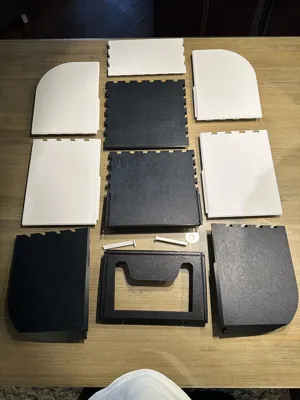
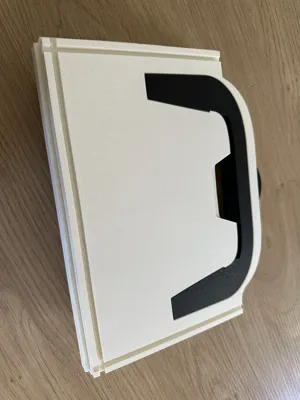
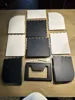
The roof is assembled from 10 parts and can optionally be glued
Since this project involves a component that is exposed to the environment 24/7, I strongly recommend printing it from ASA
To ensure that the rather bulky ASA parts can be printed without warping, I strongly recommend observing the following points:
- Print only with an enclosed build chamber! Additionally insulate the upper glass plate of the enclosure with a foam board and close the small hole at the top right of the enclosure
- Set the print bed temperature to 100°C and preheat the build chamber for at least 10 minutes before starting the print. This allowed me to achieve a build chamber temperature of just over 60°C
Prepare the print plate as shown in the following video
Warp-free printing is important because the tolerances between the individual components have been deliberately kept small to ensure a secure fit for the plug connections. If warping occurs during printing, this could prevent the parts from being assembled
A video guide for assembling the individual parts and mounting them on the charging station can be found under the following link:
Boost Me (for free)
If you like my work, I would be very happy about a boost
License
You shall not share, sub-license, sell, rent, host, transfer, or distribute in any way the digital or 3D printed versions of this object, nor any other derivative work of this object in its digital or physical format (including - but not limited to - remixes of this object, and hosting on other digital platforms). The objects may not be used without permission in any way whatsoever in which you charge money, or collect fees.
Comment & Rating (115)