Quick Compass in 1mm Increments 20-124 /224 /300mm


Print Profile(4)


Description
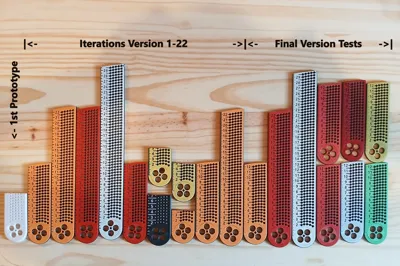
A quick compass that lets you draw circles at 1 mm increments in a range of 20 mm - 124 mm, 224 mm or 300 mm (3 versions). The print - in - place axis has a cut out in it's center that can be quickly aligned with the origin of the circle you want to draw - then simply press this disc onto your workpiece with one hand and use a pencil, pen, marker or sharp object to spin the arm around and mark the radius you want.
The axis has a very small tolerance to enhance the accuracy and has enough friction to just stay in place when pressed on a flat surface but can also be held down by a nail, screw or any pointy tool.
There is a linear ruler on the left side starting from 0 next to the center - It does not represent the distance to the center of the compass! - it's just a ruler with 1mm increments for quick measurements that was put there because there was space ;)
Print Profiles:
There are multiple ways to print this but all of them require a clean build plate for good results. After the print is finished, let it cool down before removing it to prevent the part from getting bent. The print-in-place axis has a very tight tolerance and will break free with a bit of force - make sure your filament is calibrated well and does not over-extrude or string.
The profiles (“AMS” and “manual/pause”) are composed of multiple plates hosting the 3 sizes in various combinations:
- Plate 1: 124mm version
- Plate 2: 224mm version
- Plate 3: 300mm version (diagonal)
- Plate 4: 1x 124 mm and 1x 224 mm version
- Plate 5: 2x 124 mm and 1x 300 mm version (diagonal)
The first color in the slicer will create the top and bottom surface, the second color is used in the middle to create a contrast and make the markings readable (preferably black or maybe white). There are 3 colored top and bottom layers, the changes happen on layer 4 and 18.
You will not be able to see the different colors in the slicer (or Bambu Handy) in the “Prepare” view, they will only show up colored correctly in the “Preview” tab after being sliced. There is currently no way to make it visible with Bambu Handy but the color changes will work the correct way regardless.
Settings:
The settings are made on the object to not get lost when changing the printer:
Seams: Random
Infill: 25% Cubic
Detect narrow internal infill: Off
(for diagonal prints, plate 3 and 5) Infill direction: 0 degrees
should you have problems getting a good first layer, try cleaning your bed and lowering the Initial Layer Speed to 30 mm/s.
If you like this print, you might find these models to be a nice and unique addition to your workshop:
 |  |
Boost Me (for free)
If you like my designs, give me a boost, a like and follow me to keep updated about new designs! Your support truly makes a difference :)
Membership
If you want to fuel the creation for more designs like this, consider becoming a support-tier member! A commercial licence is also available if you want to start selling my designs ;)
Like always, reach out to me should you have any problems with the design or would like to see a feature added! Happy printing and may the filament forever fall in your favor.
Cheers, fmod ;)
License
You shall not share, sub-license, sell, rent, host, transfer, or distribute in any way the digital or 3D printed versions of this object, nor any other derivative work of this object in its digital or physical format (including - but not limited to - remixes of this object, and hosting on other digital platforms). The objects may not be used without permission in any way whatsoever in which you charge money, or collect fees.
Comment & Rating (82)