Recessed Cabinet Handles + Router Jig


Print Profile(6)


Description
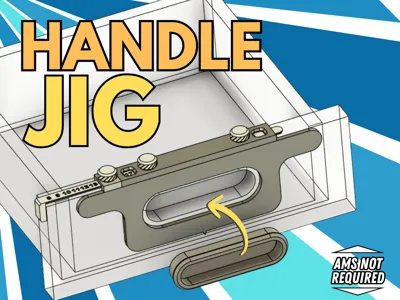
Recessed Handles + Router Jig
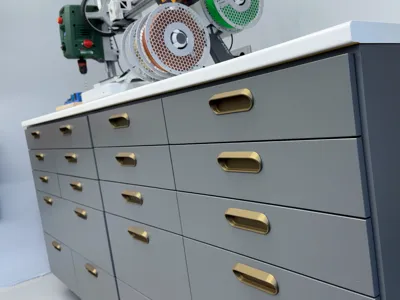
An adjustable system for installing recessed handles

My requirements were:
- to create handles without protrusions
- to do so with a custom jig for the DeWalt DCW600N trimmer (other measurements are in the “template” file, read on)
- to use only front-facing screws, no adhesive (I detest internal ones)
- to make the horizontal position of the handles adjustable
…did I succeed?
Boost Me (for free)
Make me happy and give me a BOOST!
HERE you can view a short video, or a full video (ITA/ENG).
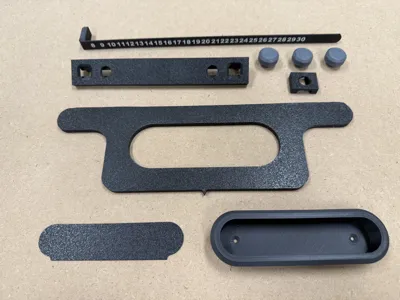
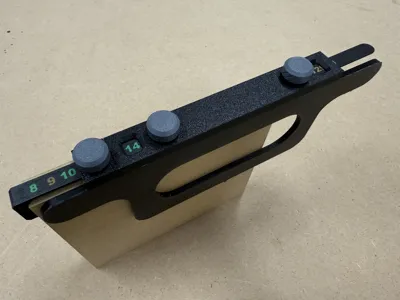
The kit I created comprises two interlocking parts (I didn’t deem gluing them necessary, but you may) and a numbered slider that can be inserted on the right or left, equipped with a reference stop.

The numbers indicate the distance between the jig’s center and the slider’s stop, covering distances from 80mm to 300mm.
The slider locks with a screw knob, and a second knob is present on the reference cursor.
Using the jig
- If the drawer requires a single handle, center the jig using the indicator point, then lock the slider with the knob to ensure repeatable handle placement.
- If the drawer requires two handles on the sides, you can take an arbitrary measurement or use the numbers on the slider for quick reference.
With the jig fixed, engage the reference cursor and lock it.
Once the first handle is made, unlock the slider (but not the cursor), move it to the other side, engage the cursor, lock the slider, and proceed with the second handle.
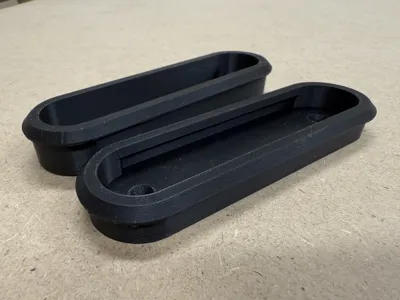
Handle
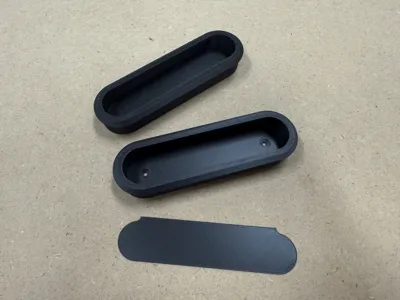
The handle is affixed to the bottom of the drawer with two countersunk 3/4mm screws, then covered with the faceplate, which remains perfectly in place without adhesive (although no one forbids you from using some).
BONUS: the faceplate doesn’t have to be the same color as the handle; it could also match the drawer front, creating a chromatic interplay.

The handle features a finger recess at the top; you’ll find both a 15mm deep version (recommended) and a 10mm slim version.

Help me help you
The jig is designed for use with the DeWalt DCW600N trimmer (copying ring diameter D=17mm) and an 8mm router bit.
I don’t want to go crazy modifying the jig’s dimensions for every router bit diameter, but creating different versions for various trimmers would be useful.
If you wish to participate in this project, message me privately with your trimmer model and the external diameter of its copying ring as per the drawing; I will gladly add dedicated masks to the printing profiles.

Why a remix?
The handles and jig made by Well Done Tips are spectacular but unsuitable for my needs in terms of size and characteristics.
The distance from the top of the drawer wasn’t right; I had to replace existing ones. Furthermore, the design is beautiful but protrudes too much, and I didn’t want to glue them to the front, so I increased their depth for better finger grip.
Finally, while remixing, I realized it was possible to adjust the horizontal spacing (within limits) to allow anyone to customize the position.
Comment & Rating (45)