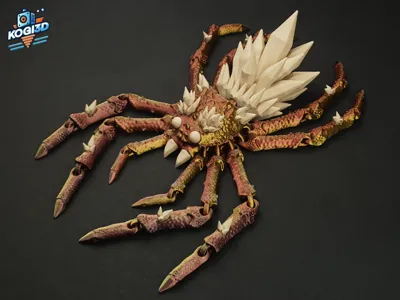
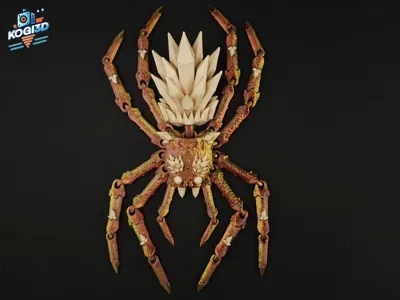
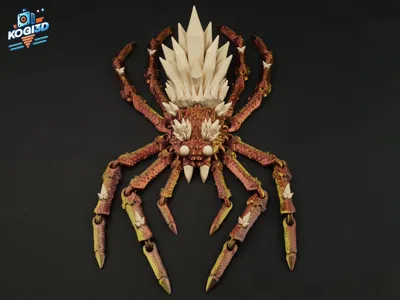
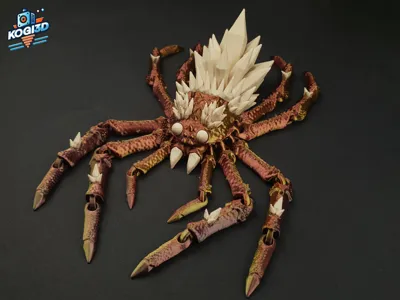
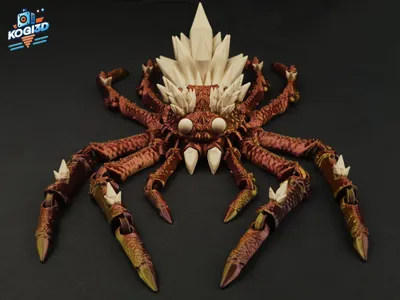
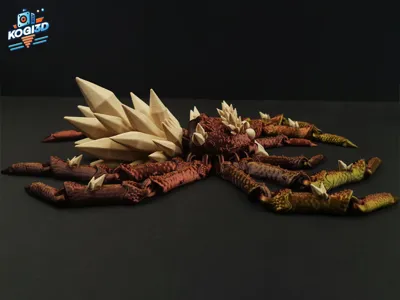
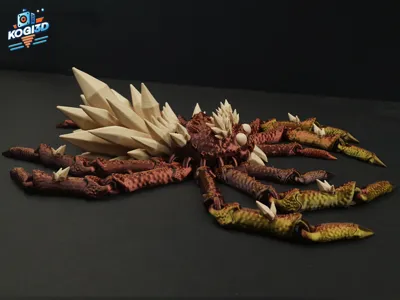
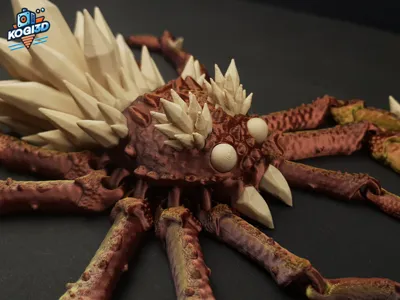
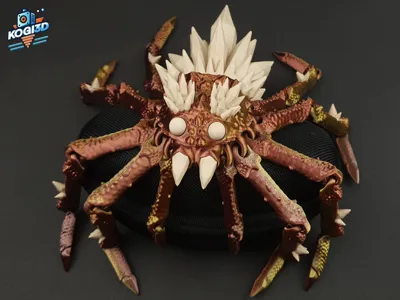
Flexi Crystal Spider


Print Profile(1)

Description
Boost Me (for free)
Just one Boost makes a big impact! ❤️
Membership
Join the Green Light Tier to sell our prints with full commercial rights!
Hey everyone!
I’m super excited to share a brand new 3D printable design with you — an Articulated Crystal Spider. Would love to hear your thoughts about it :)
License Notice:
This model is free for personal, non-commercial use only. If you'd like to sell physical prints or monetize it in any way, please visit my Patreon for licensing options and to support future designs.
🔧 Recommended Settings:
• Infill: 15%
• Walls/Perimeters: 2–3
• Layer Height: 0.2 mm (or 0.15 mm for finer detail)
• Supports: Not required
• Brim: 3–5 mm recommended for smaller parts to improve bed adhesion
🛠️ Assembly Instructions – Crystal Spider :
Your spider model comes in two separate files:
🔹 Spider_Body.stl
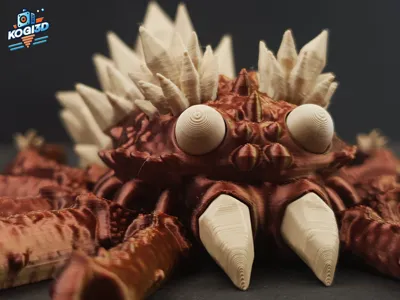
🔹 Spider_Parts.stl (includes crystals, fangs, eyes, and optional pin)
All parts are print-in-place friendly, but require a bit of post-print assembly. Here's what you need to know:
🕷️ 1. Gluing the Parts
All additional parts (crystals, fangs, eyes, etc.) are designed to be glued into the body.
Use a small amount of superglue or plastic glue. The contact points are keyed and should align clearly.
Tip: Dry-fit the pieces before applying glue to ensure correct orientation.
💎 2. Spider Back Crystal
This centerpiece crystal can be attached in two ways:
Option A – Glue it in:
Just like the other parts, you can simply glue it into place.
Option B – Lock it in with the pin:
Included in the parts file is a small printable pin that can be used to mechanically lock the crystal into the body.
It will require a slightly firm push to snap in — this is intentional for a tight, secure fit.
Tip: If the fit is too tight, gently sand the pin or socket for easier insertion.
🧼 Final Note:
Make sure all surfaces are clean and free of print residue before assembly. A light sanding of connection points can help with a smoother fit if needed.
⚠️ Important Note:
Before printing, please make sure your build plate is clean and properly leveled. A dusty or oily surface can lead to poor adhesion — especially on the small contact points of articulated joints.
A clean bed = a successful print 🧼👌
Happy printing, and I’d love to see your finished spiders!
License
You shall not share, sub-license, sell, rent, host, transfer, or distribute in any way the digital or 3D printed versions of this object, nor any other derivative work of this object in its digital or physical format (including - but not limited to - remixes of this object, and hosting on other digital platforms). The objects may not be used without permission in any way whatsoever in which you charge money, or collect fees.
Comment & Rating (21)