The 'Block' - PTFE Tube Length Corrector for TPU


Print Profile(1)

Bill of Materials


Description
My Perfect TPU Set up for the H2D - Simple, easy and affective!

Like many people I was trying to find the perfect set up for my H2D Printer when it comes to printing TPU via the dedicated port on the back. I believe this print, along with another adaptors on MakerWorld together gives you the finishing touch to make for an easy set up and switching from adjusting your printer to print TPU Filament from other ‘normal’ filaments. This print is a very simply print, quick to test out, no supports needed and no hardware needed to test out first on your TPU set up. Magnets can be added if you want as explained below. This description here is as much about my TPU Printing set up as it is about ‘The Block’ model here. By sharing this I'm hoping others can experience an easy TPU Printing set up without lots of extra hardware or hassle and having to adjust so much on your H2D each time, that it stops you wanting to print in TPU, as it's so much fun! I have had great success with this Bypass port on TPU down to 90A.
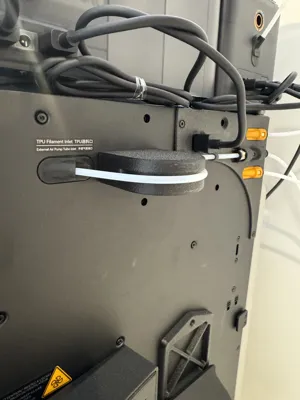
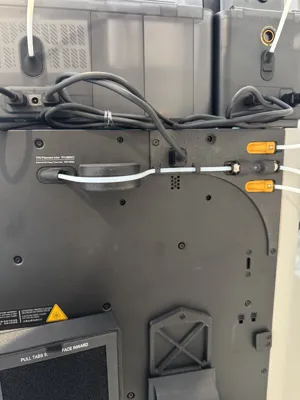
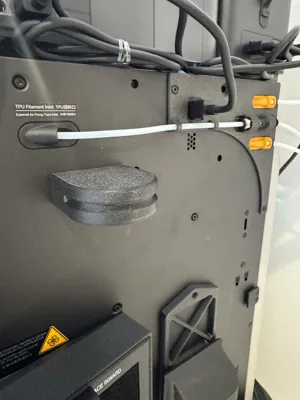
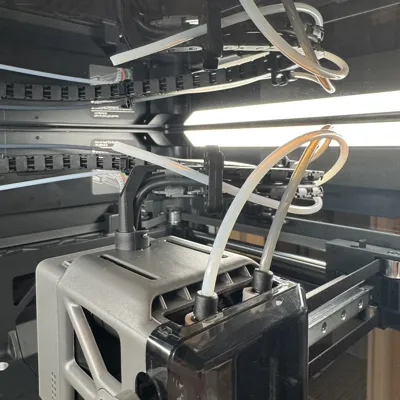
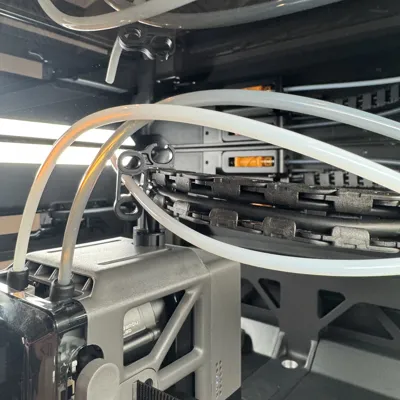
This print I am sharing here works in conjunction with 'suit1337's' great easy add on of the "H2D Right Extruder Buffer Bypass for TPU" which you can find here - https://makerworld.com/en/models/1410954-h2d-right-extruder-buffer-bypass-for-tpu-4-types?from=search#profileId-1464737 - Following this models set up I further enhanced the idea by running the dedicated PTFE Tube into the bypass port for the TPU in one continual length straight to the toolhead and leaving the PTFE Tube in place all the time. so it becomes a one and done exercise! The length of the PTFE Tube you will need is exactly 75 cm. This is important as I have spent much time and tested this set up out to work perfectly meaning you can leave the PTFE Tube in place for the TPU all the time without any issues, catching, dragging, banging or extra weight on the moving head.

Connect the PTFE Tube to the - H2D Right Extruder Buffer Bypass for TPU model - run it into the inside of the H2D and through the empty centre holes of the Tube Organizer. It is also worth purchasing 1 x additional Tube Organizer from Bambu which you can find listed here - https://uk.store.bambulab.com/products/tube-organizer. I added this onto the end of the run of the Cable Chain to hold the unused PTFE Tube in place and away from the toolhead. Again, I have tried many different prints of this and holders, all have failed in one way or another eventually, so in the end it made sense to just purchase a dedicated clip from Bambu which has held solid during all vibrations, movements and heated chambers test.

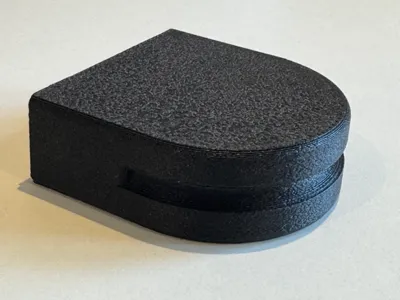
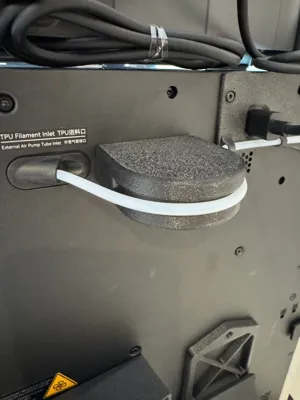
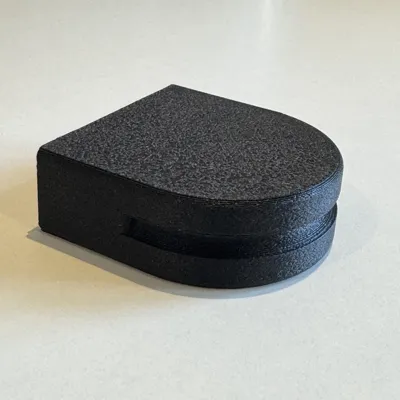
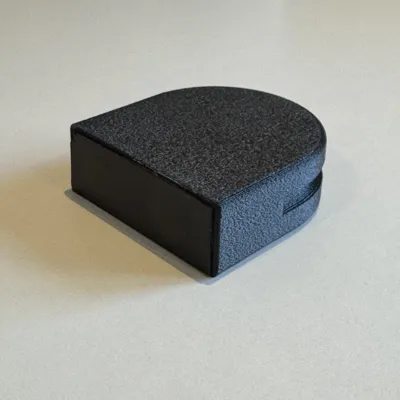
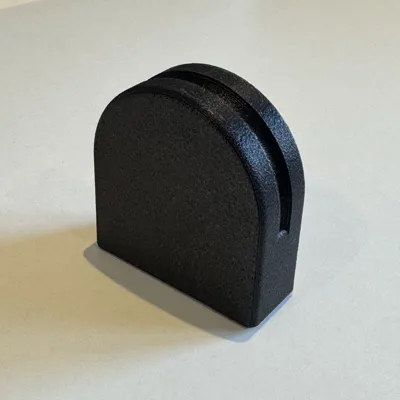
So to get to what this print is all about…. With this set up as above and as in the photos here, you will discover if nothing is adjusted that the PTFE Tube for the dedicated TPU will be the perfect length when actually connected to the tool head and printing TPU - at that 75cm tube length from the connector on the “H2D Right Extruder Buffer Bypass for TPU”. But it will be too long when its not being used to print TPU and is left disconnected and is just being held out of the way. If you do nothing the tube will catch and knock on the casing and also rub continually against other parts. As I didn't want this to happen, I designed this very simple Block which just gets magnetically attached to the back of the H2D by two 10mm x 3mm Bambu magnets you can find listed here in the BOM. I even used some black foam tape also listed in the BOM to protected the back of the printer from the block and magnets. This means the block stays in place during all the printer movements keeping the PTFE Tube perfectly held in place, whilst at the same time easy to remove and store on the back of the Printer again using the magnets. Although simple I spend much time working out the actual sizes needed for this block so the PTFE Tube would be generally curved around whilst shorting it's length inside the H2D enclosed just enough to meaning that the length of the PFTE Tube inside was shorter and would hold in place BUT at the same time not rubbing or knocking onto parts of the H2D potentially catching or causing damage or ware over time. But at the same time you can easily remove the Block and the tube lengths inside the printer allowing for it to easily and correctly reach the Toolhead connector.
I used ABS-GF to print the block shown here in the photos. You can use other material filament for sure, but do be aware of the temperate on the back of the H2D when printing with an enclosed heated chamber, it does get very warm so you need to be aware of filament warming up and warping out of shape. Also the finish gives a great match to the H2D Back casing colour and texture!
With this block in place you can set about printing your everyday projects without any worry about the spare PTFE Tube catching, then you simply remove the block from the location where the PTFE Tube is bending over it and allow the PTFE Tube to run flat direct into the printer and its the perfect length for the TPU print connection to the tool head. By not adding in additional connectors, splitters or any other components it means you can successfully print TPU 90A without having to set about removing the top glass and all that set up, so much quicker this way and still getting great prints in TPU!

I hope you find this small idea (my very first model made and uploaded!) useful to your TPU Printing set up and you too can now find a much simpler way to work with TPU on the H2D
Comment & Rating (0)