Search models, users, collections, and posts
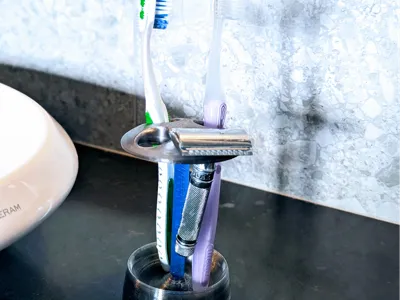
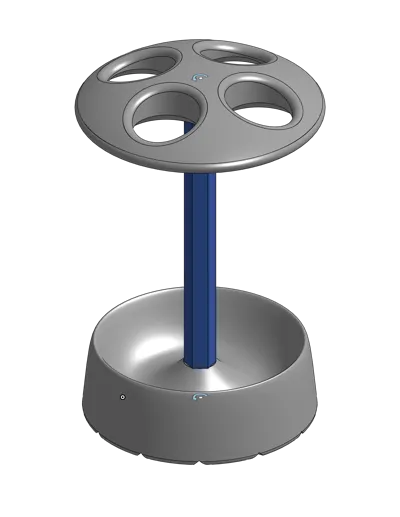
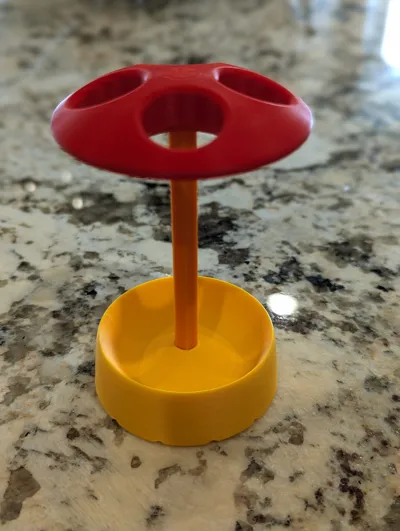
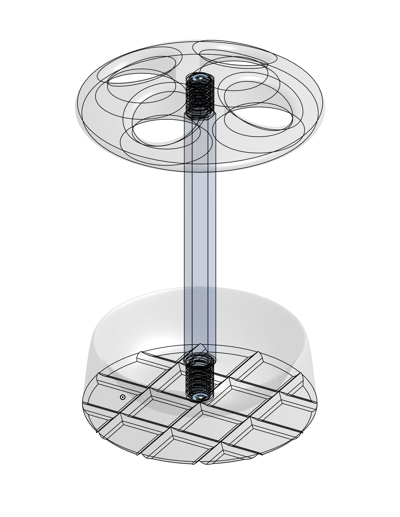
Modular Quad Toothbrush Razor Makeup Holder Stand
IP Report


Print Profile(3)

A1 printer, variable layer, 3 walls, variable infill
Designer
2.5 h
1 plate

A1 mini printer/single color, variable layer, 3 walls
Designer
2.5 h
1 plate

P and X series printers, variable layer, 3 walls
Designer
2.2 h
1 plate
Open in Bambu Studio
Boost
15
27
2
0
34
17
Released
Description
Modular Quad Toothbrush / Razor / Makeup Brush / Holder / Stand / Organizer
Ever had a favorite bathroom toothbrush/razor stand give up on you, only to realize the company doesn’t make it anymore? Same. Every replacement I found had some deal-breaker—too bulky, hard to clean, bad with water, sharp edges… nope.
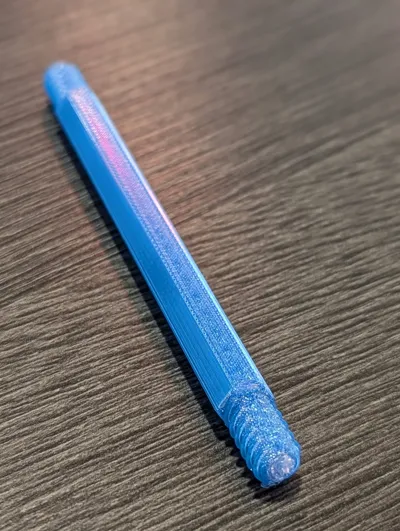
So, I did what any 3D-printing addict would do: opened up CAD, fired up the printer, and made one that improves on the original. Spoiler: I love it! Also, it’s my first design using screw threads made just for 3D printing, and they came out way better than I expected.
(And if you happen to need something for cutting PTFE tubes, check out my Bowden Puck—it's precise, safe, and ridiculously satisfying to use.)
Why this thing rocks:
- Modular – If one part gets grimy, just reprint it.
- Color-friendly – Designed for up to 3 colors, with zero filament waste.
- Elegant – Looks good on the counter instead of like a science project.
- Clean & sanitary – Bristles never touch plastic or each other.
- Compact – Small enough to fit anywhere, big enough to do the job.
- Water-smart – Collects drips without flooding your counter.
- Minimal supports – Everything prints cleanly with only a tiny amount of support.
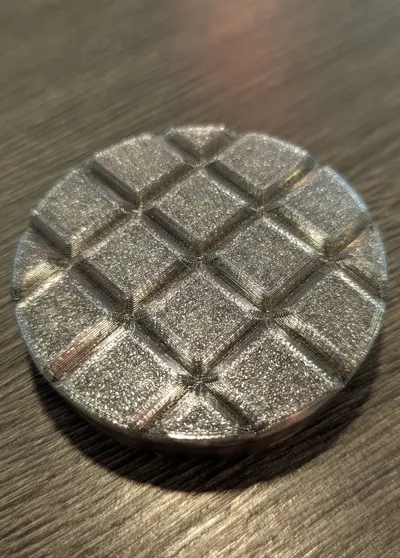
- Ventilated – Patterned underside helps your counter dry out.
- Silent – No clanging metal parts at 6AM.
- Optimized threads – Screw-together assembly made for plastic, not metal.
- Stable – Weighted base helps prevent the stand from falling over.
- Rust-proof – Because plastic doesn’t rust, ever.
For best results, print in PETG—it laughs at water, shrugs off mold way better than PLA, and it's also ideal for the screw threads.
Important tips:
- Make sure you’ve removed all support from the stem before assembly—even a tiny bit can jam up the threads—and be sure to remove it within 2 hours of print completion.
- Don’t crank the threads like you’re tightening lug nuts—stop at snug.
- Threads too tight? Just screw/unscrew a couple of times. It smooths itself out like breaking in new sneakers.
- Let the build plate cool all the way before pulling the stem off, or you might warp it.
- Dialed-in printer = dialed-in threads.
License
This user content is licensed under a Standard Digital File License.
You shall not share, sub-license, sell, rent, host, transfer, or distribute in any way the digital or 3D printed versions of this object, nor any other derivative work of this object in its digital or physical format (including - but not limited to - remixes of this object, and hosting on other digital platforms). The objects may not be used without permission in any way whatsoever in which you charge money, or collect fees.
Comment & Rating (2)