
Magnetic or Screw-On Power Tool Holder Hook
Print Profile(3)


Bill of Materials



Description
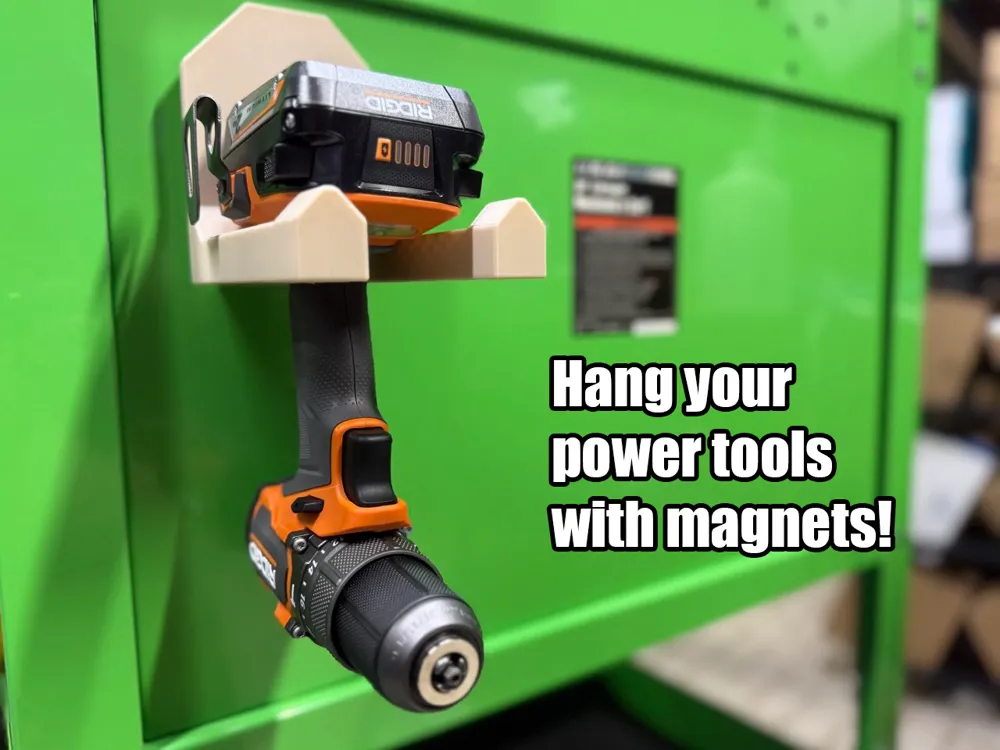
This tool hanging hook uses a Harbor Freight Magnetic Hook to stick to ferrous surfaces such as tool cabinet doors / sides / steel beams / pallet rack / whatever else is around you. Holds drills, lights, hot glue guns, whatever you need within the holding capacity of the magnet.
You can use a screw and washer to hold it to a wall too, if you don't care to have it be magnetic.
Notes:
- Printable on all Bambu Lab printers
- PETG Recommended for durability, though can be printed in PLA or other materials
- No supports required!
Not for use hanging things overhead
Boost Me (for free)
If you find this useful, a boost would be greatly appreciated!
Required additional materials:
U.S. GENERAL 25 lb. Magnetic Hook:
https://www.harborfreight.com/25-lb-magnetic-hook-black-58106.html
Magnet Install Instructions:
- Remove the bolt that holds the wire hook onto the magnet and discard the wire hook, keep all the other pieces
- Insert magnet into the back of the print, it should fit in with little wiggle room, and should stick out the back of the printed piece by about 1mm to ensure optimal magnet contact with the attachment surface
- Install the washer, lock washer, and bolt through the front of the print and tighten it down
- Attach newly assembled hook to surface
- Hang your power tool on the hook however you'd like, though I'd recommend upside down / battery sitting on the top of the hook.
- Repeat as needed.
License

You shall not share, sub-license, sell, rent, host, transfer, or distribute in any way the digital or 3D printed versions of this object, nor any other derivative work of this object in its digital or physical format (including - but not limited to - remixes of this object, and hosting on other digital platforms). The objects may not be used without permission in any way whatsoever in which you charge money, or collect fees.


Comment & Rating (9)