
Bitaxe Silent Cooling Pro – Overclock Ready
Print Profile(2)


Description
Overview
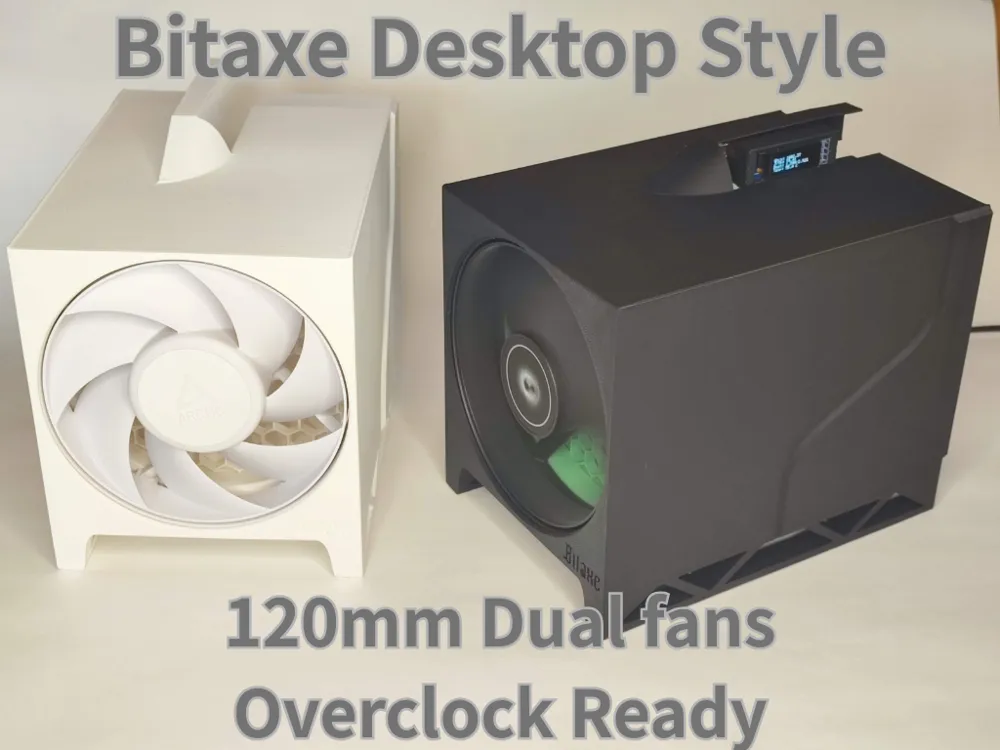
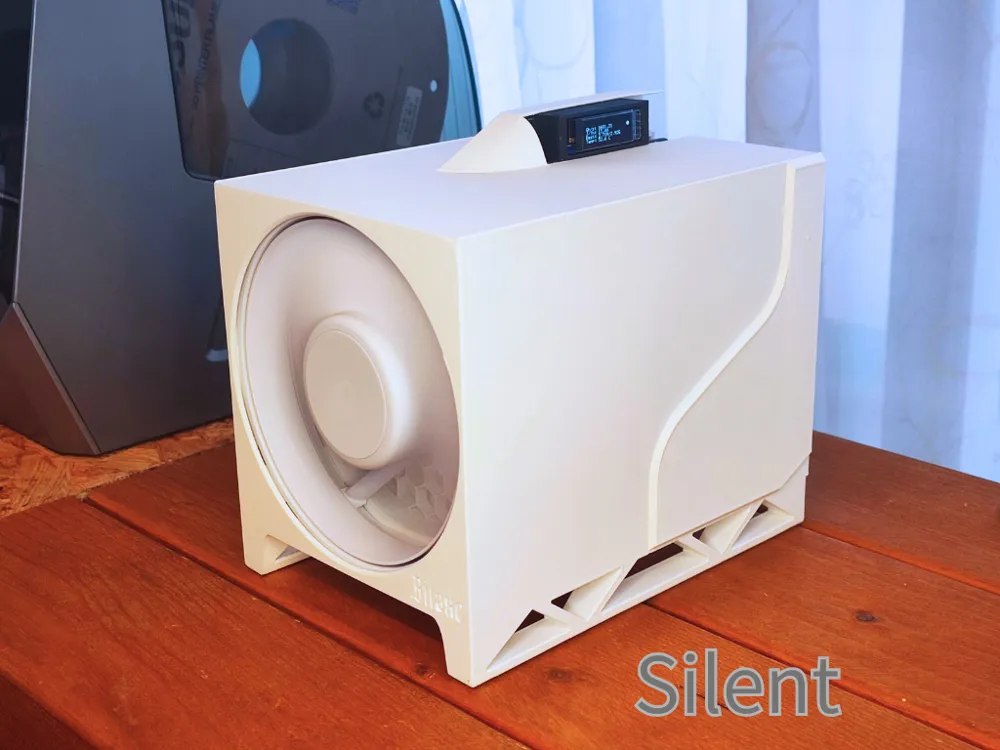
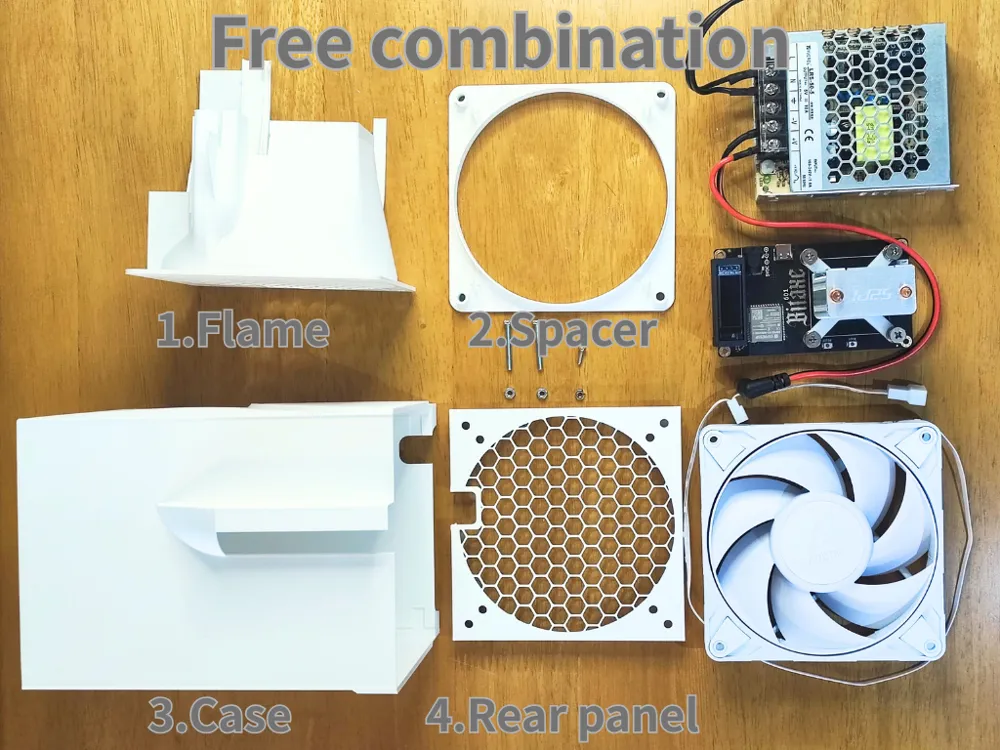
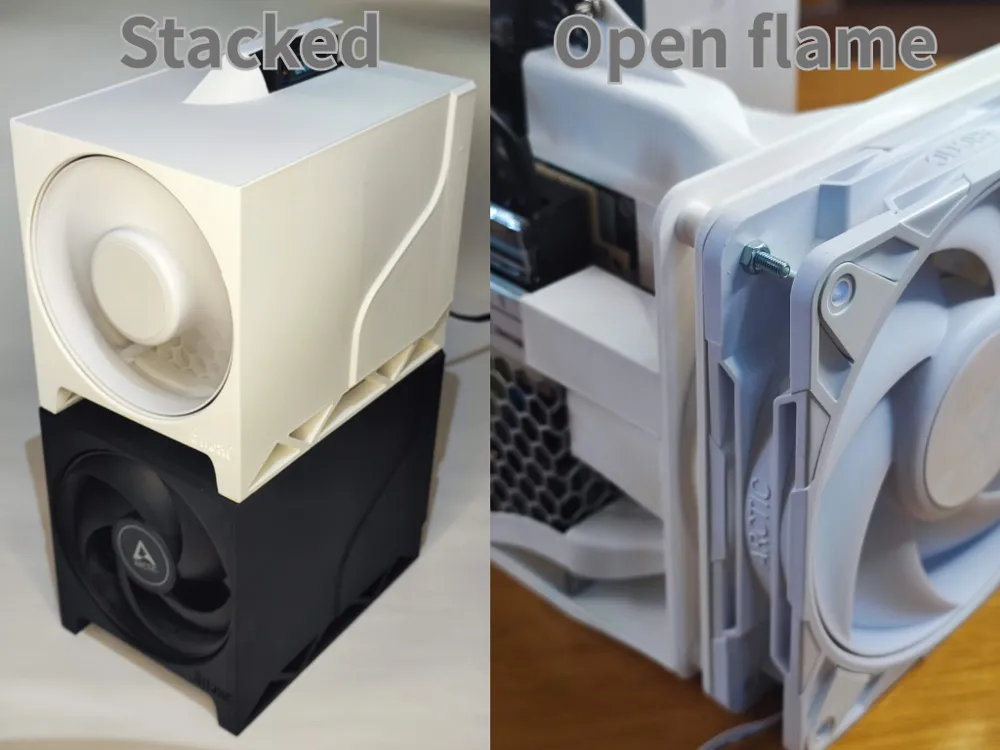
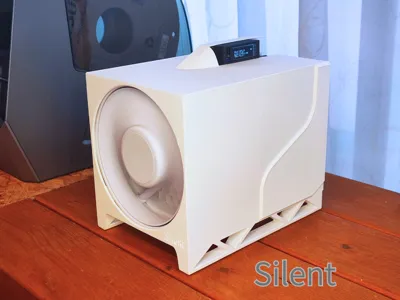
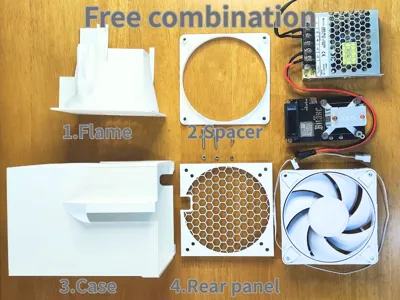
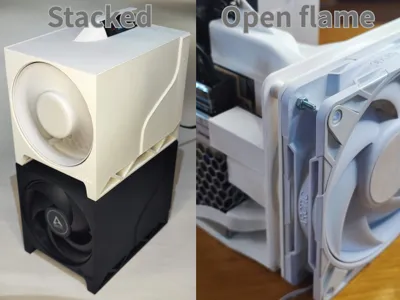
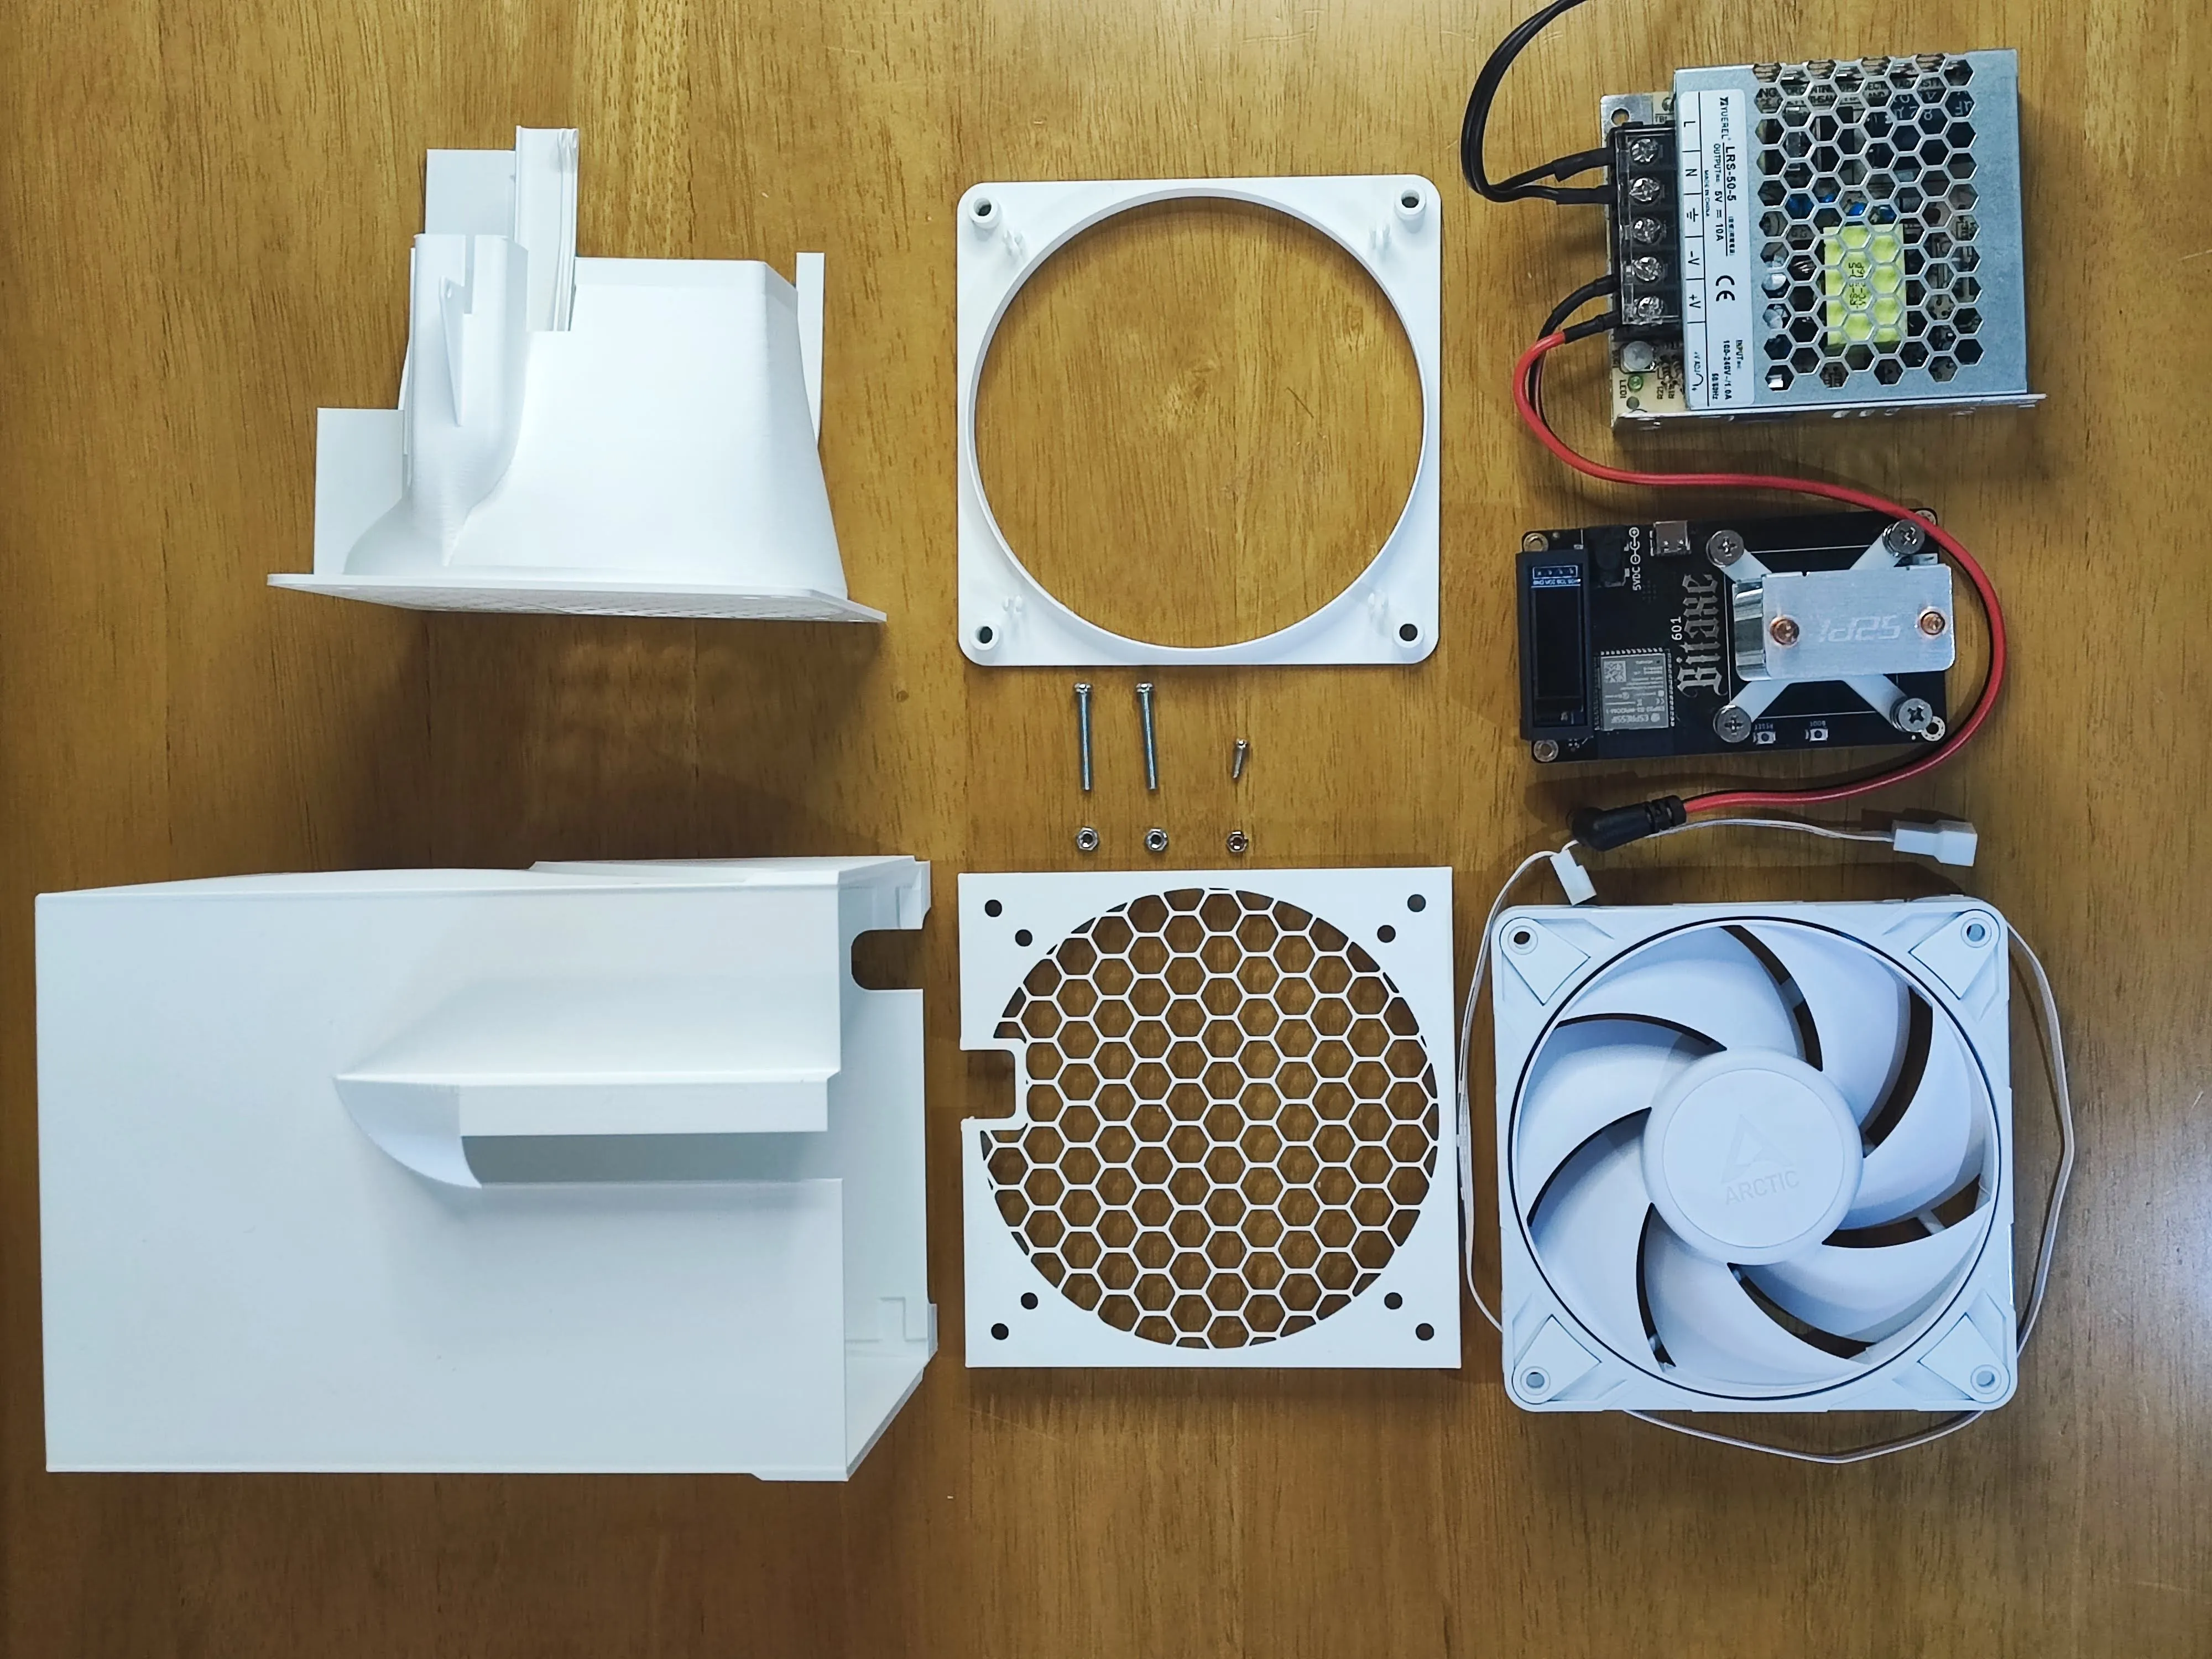
Designed from scratch to enhance both cooling performance and silent operation, this model blends seamlessly into desktop or living room environments. Featuring a modular 4-part structure (Frame, Spacer, Case, Rear Panel) and support for dual 120 mm fan setups, it offers flexible configurations for a wide range of use cases—from ultra-quiet standard clock operation to stable overclocking, or even stacked setups for compact home mining farms.
Key Features
- Flexible Configurations (Open, Closed, Dual Fan)
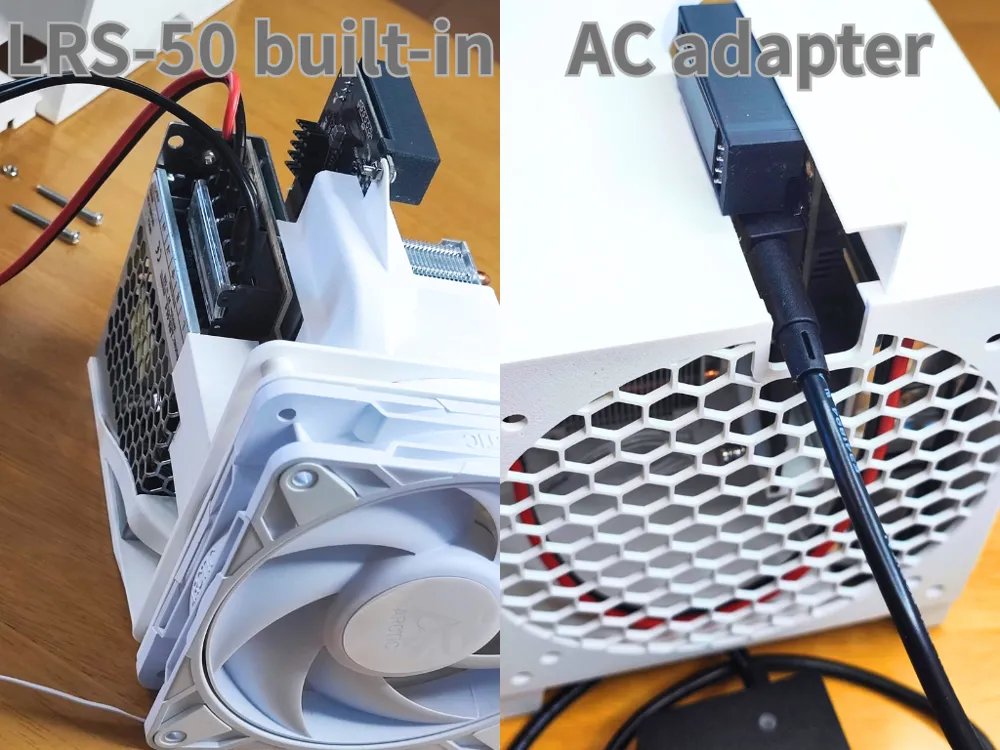
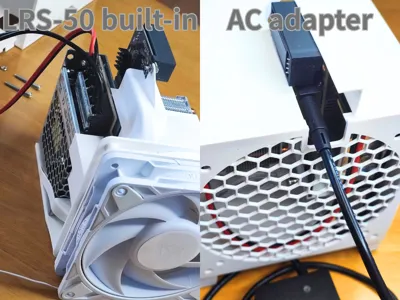
Combine the 4 parts to adapt to your environment:- Frame only – Minimal setup, includes all essential functions. Can also house an LRS-50-5 PSU. Ideal for quick use.
- Frame + Spacer – Reduces swirl flow and improves acoustics. Suitable for undervolting or near-silent standard clock operation. Open setups are generally quieter than closed ones.
- Frame + Spacer + Case – Provides a clean look with stackability. Rear remains open for easy maintenance.
- Full Setup (Frame + Spacer + Case + Rear Panel) – Balanced design that integrates well in living spaces. Best for long-term operation or multi-unit setups.
Dual Fan Setup – Rear panel can mount an extra 120 mm exhaust fan. For maximum cooling. For quieter operation, add a second spacer between the rear panel and fan to reduce mesh turbulence noise. Note: An L-shaped DC jack may be required to avoid interference.
Improved Airflow & Silence
Honeycomb airflow guides improve ASIC heatsink cooling, reducing temperatures by several °C. An optional 10 mm spacer behind the fan reduces swirl flow and suppresses noise.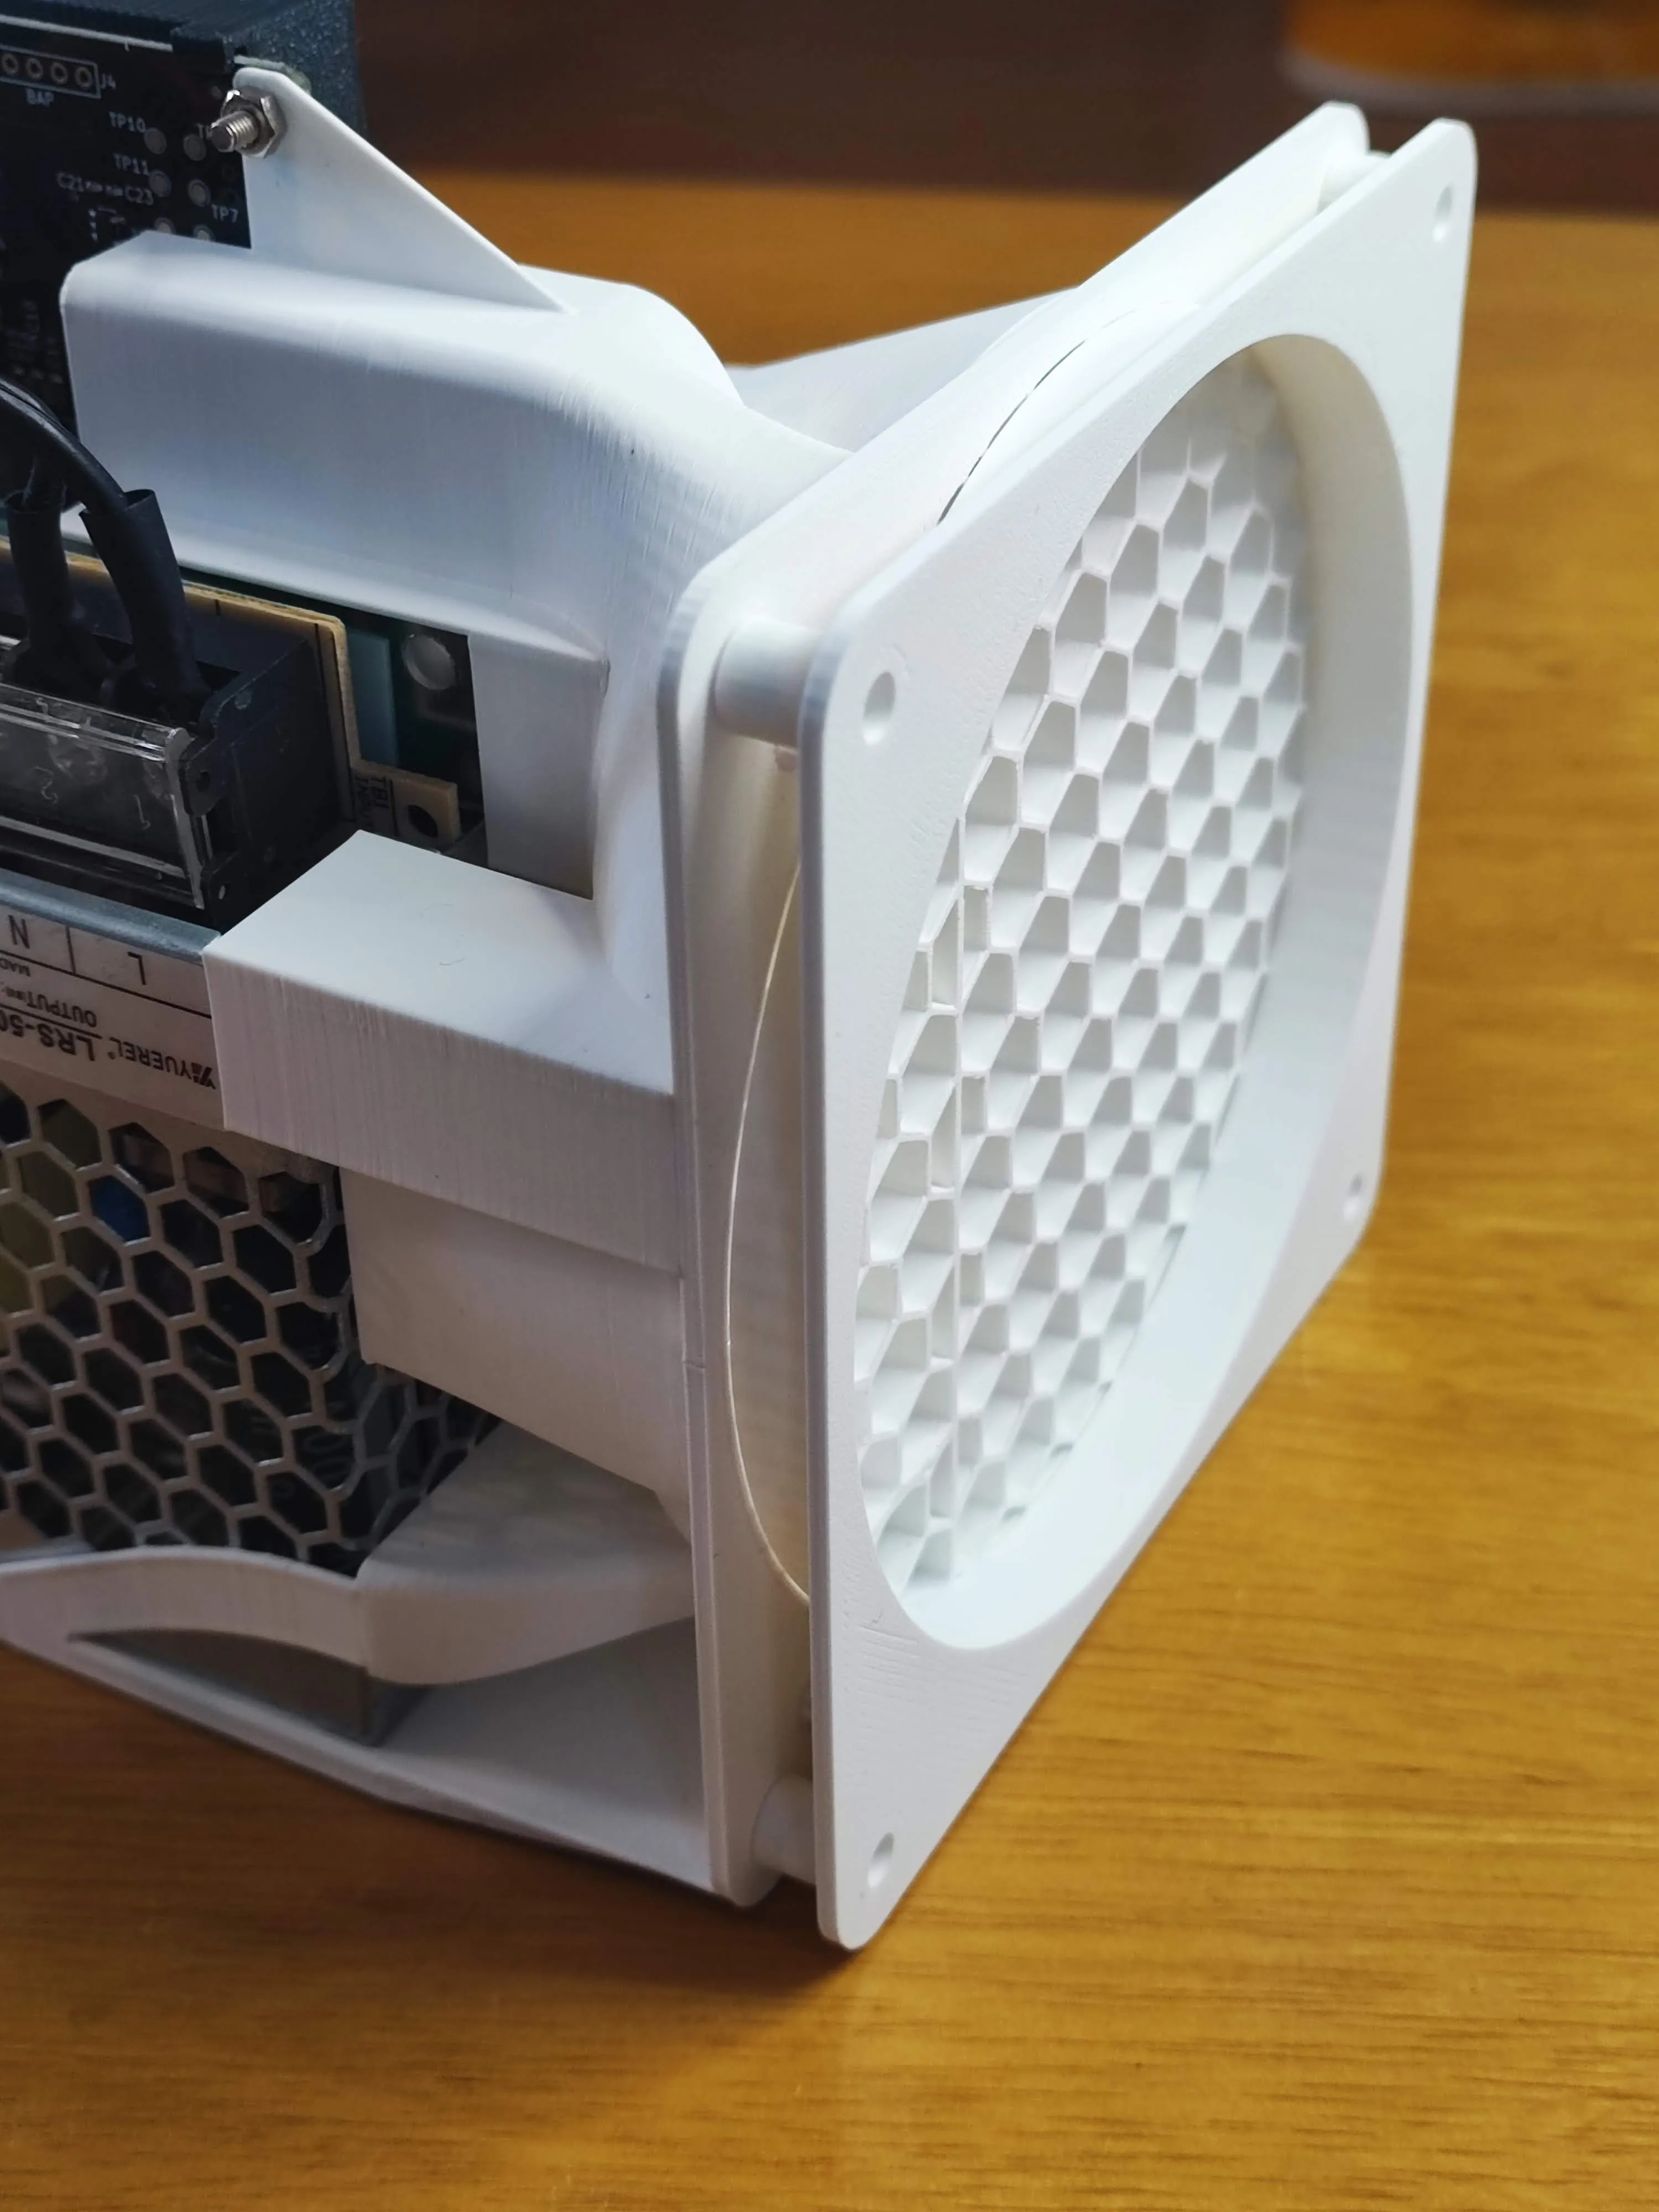
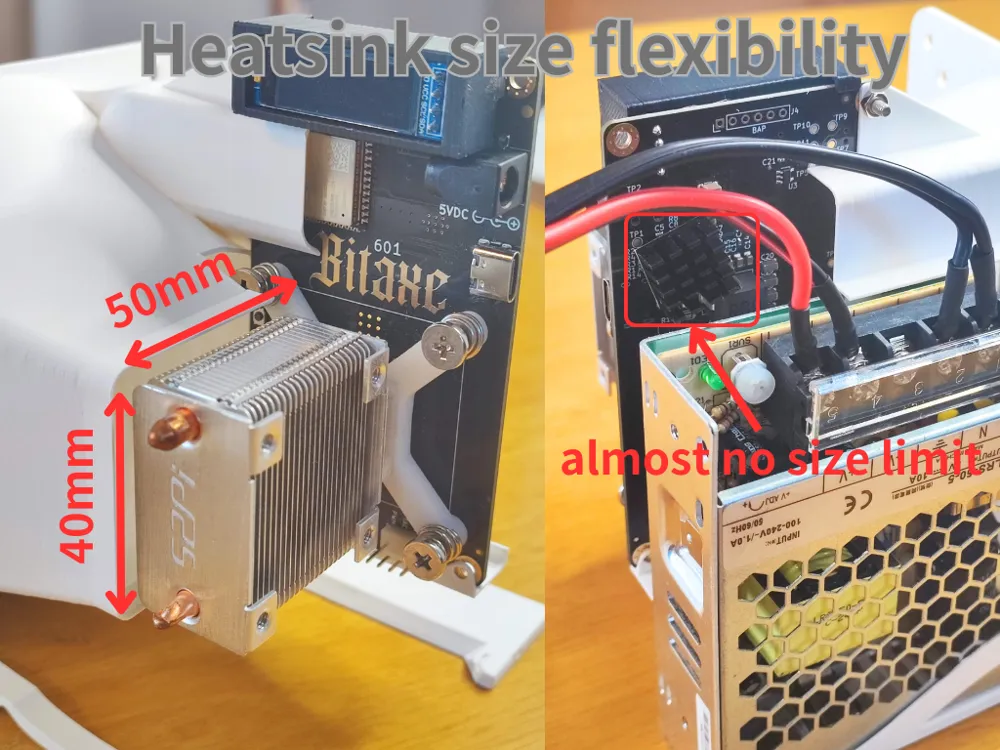
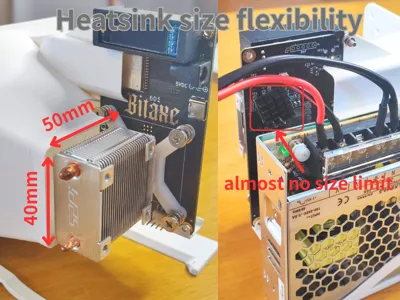
- Flexible Heatsink Support
VR section supports heatsinks up to ~10 mm high. ASIC side supports up to 50 mm height × 40 mm width, optimized for ICE Tower but compatible with smaller heatsinks as well. - Integrated 50 W PSU Support
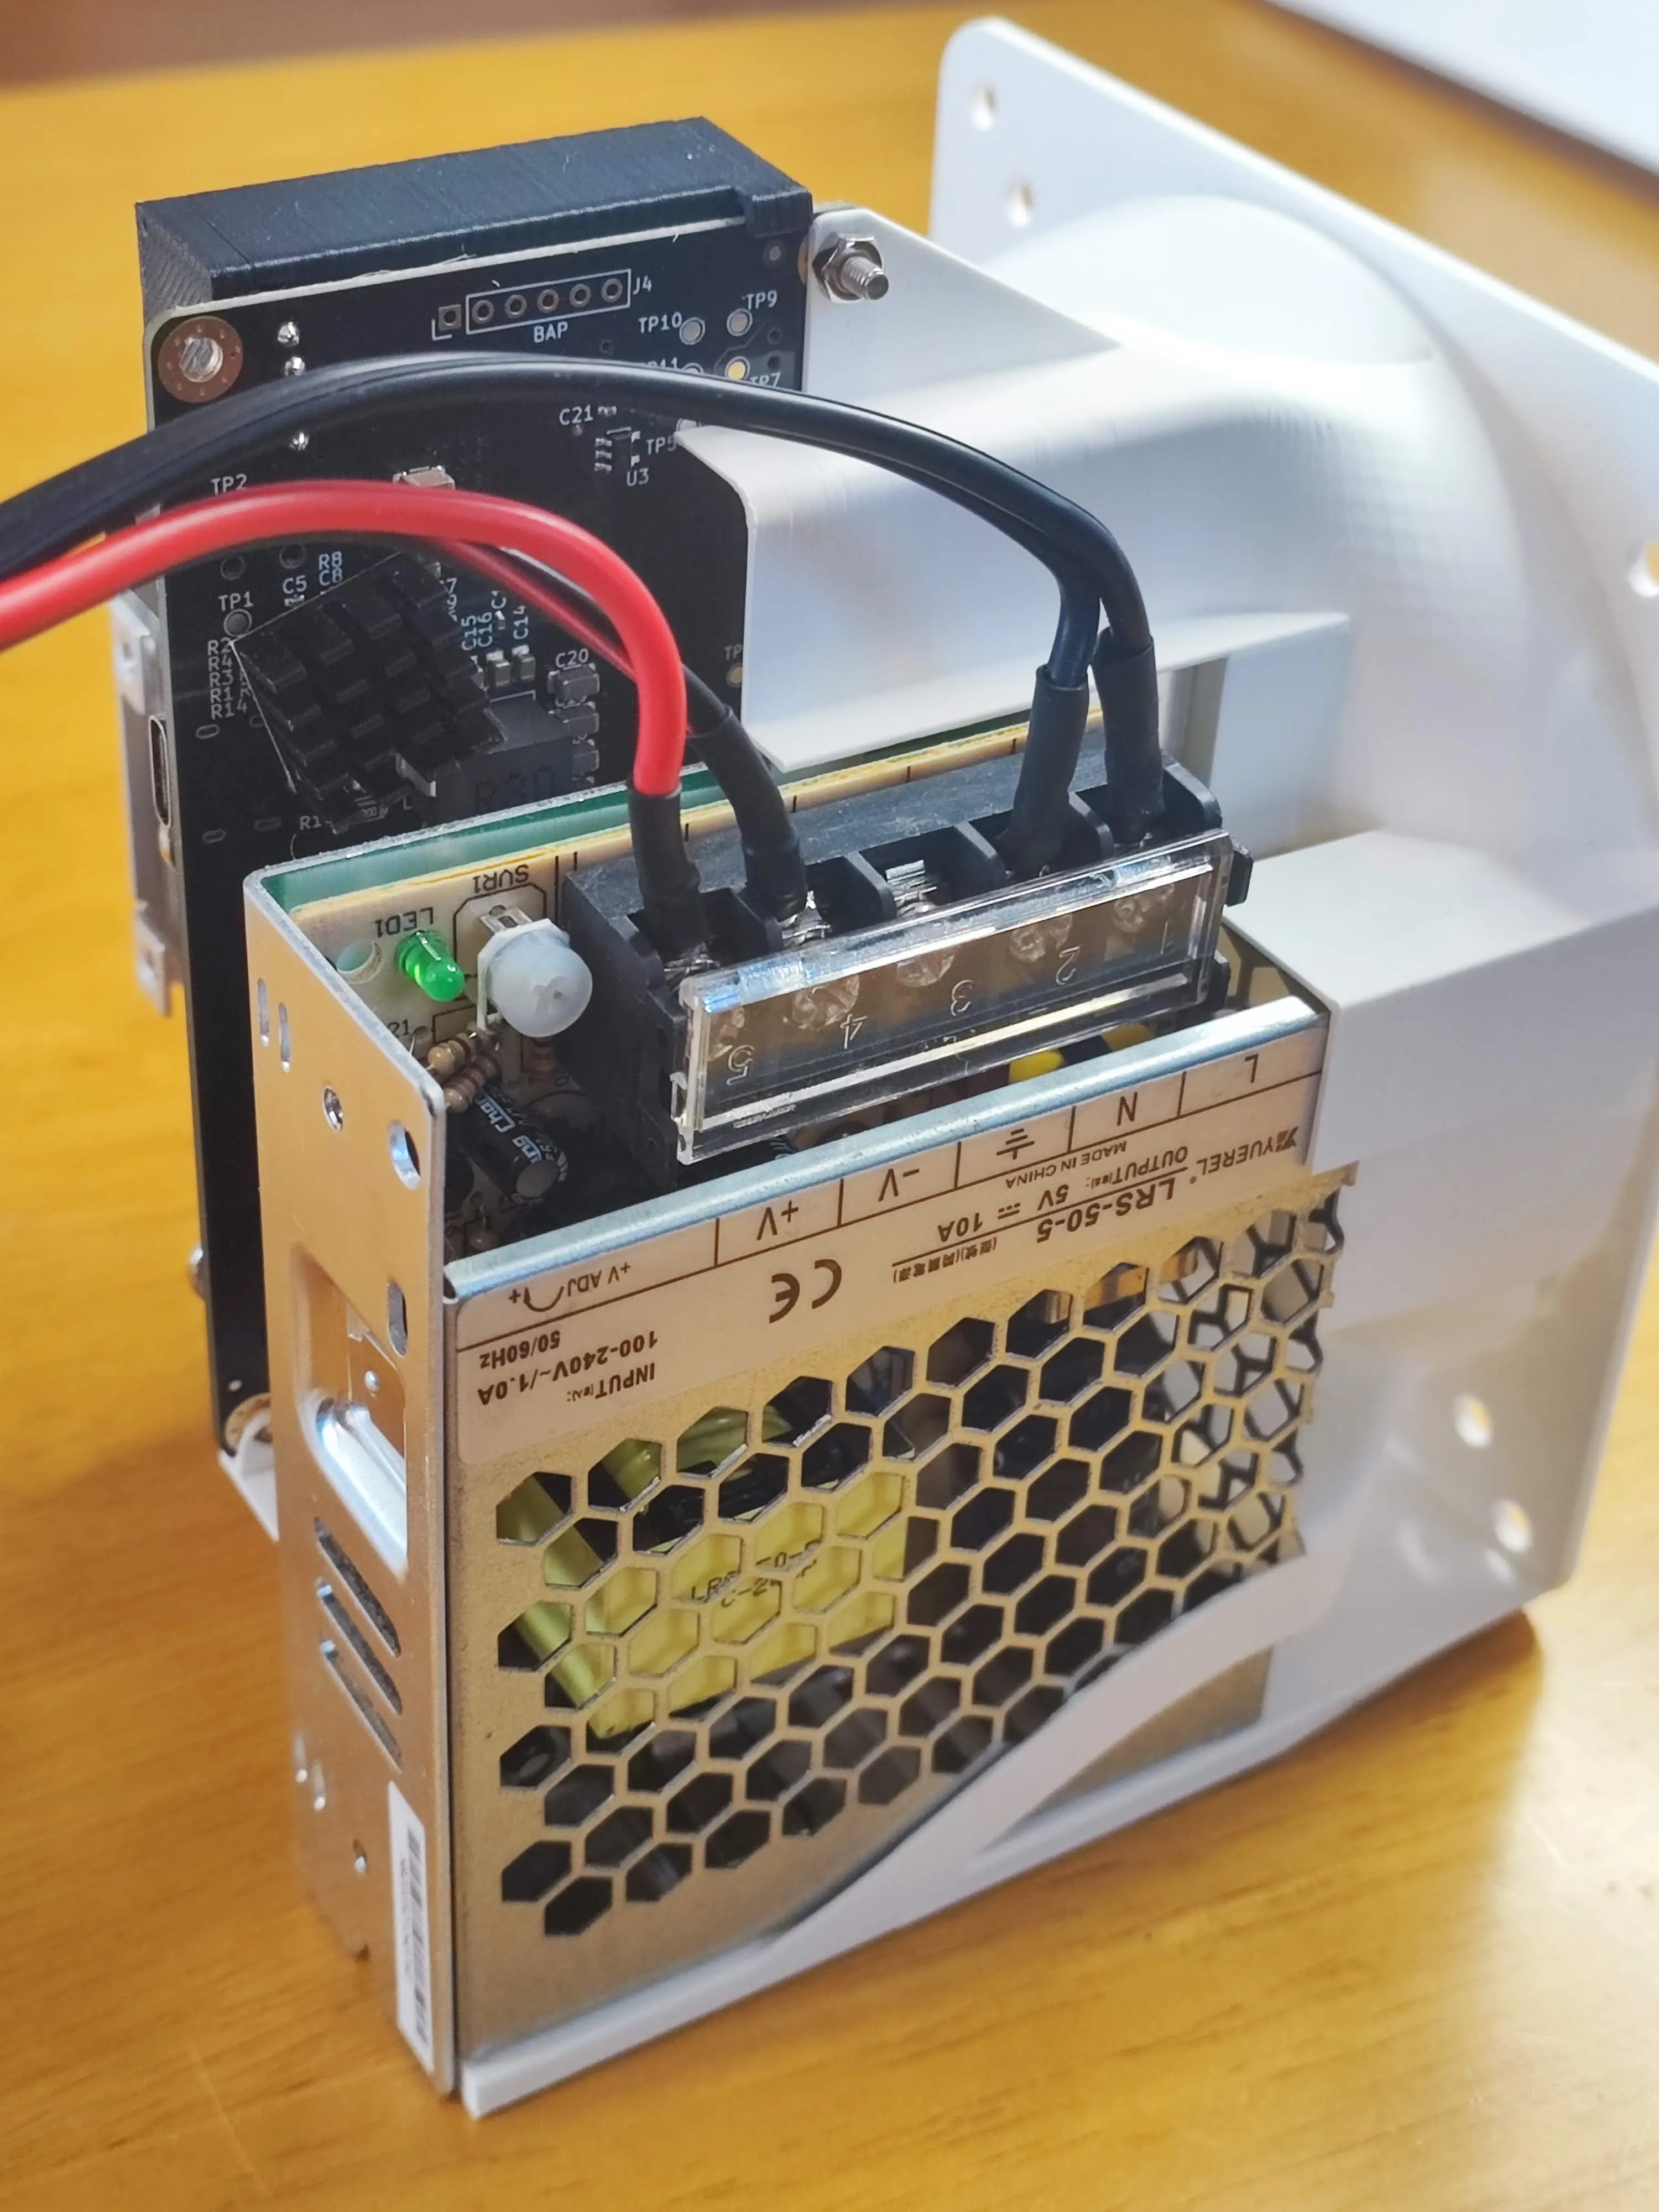
Compatible with LRS-50-5 PSU integration, enabling stable power delivery during overclocking while also cooling the PSU. Eliminates the need for an external adapter. Rear panel includes a DC jack hole for external adapters if preferred. Using an L-shaped DC jack is recommended for clean internal wiring and dual fan clearance. - Maintenance-Friendly
Slide-in structure allows easy assembly and part replacement. Minimal screws are required, but mounting holes are provided for additional stability if desired.
Assembly Guide
- Mount Bitaxe – Slide into the frame, secure with M2 screw (5–10 mm) if needed.
Attach Spacer (optional) – Snap onto the frame. If used, mount fan after attaching spacer.
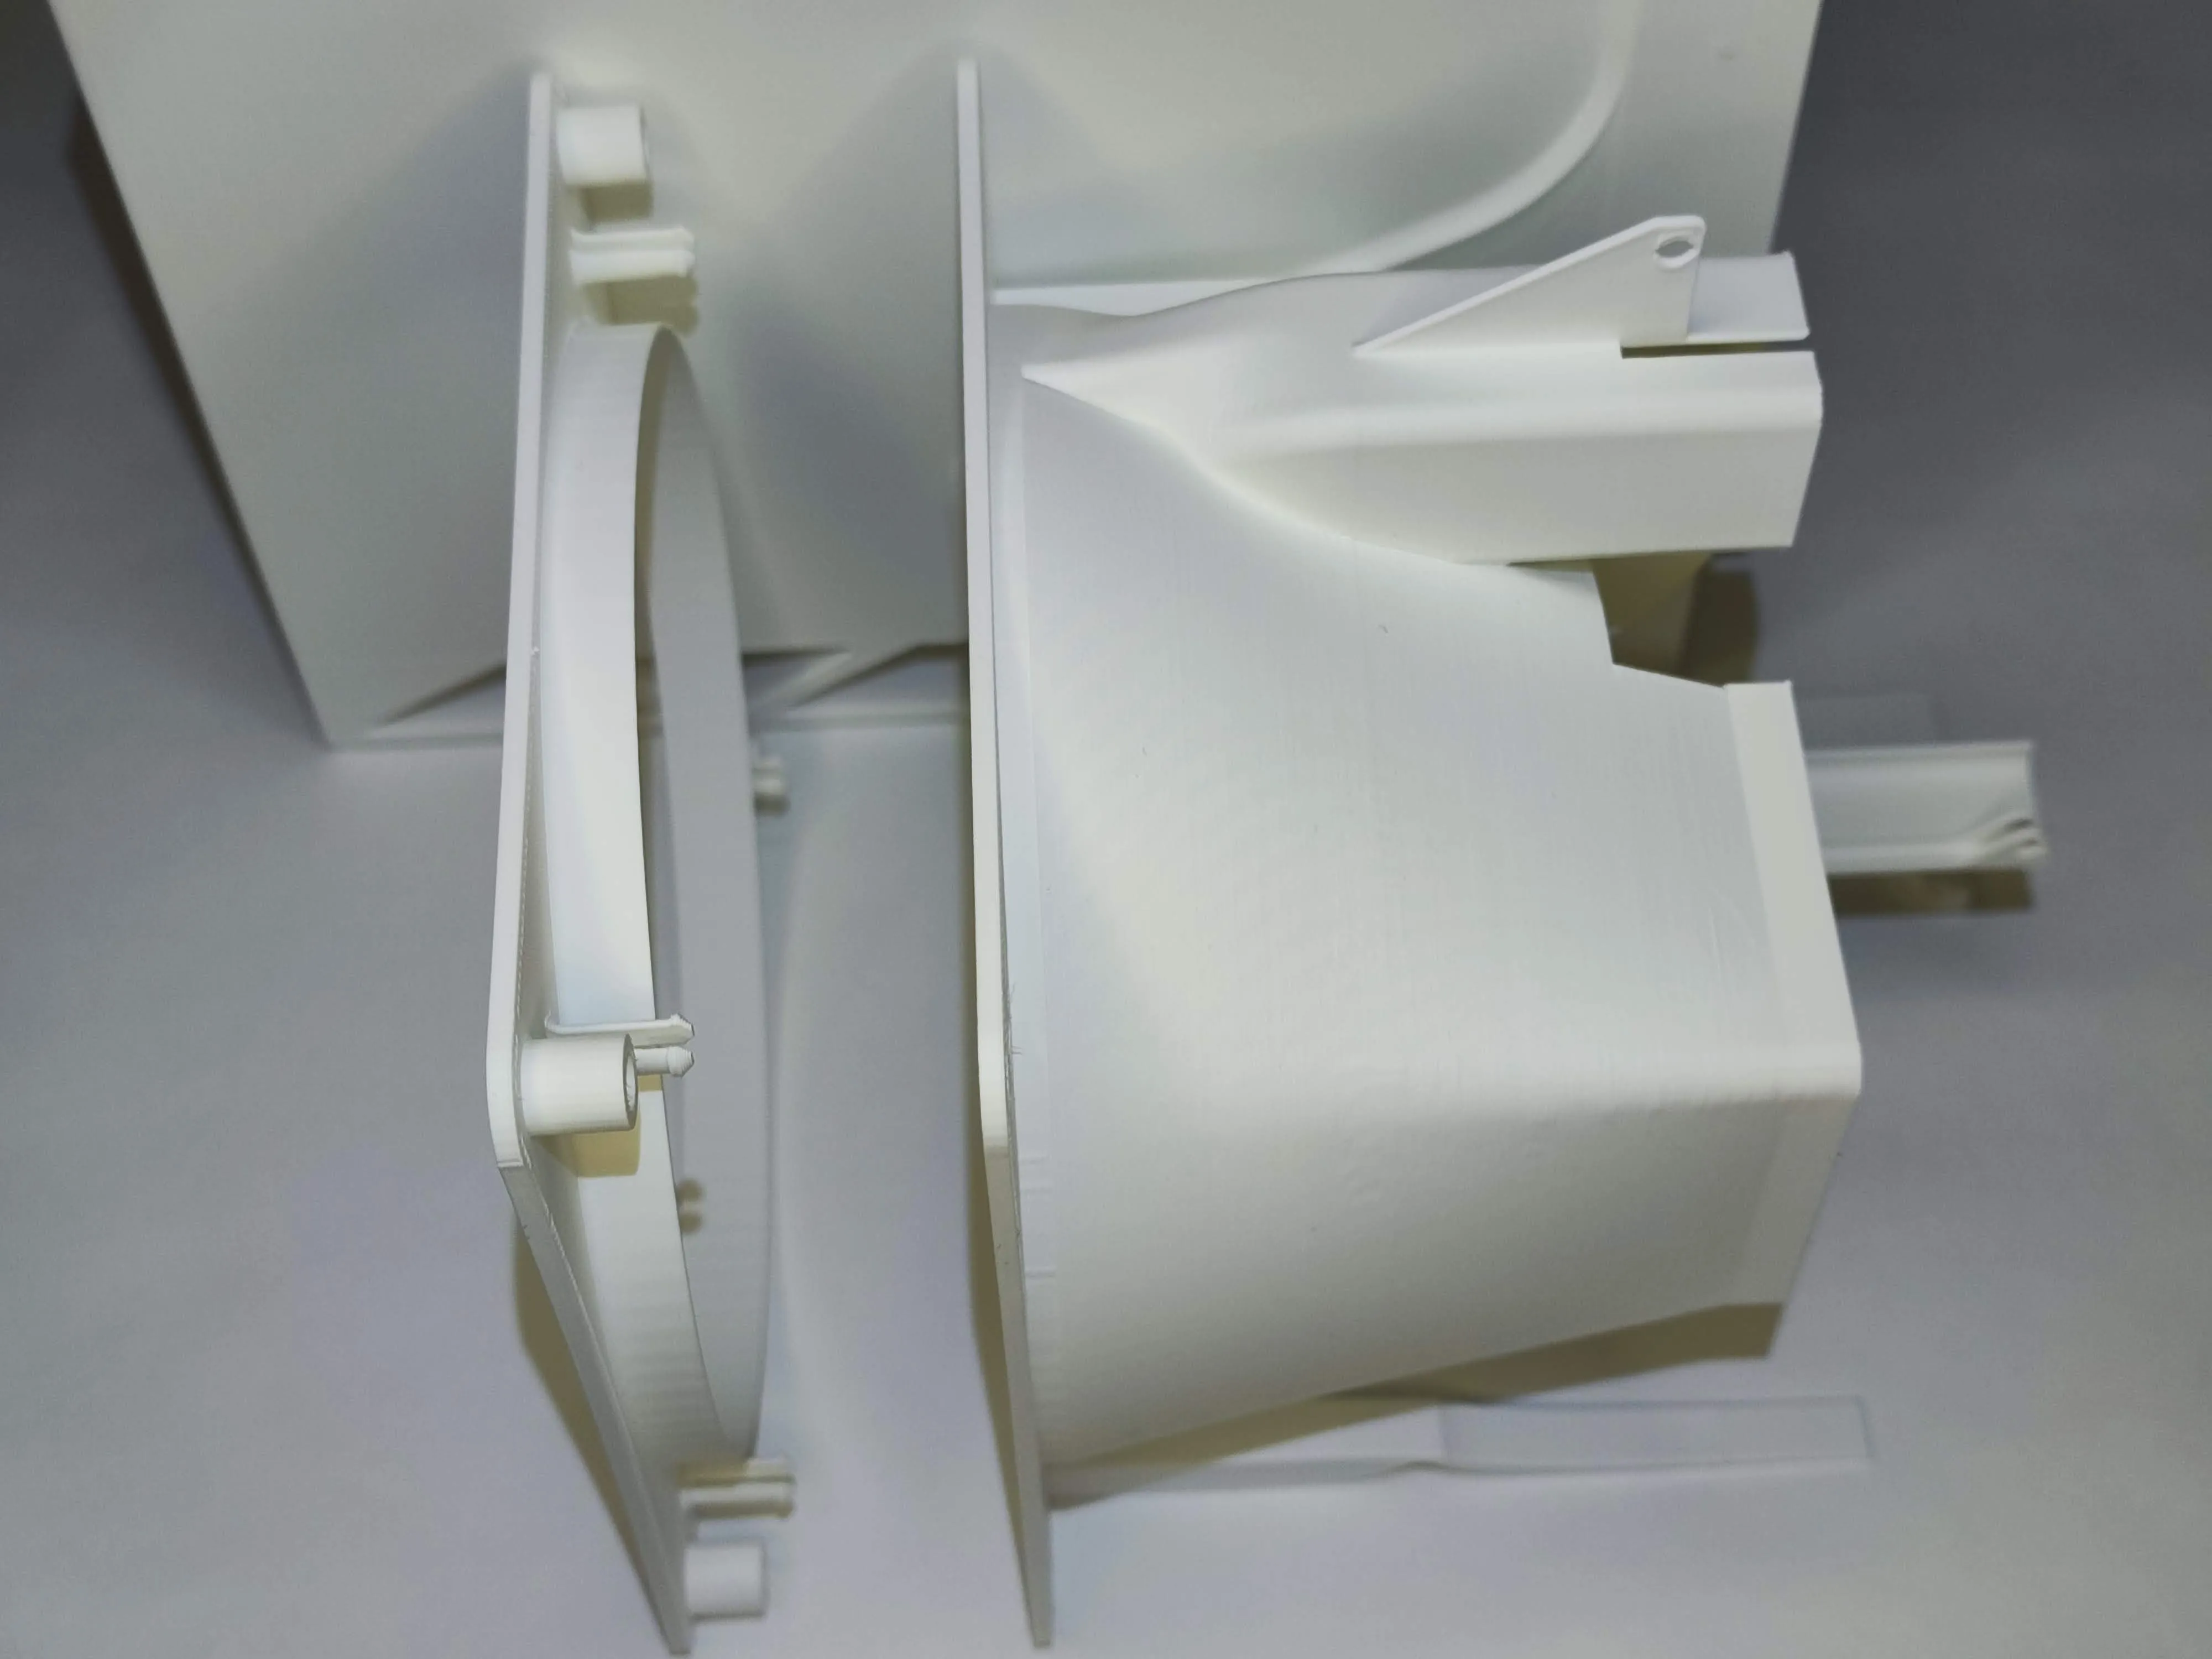
Install Fan – Fix with M3–M4 screws (≥10 mm if direct to frame, ≥20 mm if with spacer).
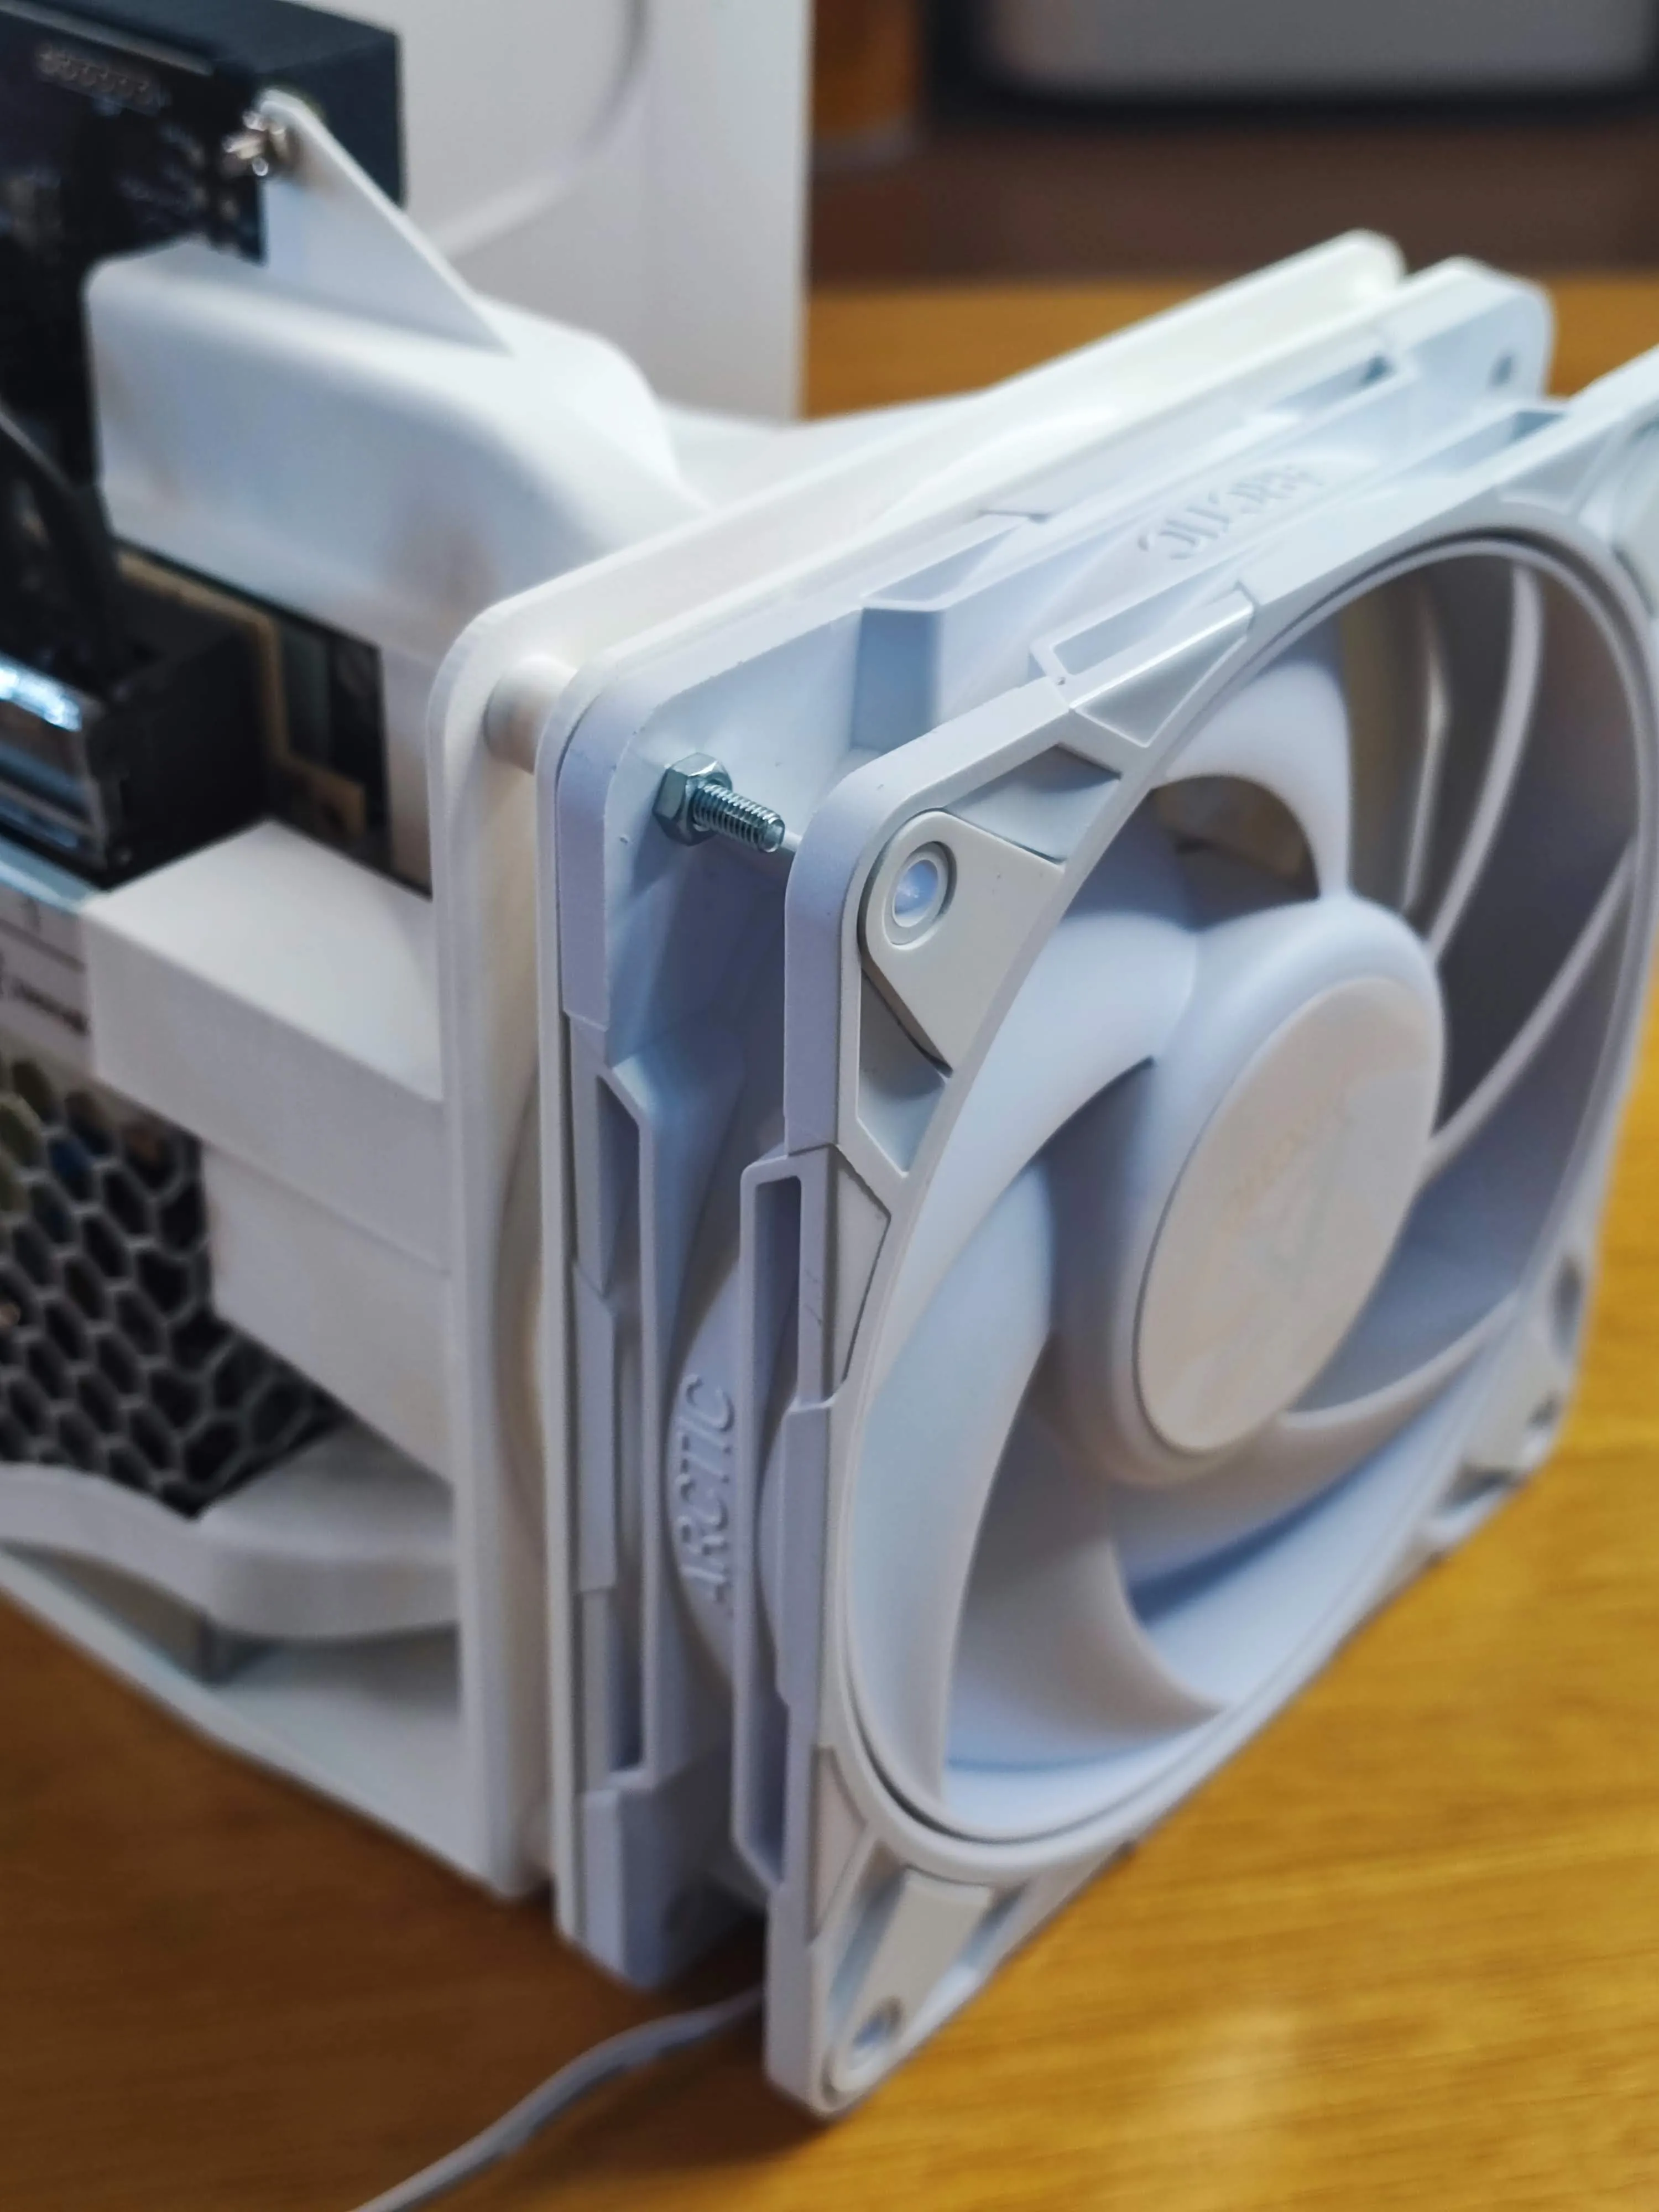
Install LRS-50-5 (optional) – Slide in from the rear with terminals outward. Secures with chassis notch; screws optional. Use an L-shaped DC jack for neat wiring and dual fan clearance. If omitted, use external AC adapter.
Install Case – Slide assembled frame in from the rear. Route fan cables through the bottom slit.
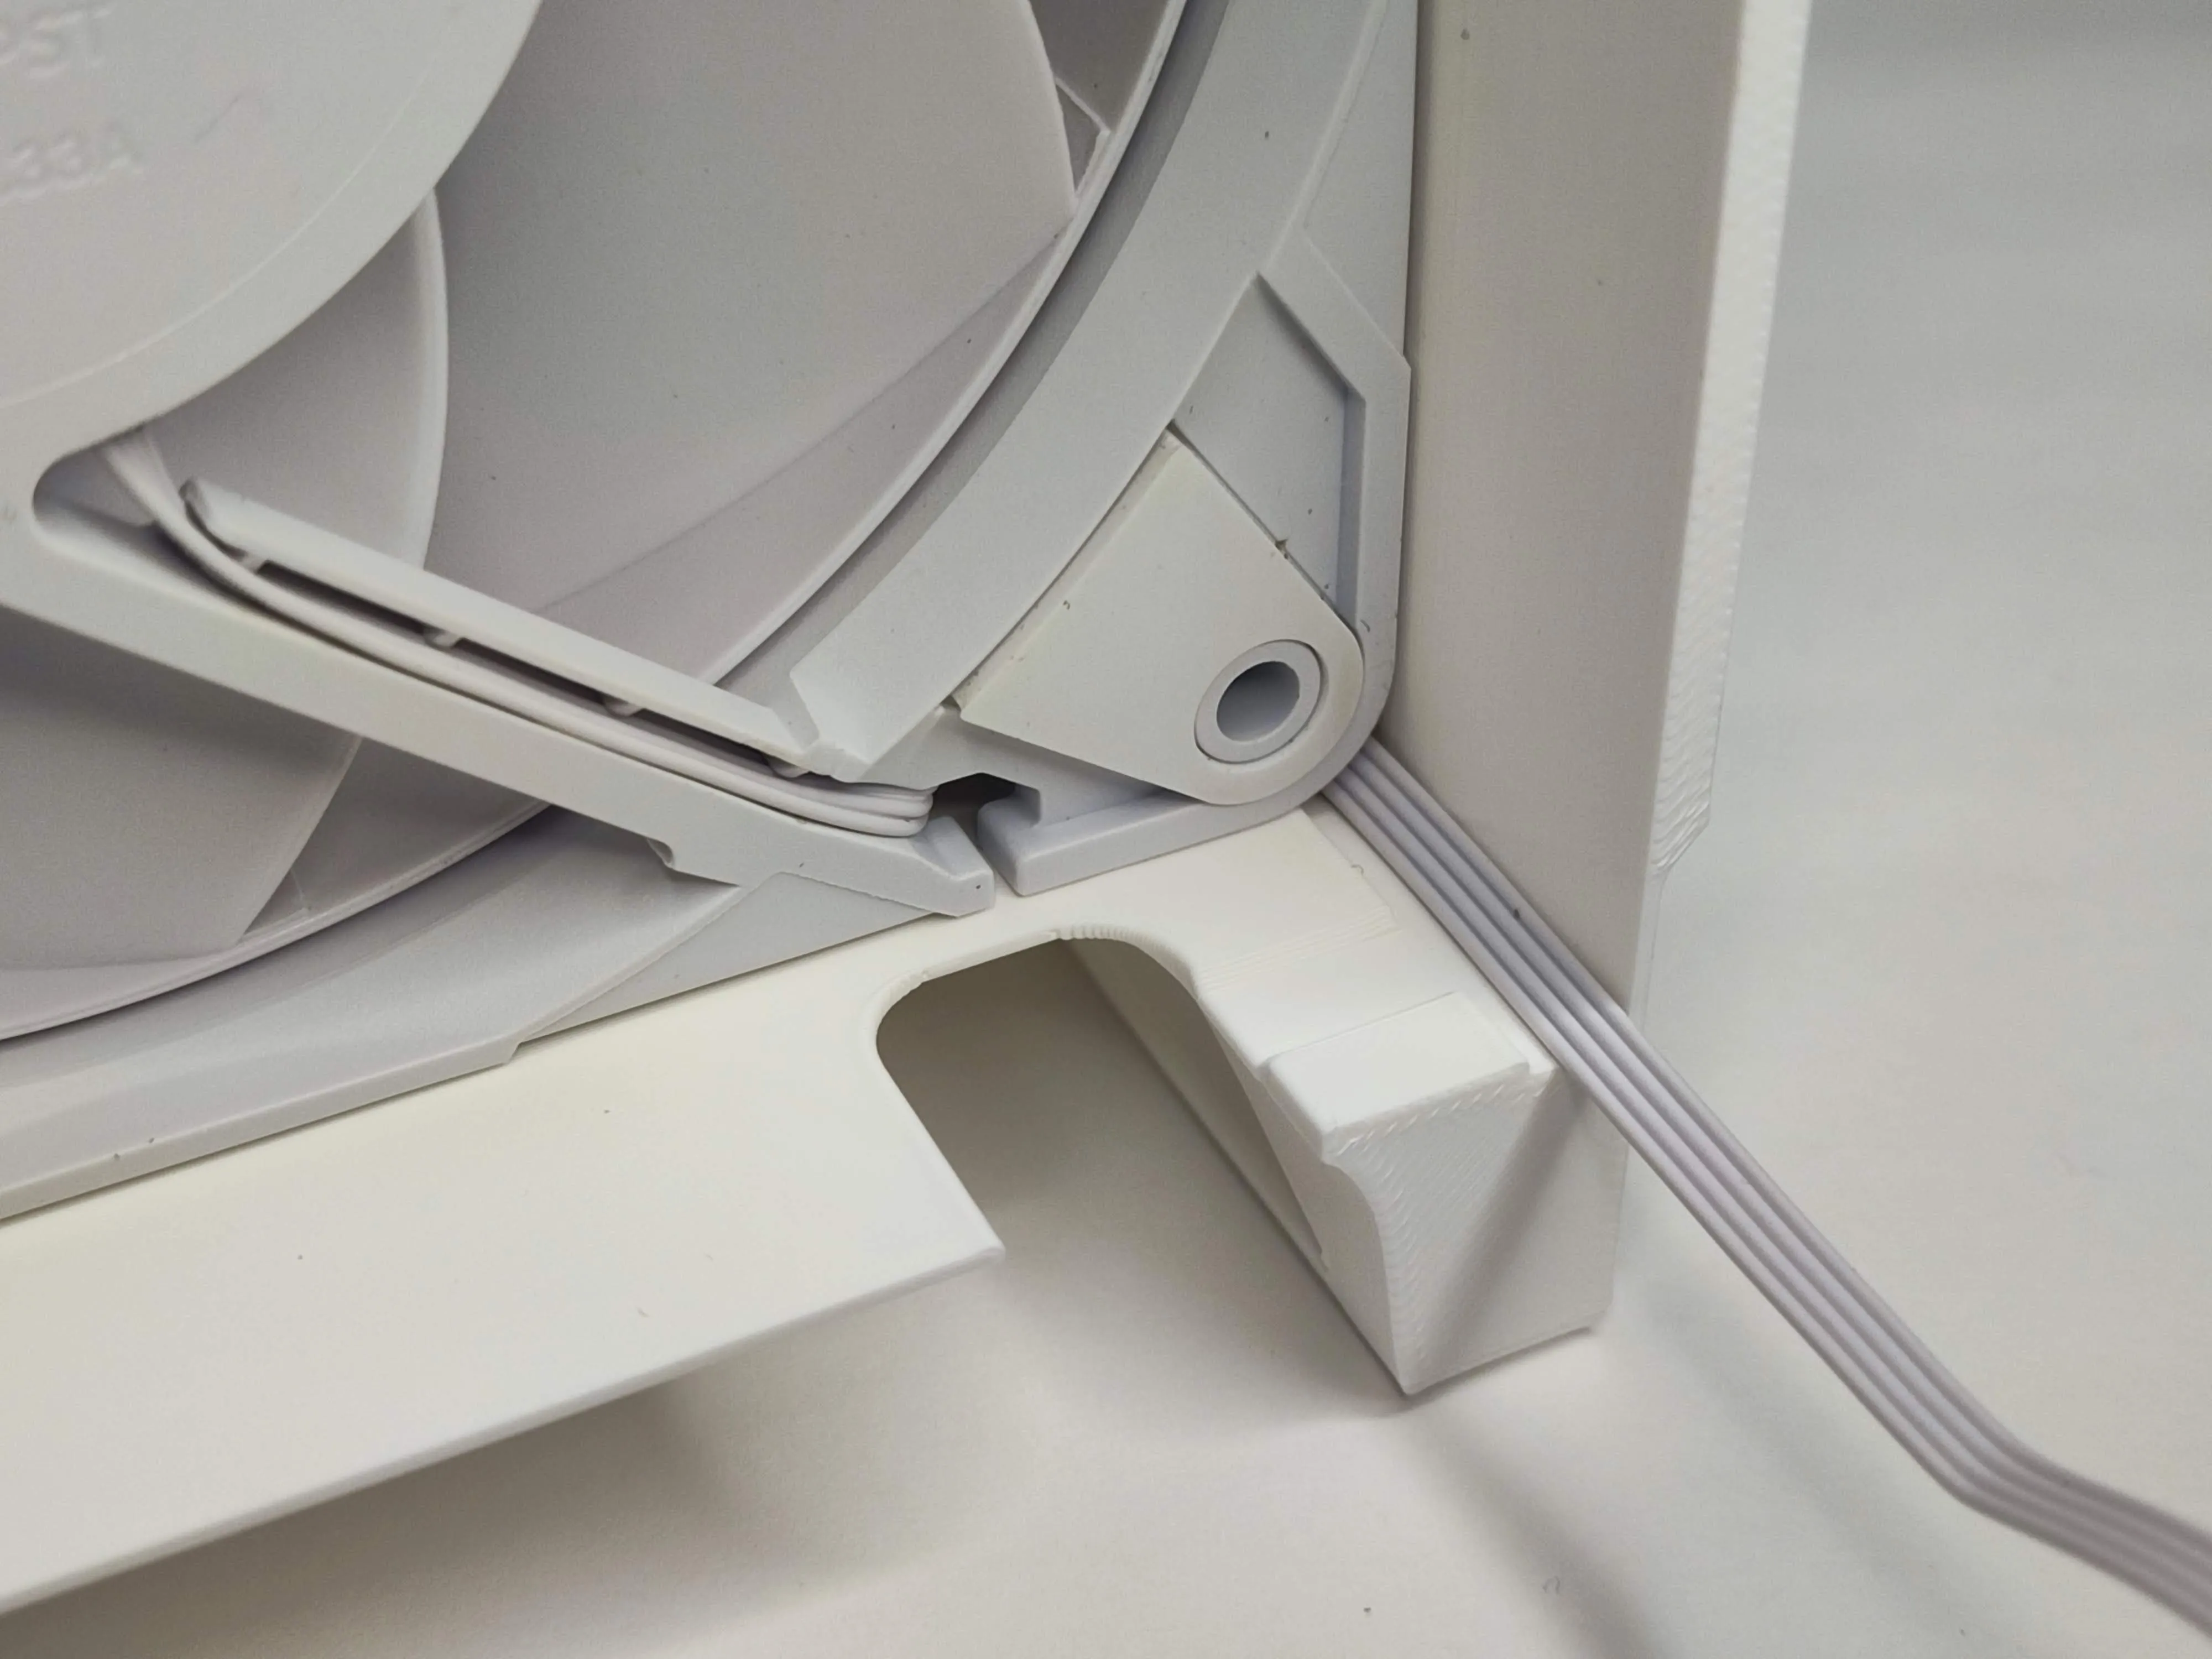
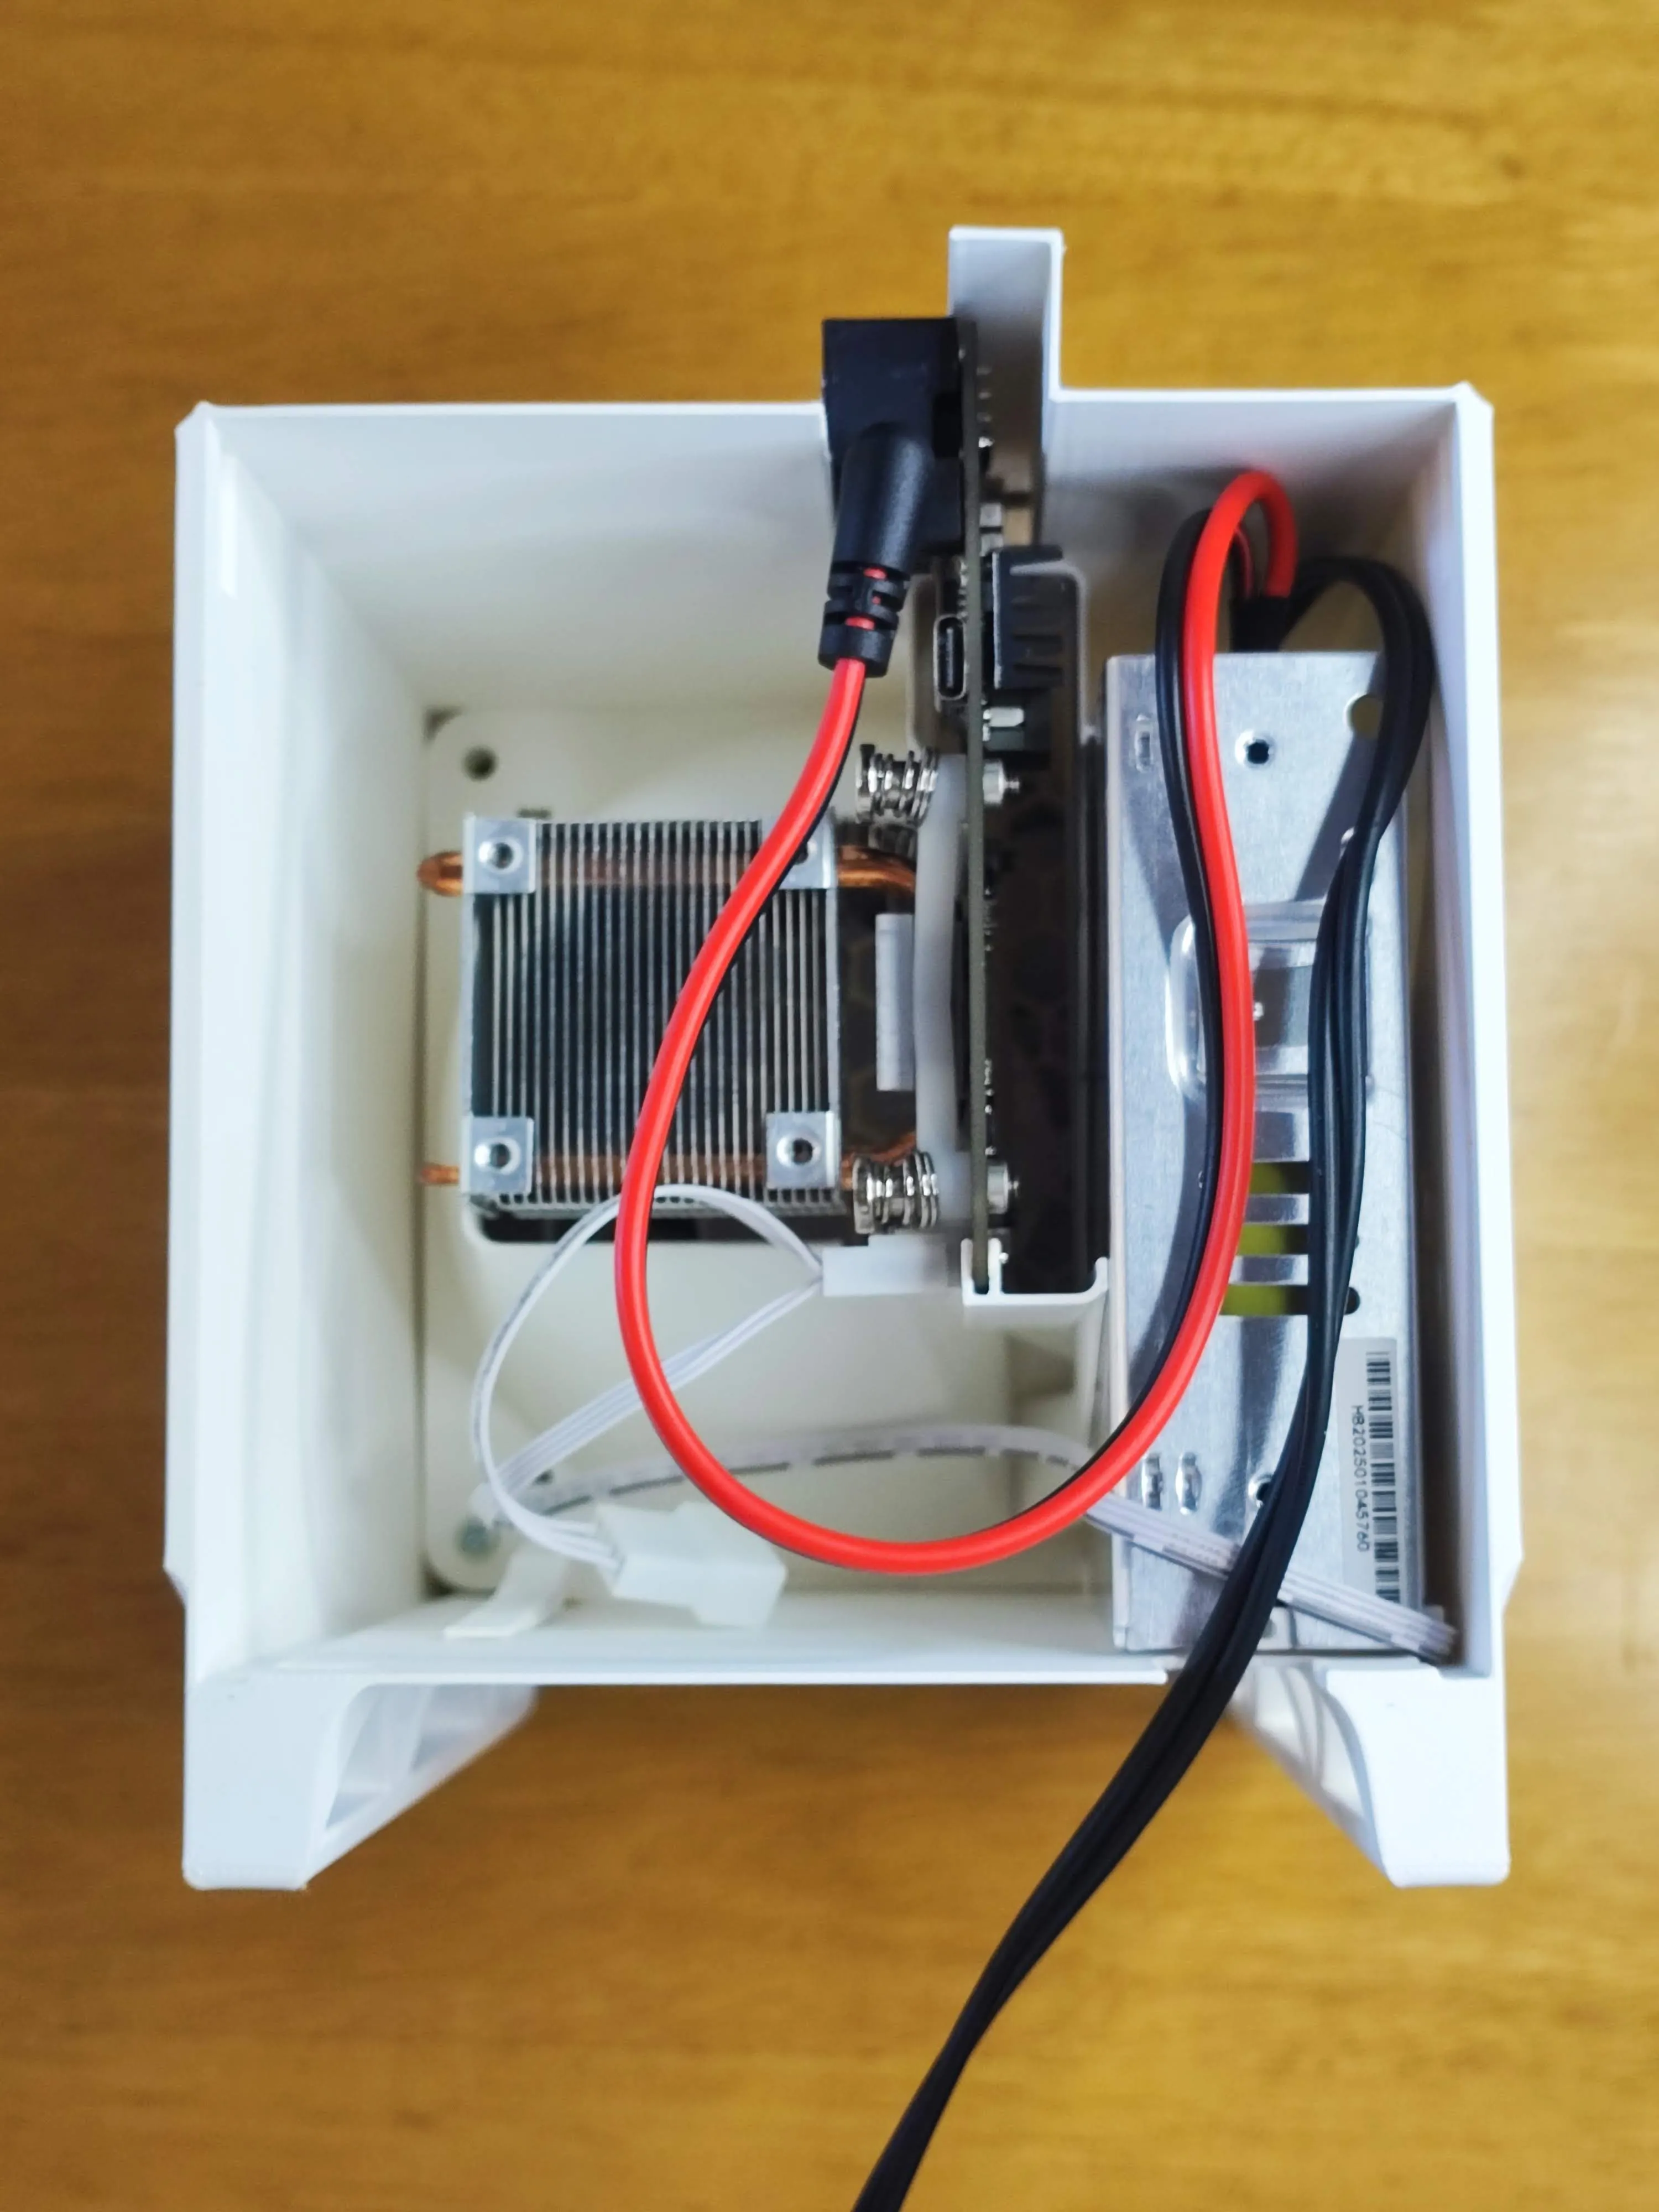
Attach Rear Panel – Snap into the case. Route cables through the bottom slit. When using AC adapter, insert through DC jack hole.
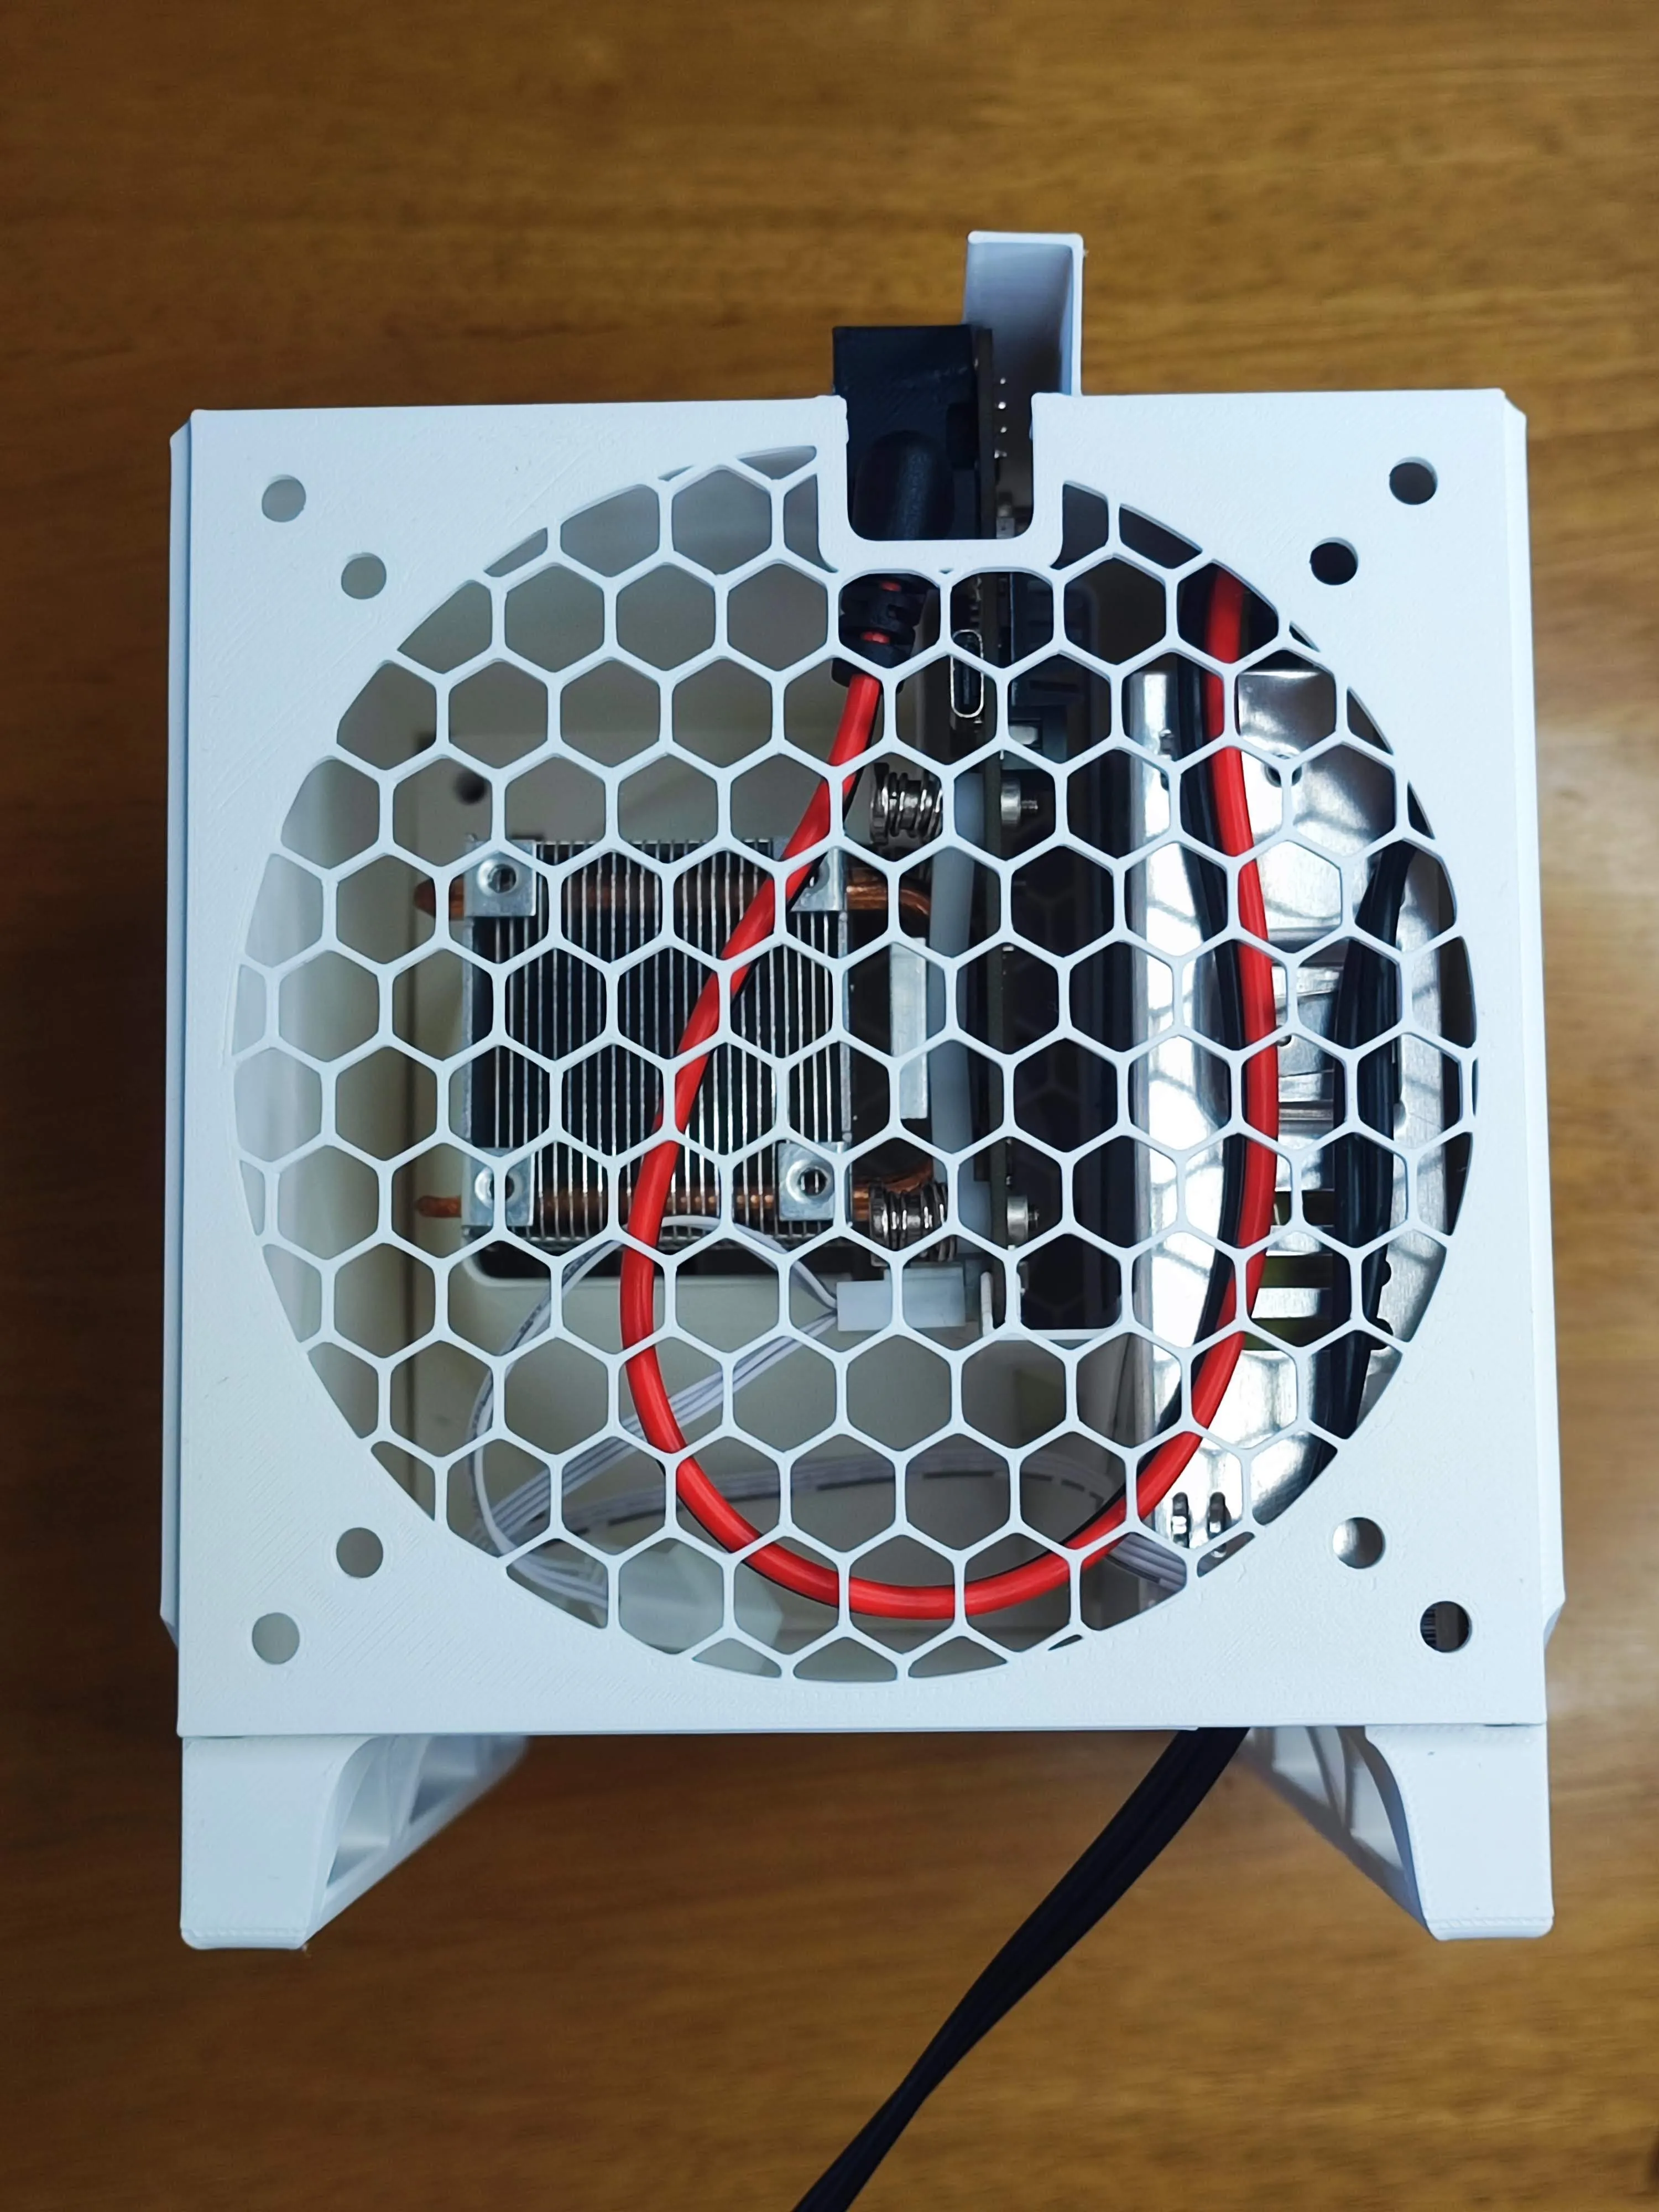
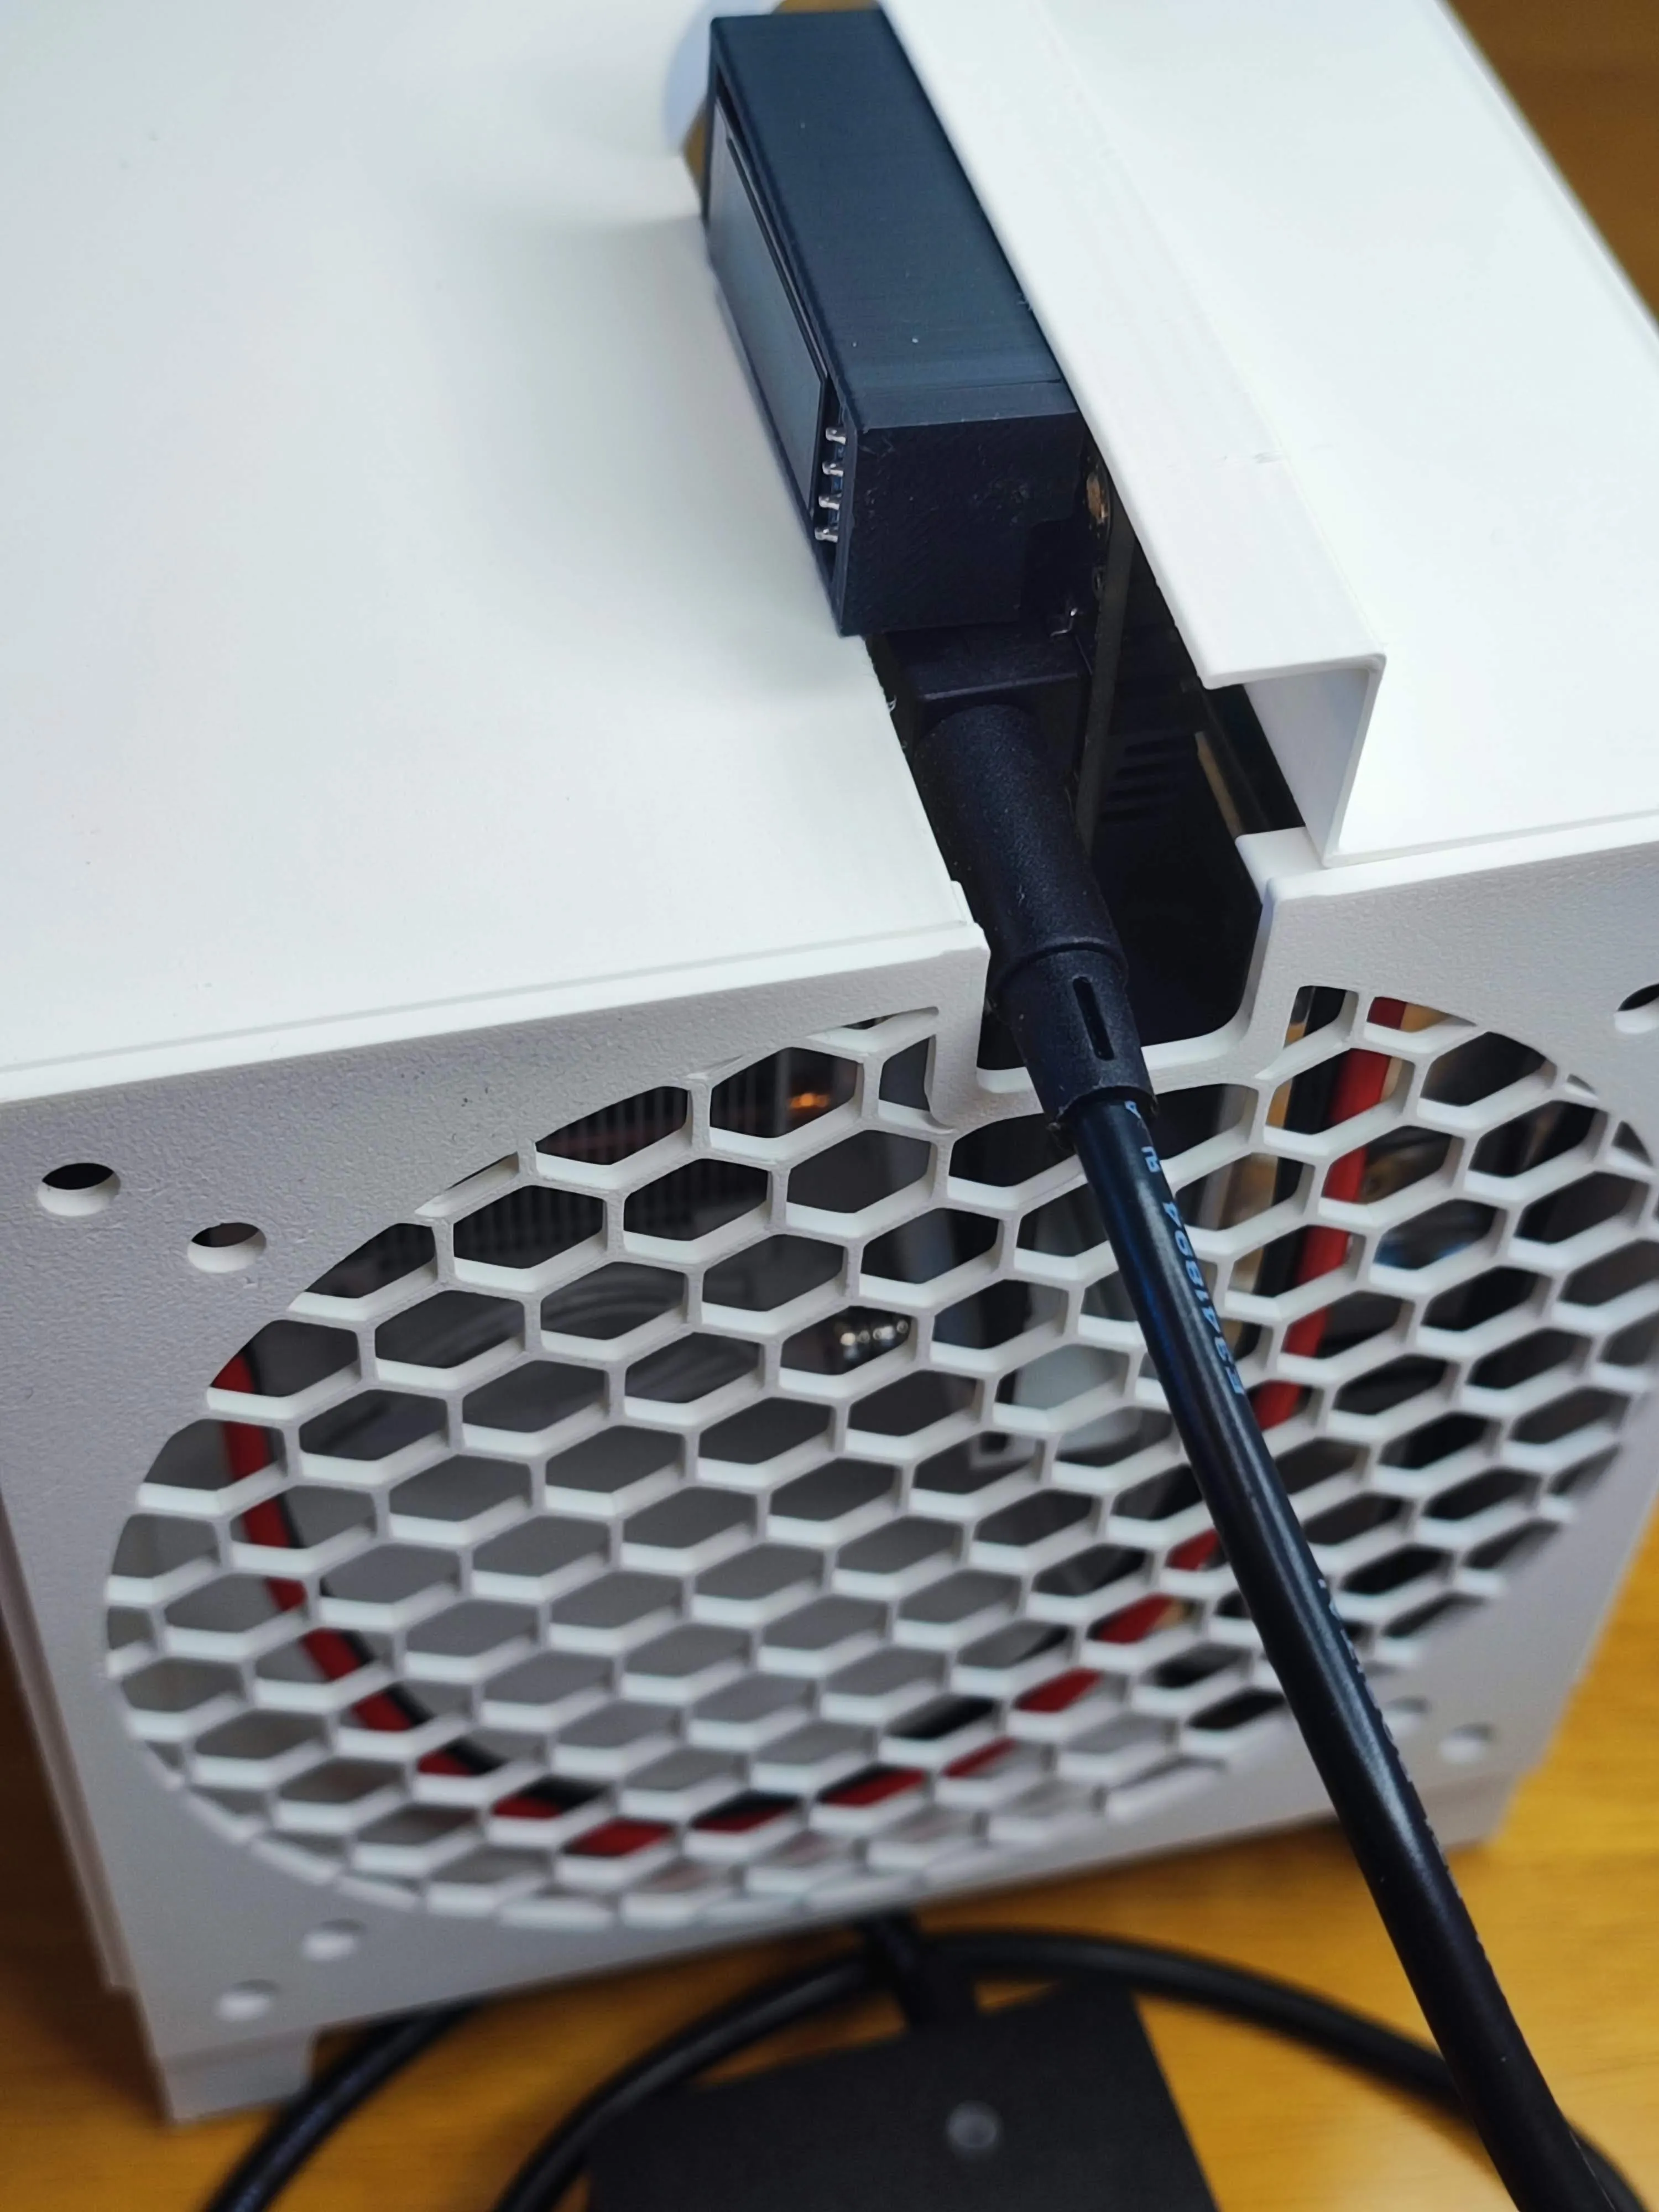
Add Dual Fan (optional) – Fix to rear panel with M3–M4 screws. For quieter use, add a spacer. L-shaped DC jack may be required to avoid interference.
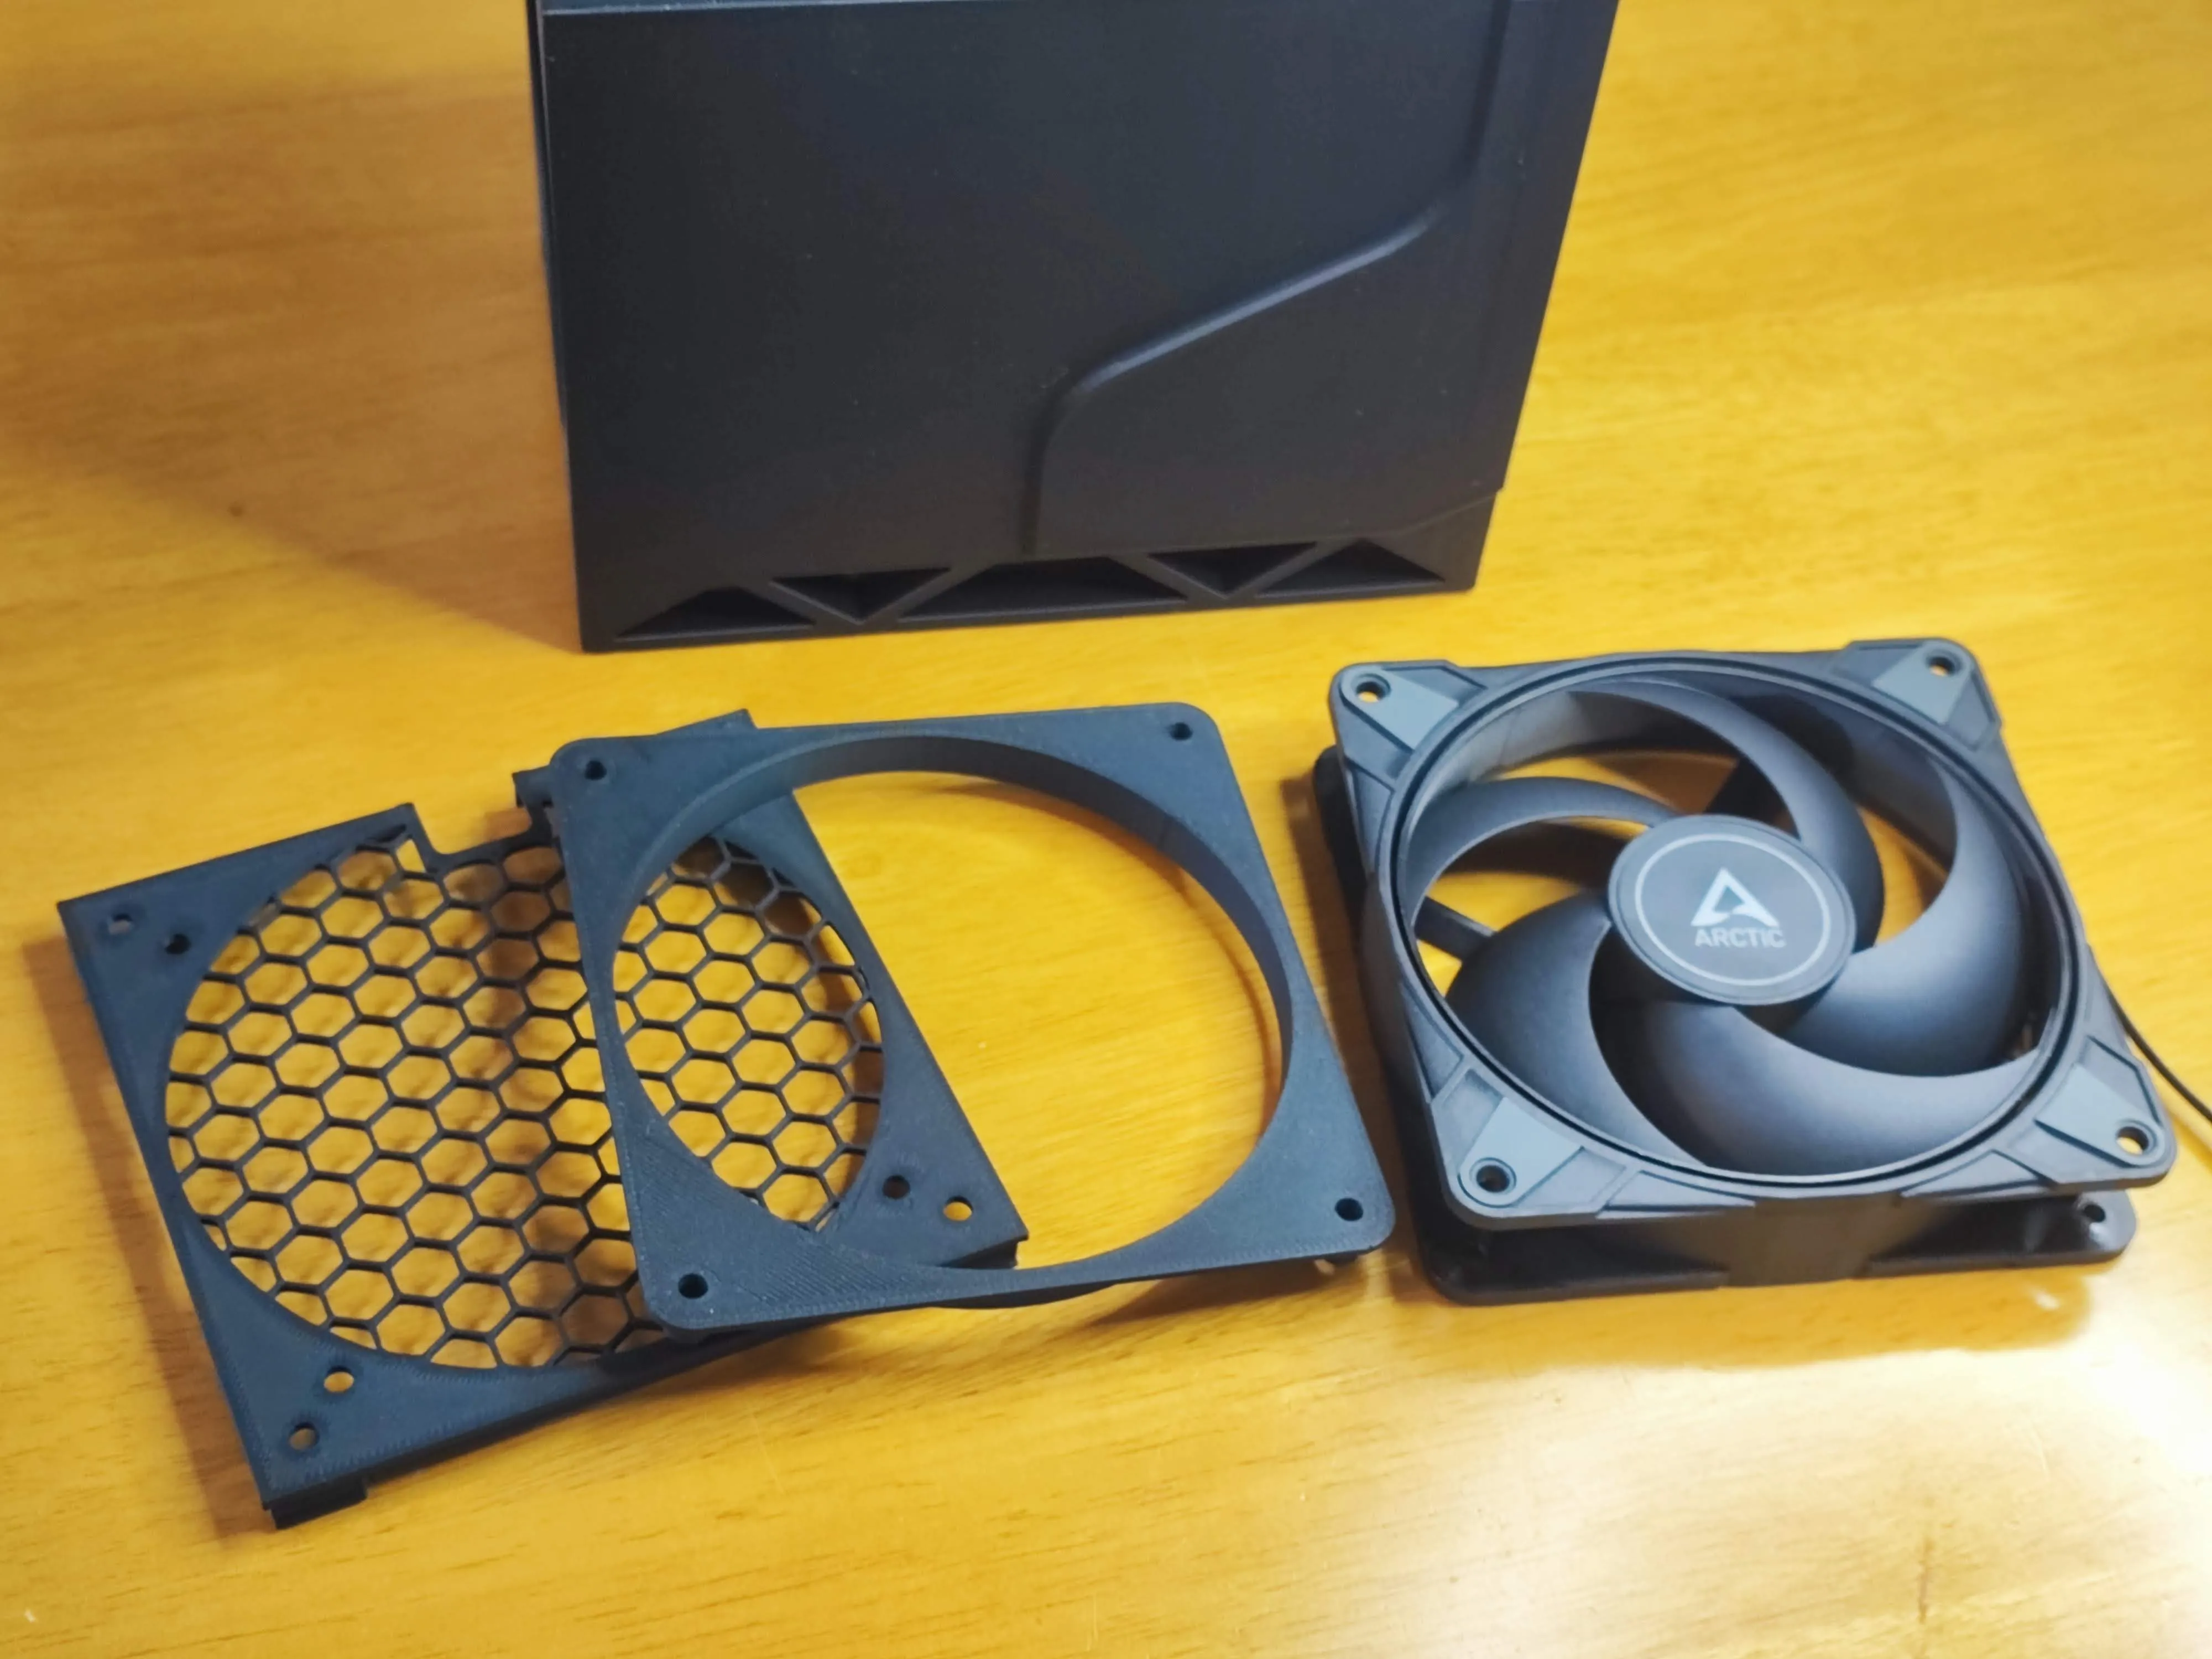
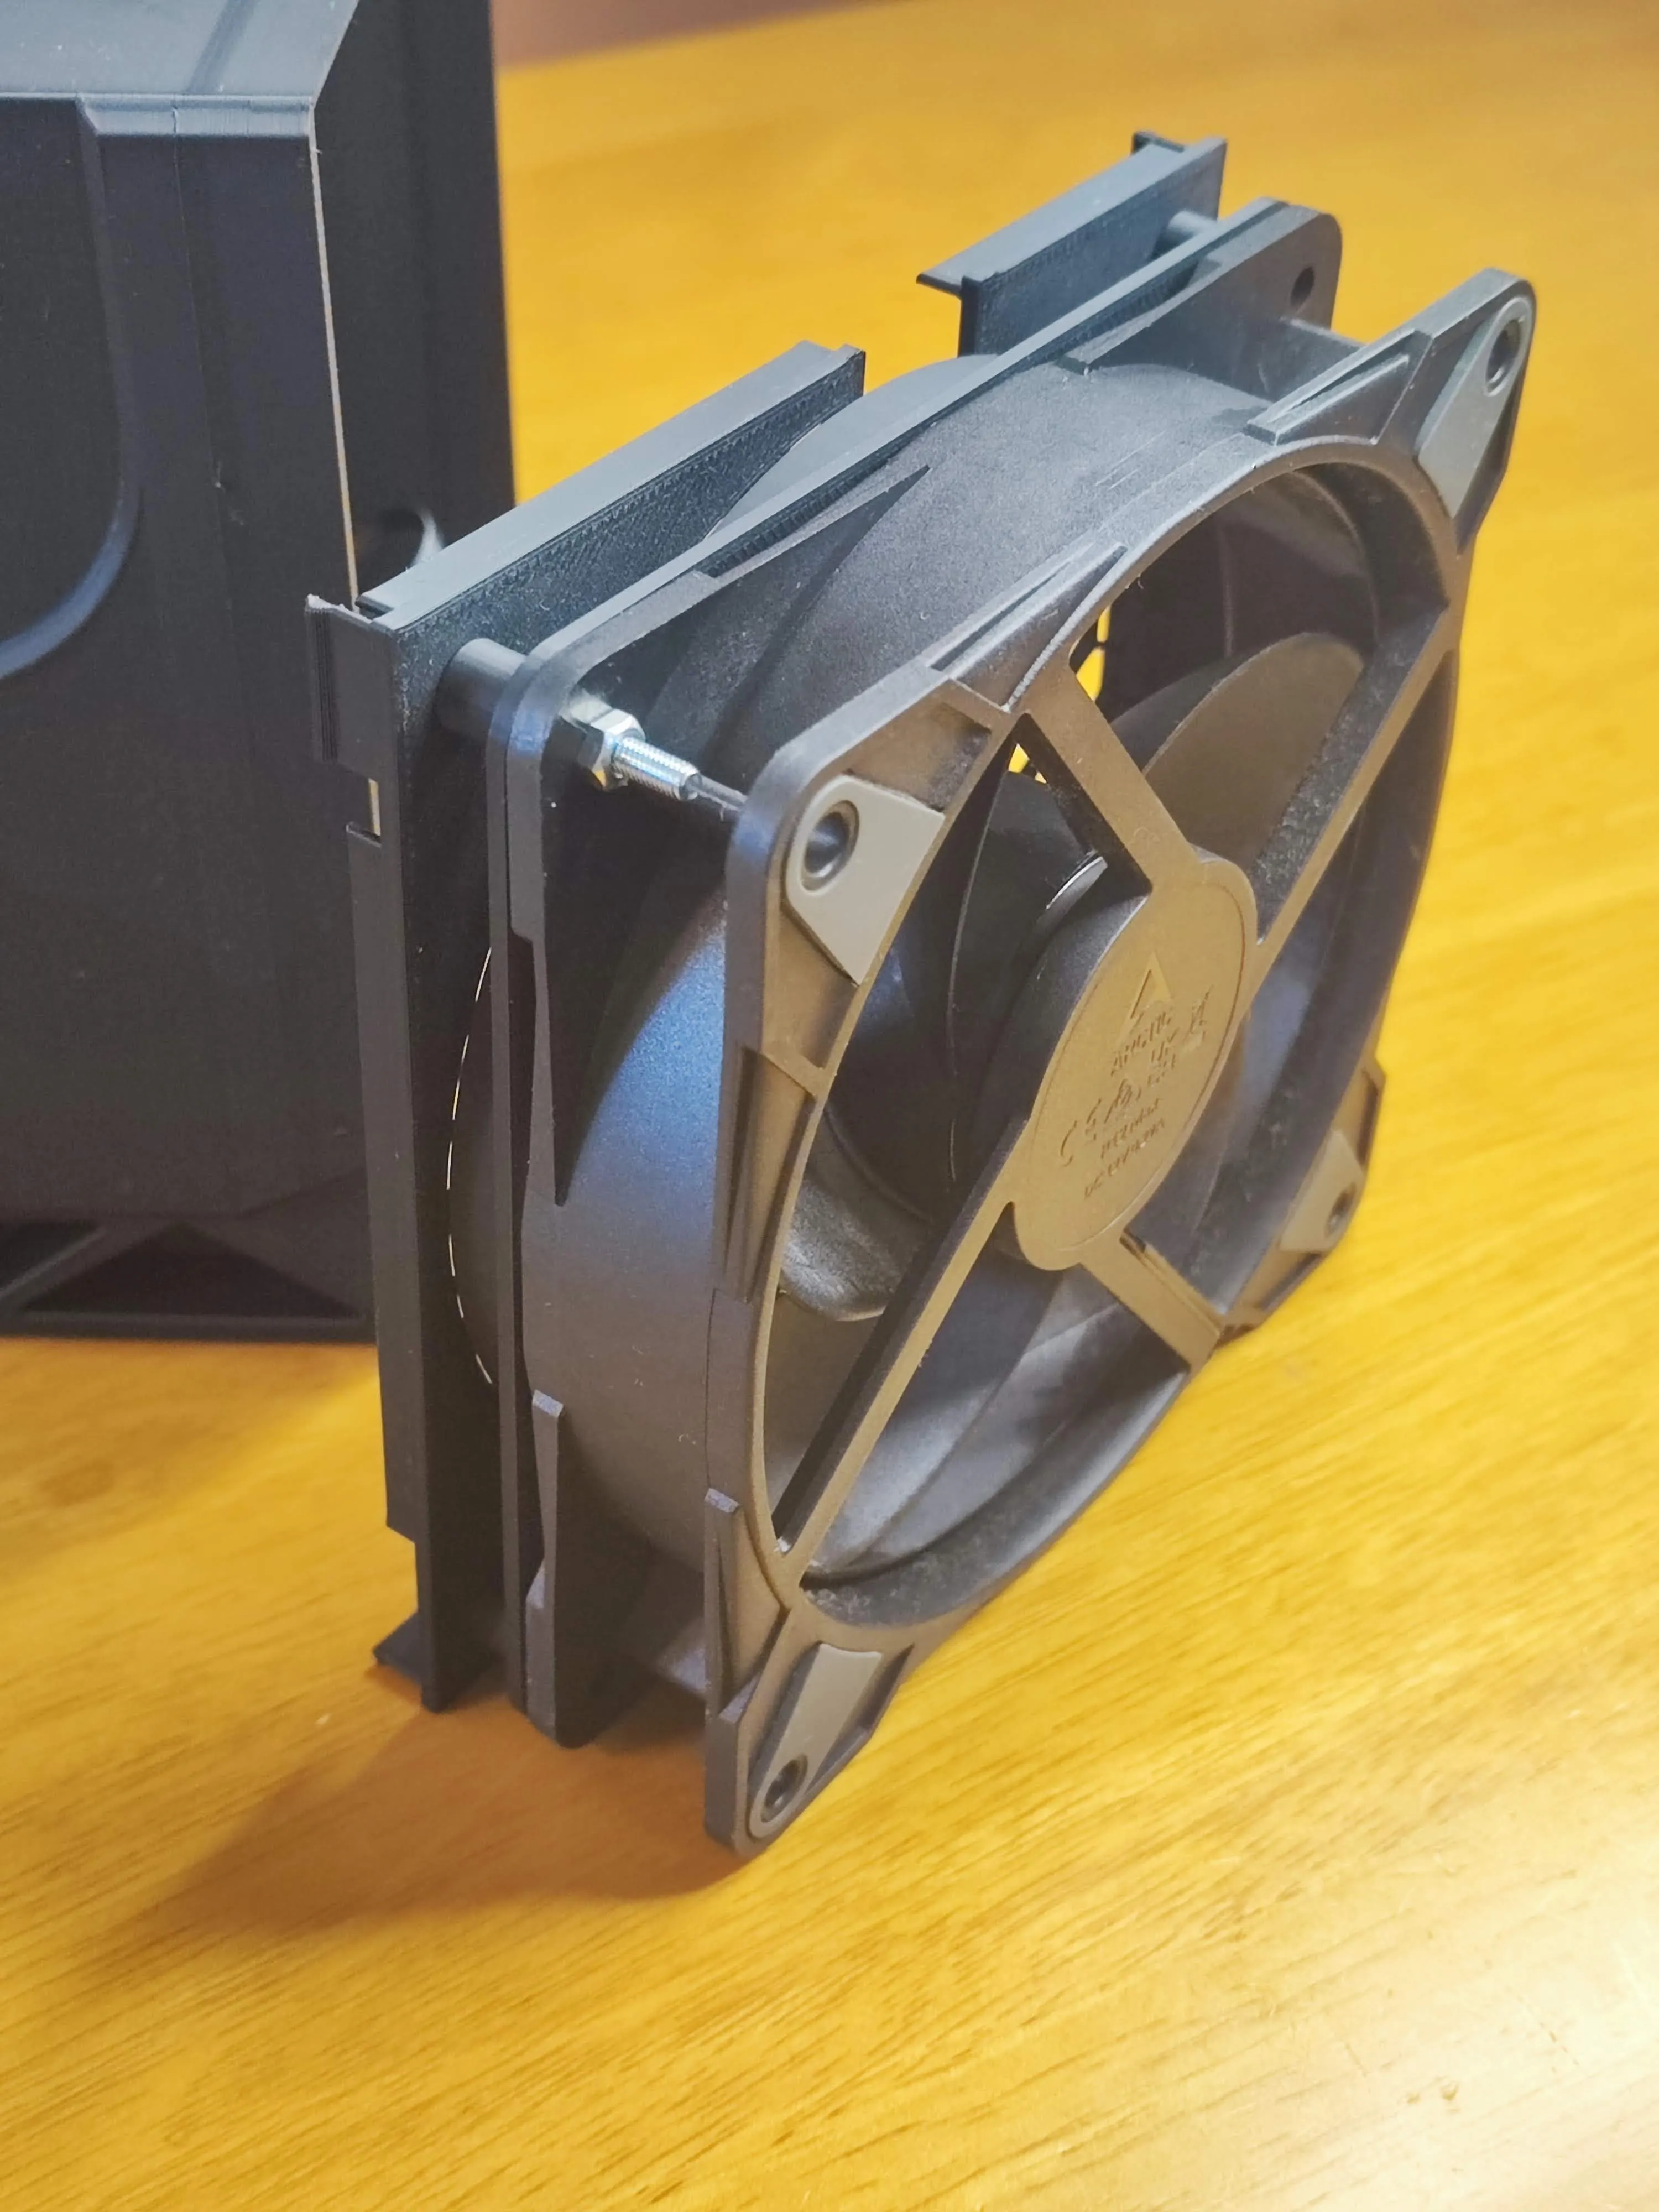
Recommended fans
12 V fans rated around 3000 rpm. When powered at 5 V, they run at about 1700 rpm, which is a quiet and optimal speed for this project.
Test Environment
- Fan: ARCTIC P12 MAX(black) and Pro PST(white) (max3300~3000rpm@12V, 1700rpm@5V)
- PSU: MW LRS-50-5 compatible model
- ASIC Heatsink: ICE Tower
- VR Heatsink: Aluminum 14×14×7 mm
- Room Temperature: 28℃ (air-conditioned), up to 35℃ continuous run
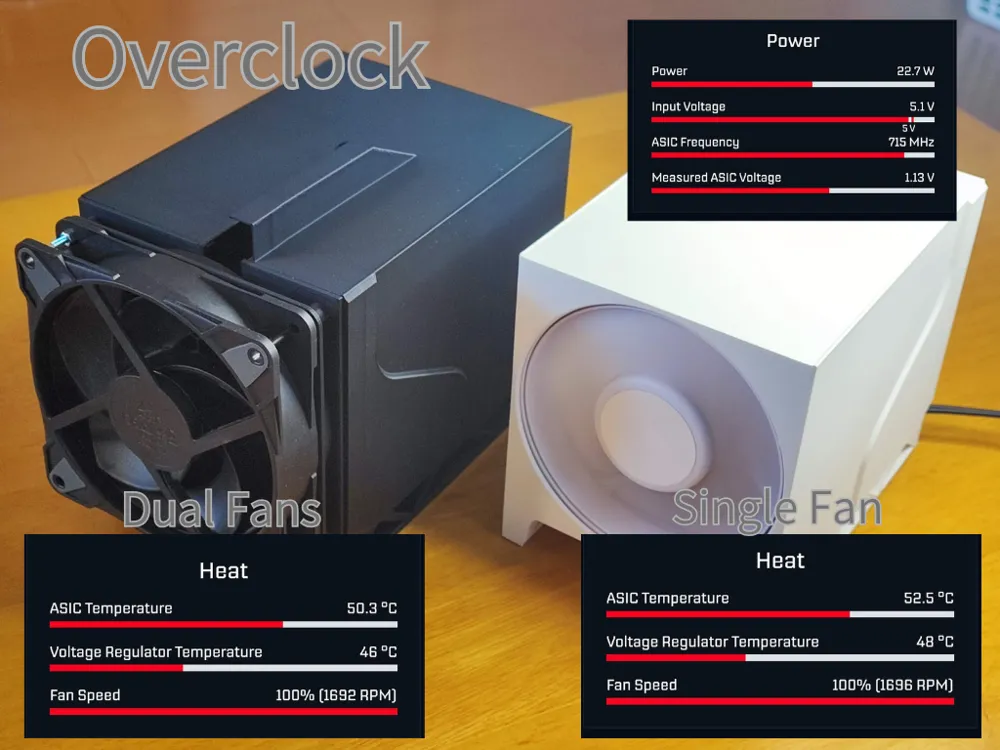
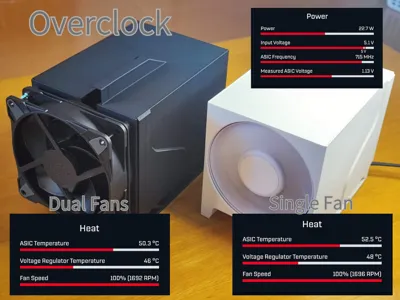
- Bitaxe Settings: 715 MHz frequency, 1166 mV core voltage, fan 100%
Test Results (Full Configuration)
- Single Fan: ASIC 52.5℃, VR 48℃
- Dual Fan: ASIC 50.3℃, VR 46℃
Recommended Bitaxe OC setting
The recommended settings for Bitaxe were calculated based on the results of actual testing (see graph below).
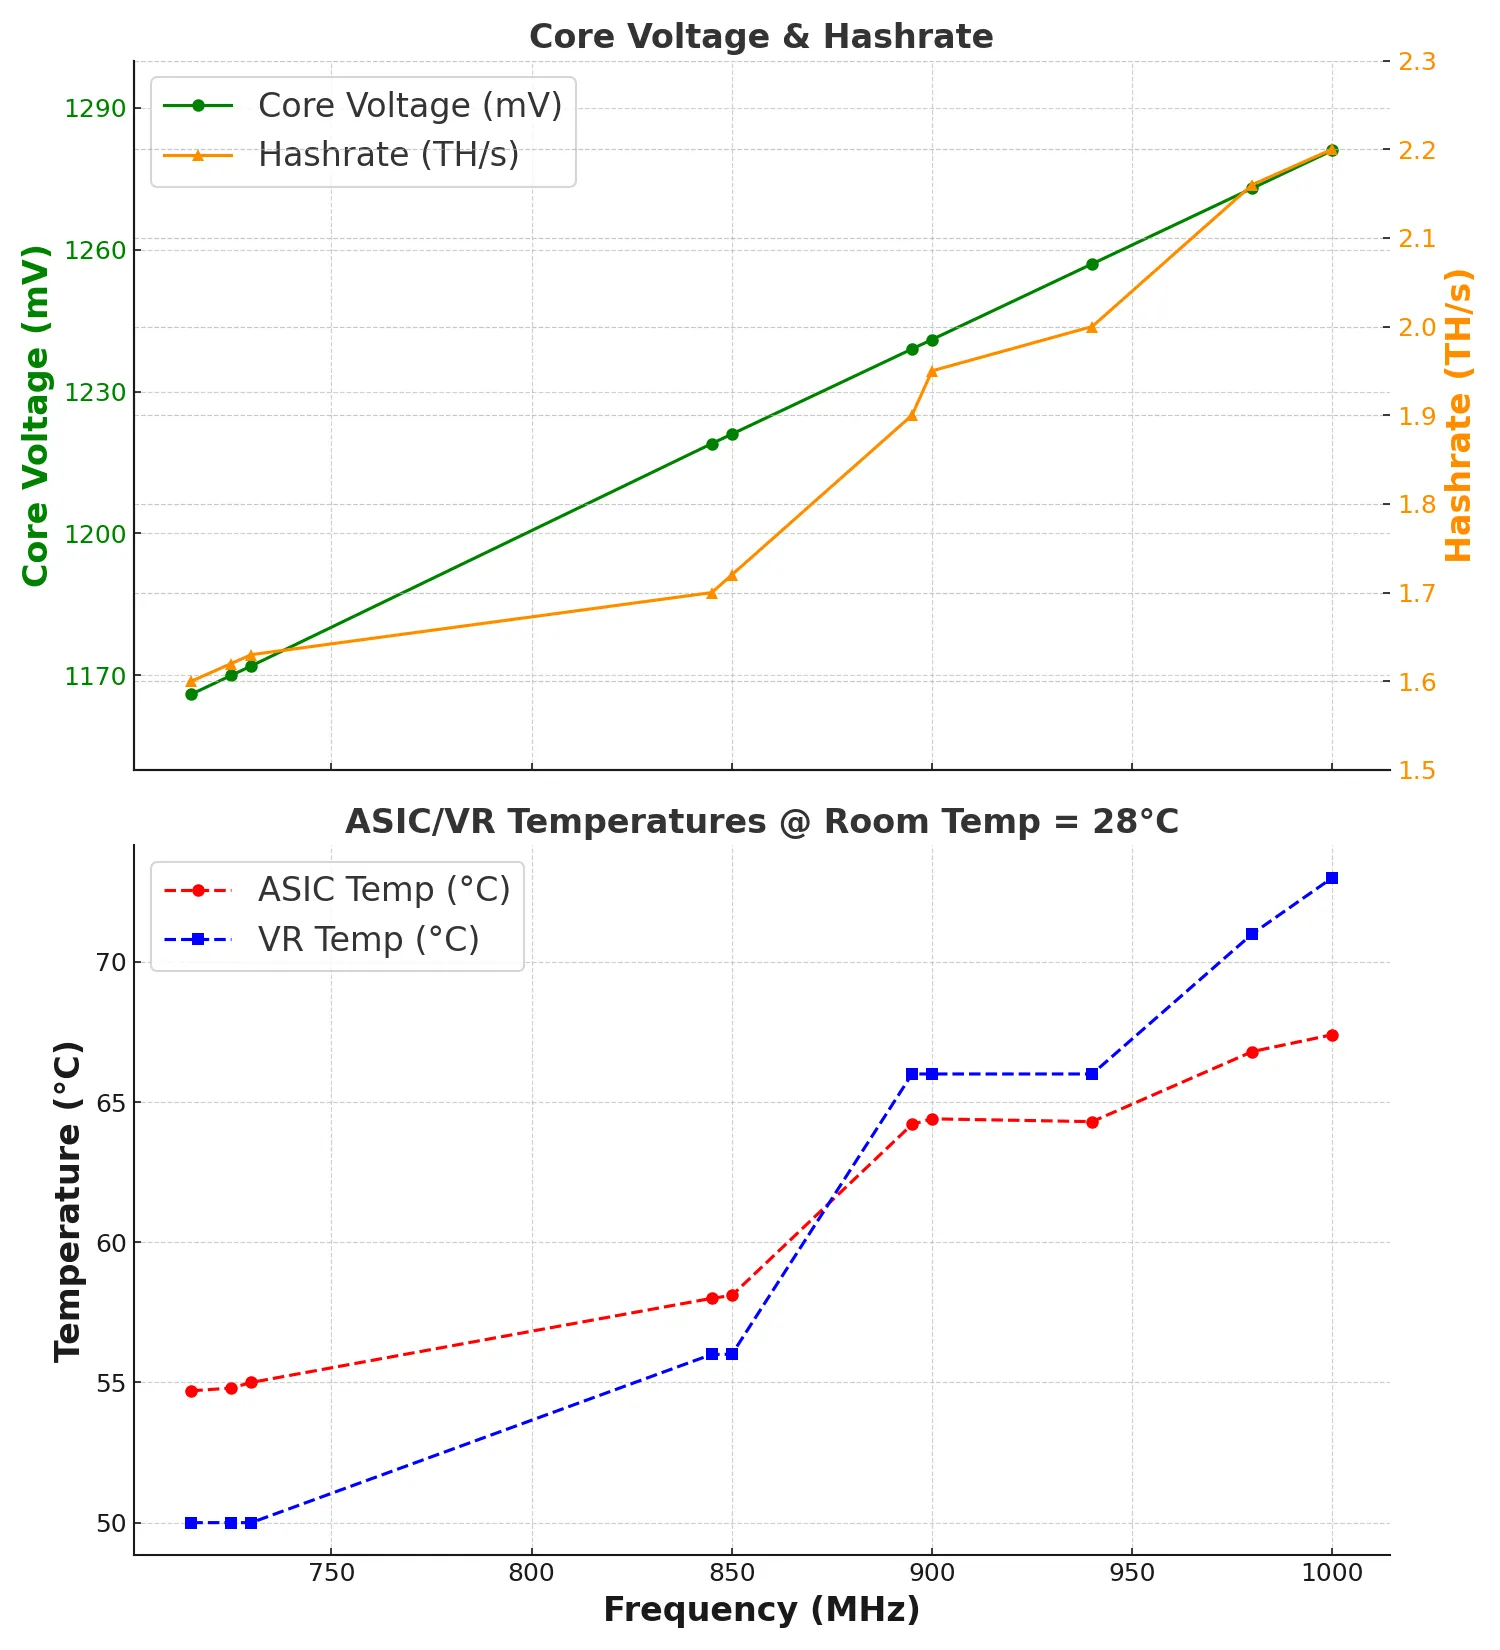
Recommended Settings by Ambient Temperature
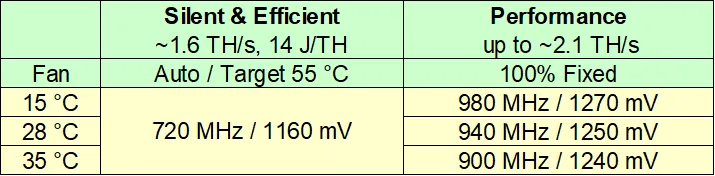
⚠️ These values are reference settings based on our test environment (Dual fan, ambient 28 °C).
Actual stable settings may vary depending on your cooling setup, ambient temperature, and unit variation.
If you are overclocking, don't forget to upgrade your power supply.
Recommended Print Settings
- Material: PLA is sufficient (PETG optional, not required since parts don’t touch heat sources)
- Supports: None required
Epilogue
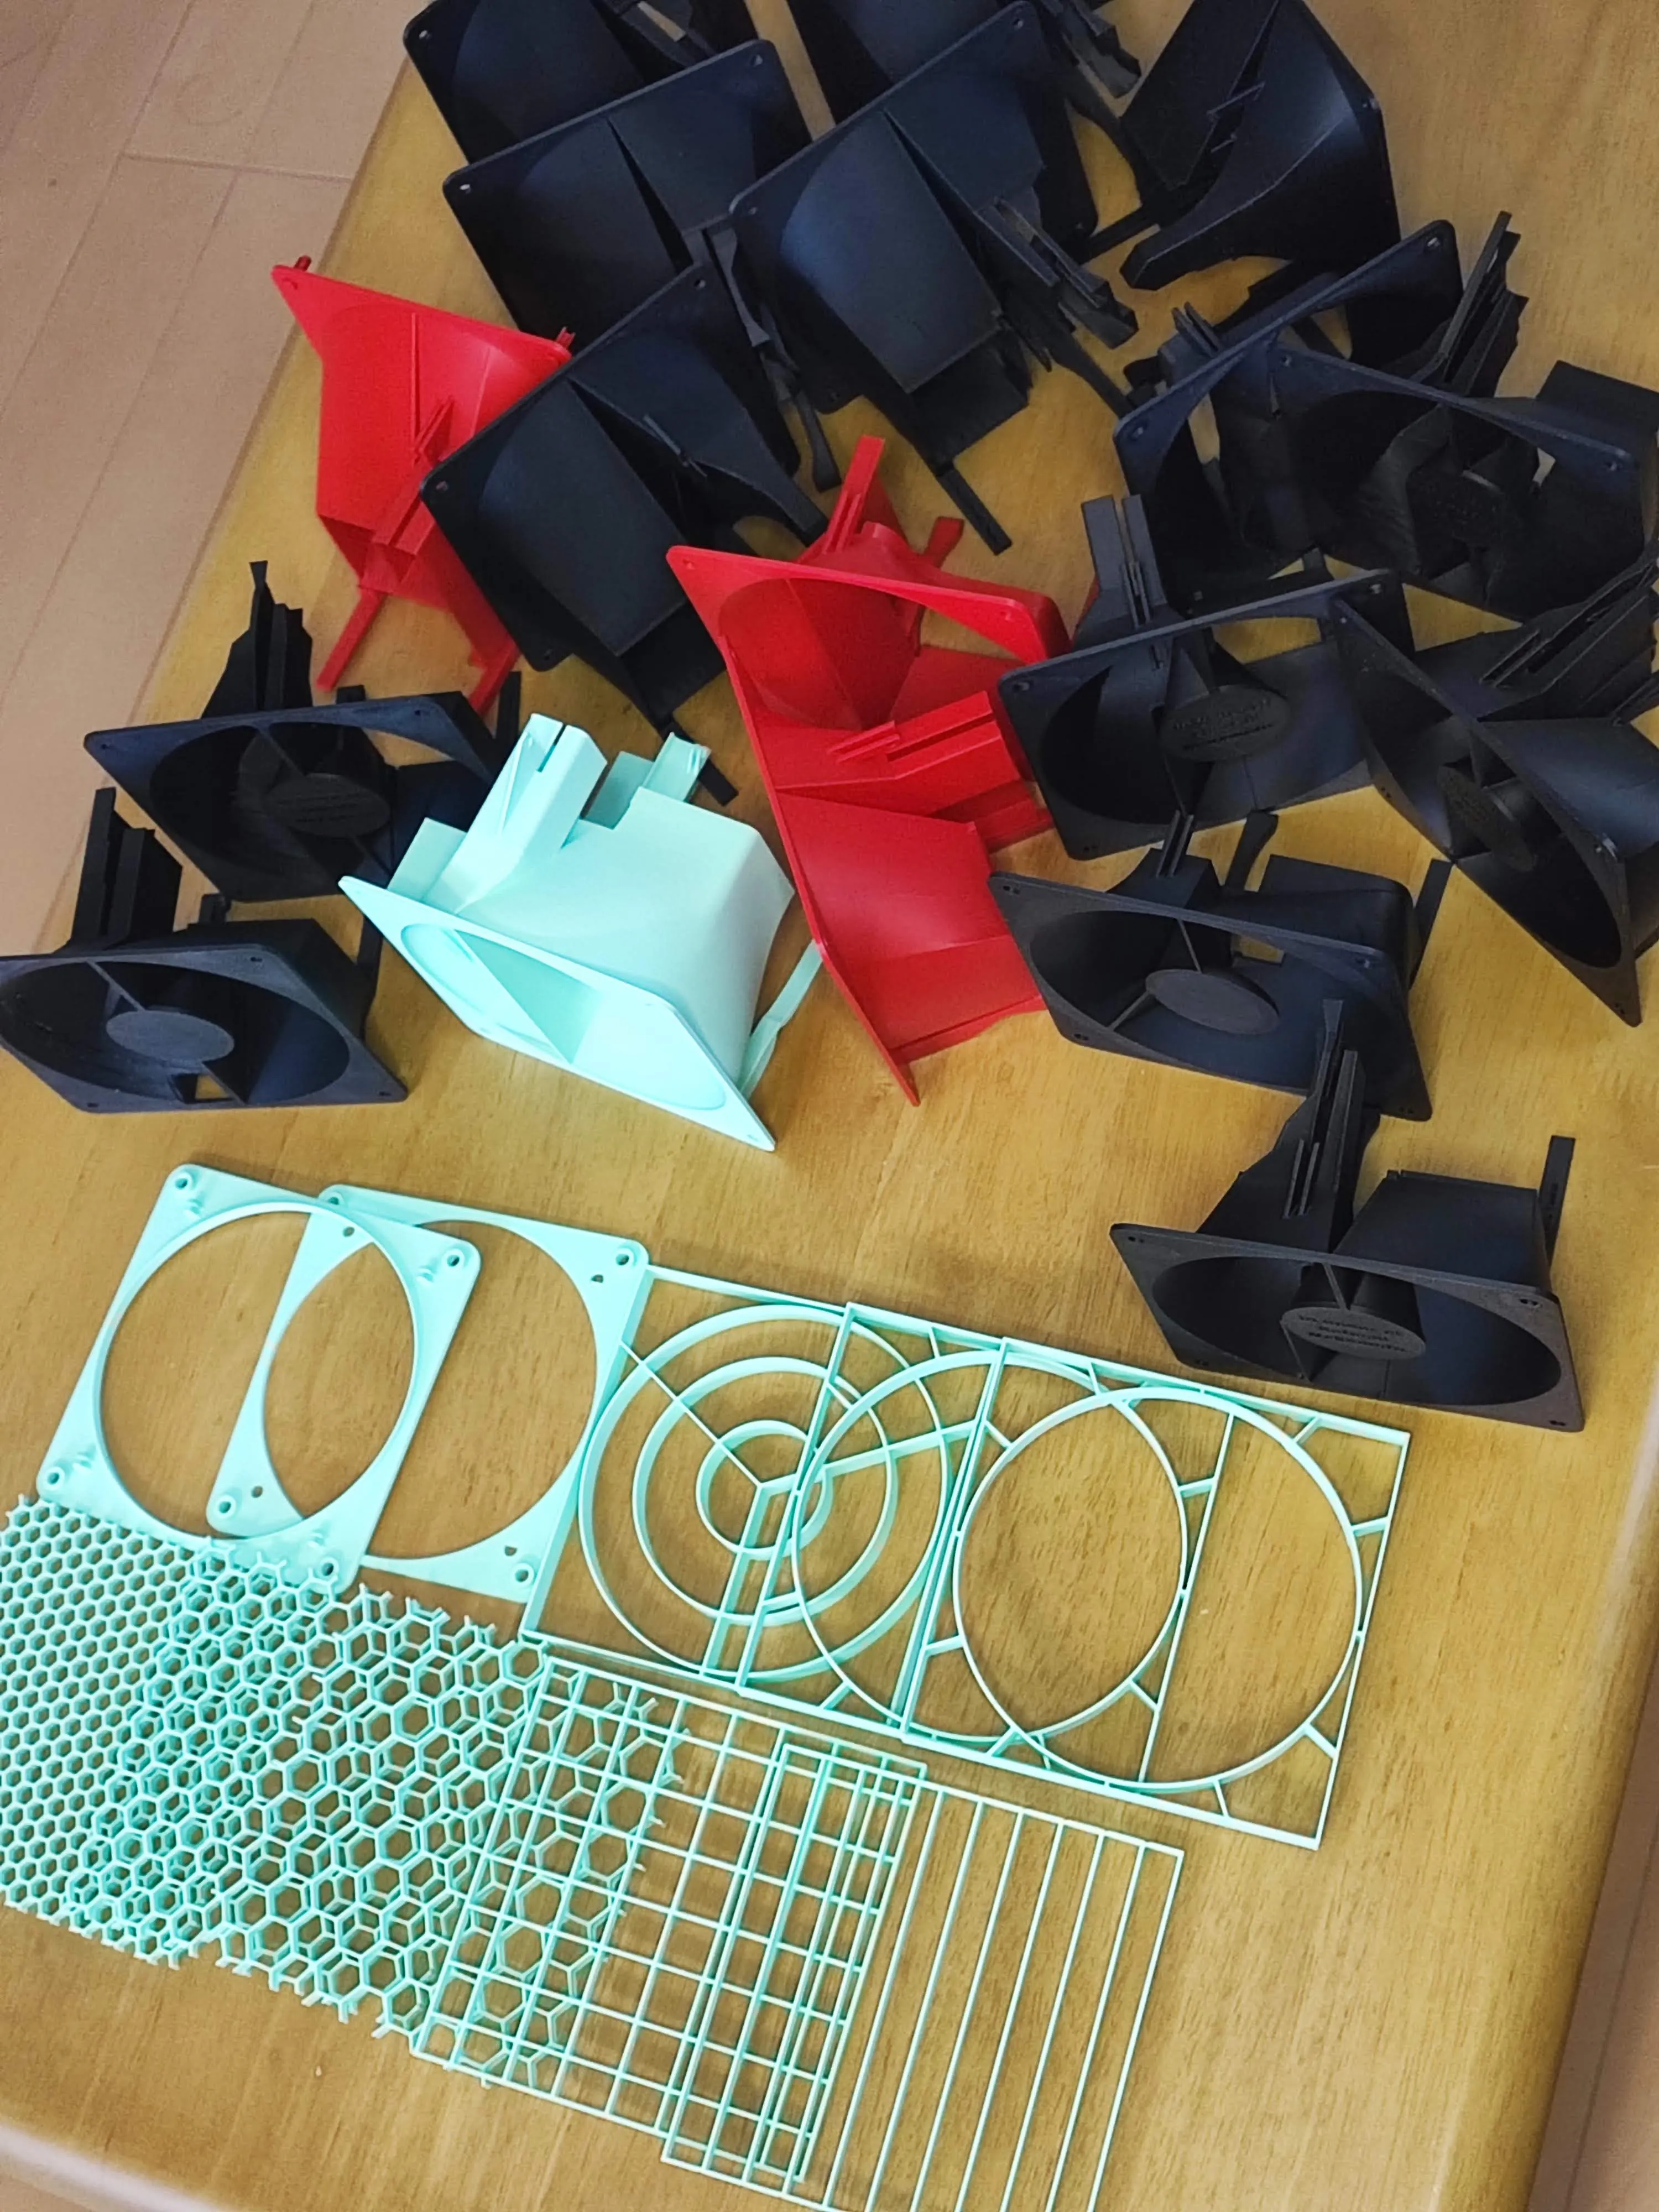
Countless prototypes and test pieces were produced during development. As Edison said, “Every failure is a step closer to success.” These iterations built the foundation for the final design.
License



Comment & Rating (25)