Milwaukee PACKOUT 360° Auxiliary Wheel Upgrade Kit


Print Profile(1)

Description
Milwaukee PACKOUT 360° Auxiliary Wheel Upgrade Kit
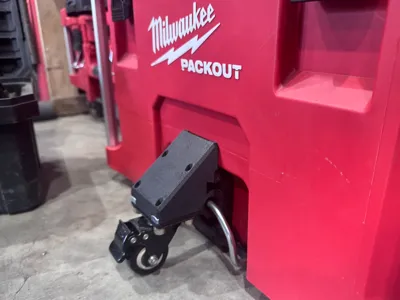
The Milwaukee PACKOUT rolling toolbox is already incredibly practical, but sometimes you still have to tilt the box to move it. In tight spaces or when you need precise movement, it just feels like it could be easier.
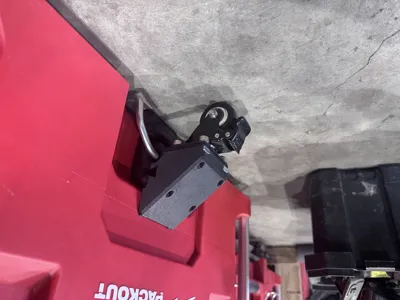
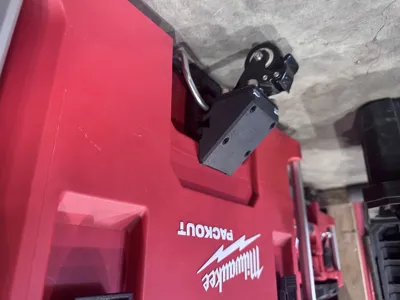
This 3D-printed auxiliary wheel bracket was designed to solve that minor inconvenience. It adds a third swivel caster to your toolbox, allowing you to push it flat on the ground like a suitcase. This significantly boosts its mobility and convenience.
Key Features
- Easy Flat Pushing: Adding a 360° swivel caster allows the toolbox to move and turn effortlessly on flat surfaces, eliminating the need to tilt the entire case.
- Enhanced Convenience: This modification reduces strain on your wrists and arms, especially when moving heavy loads, making the process much smoother.
- Non-Destructive Installation: The bracket is designed to fit the toolbox perfectly without requiring any drilling or permanent modifications.
Important Reminder Before Printing
Since there are many brands and specifications of casters on the market, their mounting plate sizes and screw hole positions may vary. To ensure your printed bracket perfectly fits the wheel you purchase, we strongly recommend that you carefully measure the mounting plate and hole positions of your caster before you start printing.
Required Parts List
In addition to the 3D-printed part, you will need the following materials:
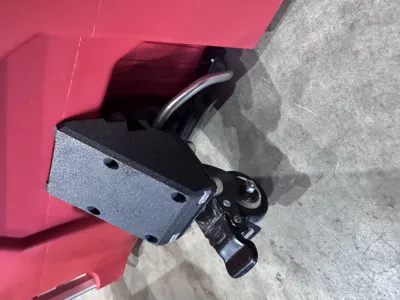
- One swivel caster (The designer found that a 2-inch wheel was a bit tight, so a 1.5-inch or smaller size is recommended. A model with a brake function is also a great choice for added stability.)
- Four M6 hex screws
- Four M6 square nuts
Printing & Installation Guide
Printing Parameters
- Material: PETG or ABS or ASA is highly recommended. These materials offer superior strength and durability to handle the load.
- Infill: To ensure structural integrity, you should use a high infill density.
Installation Steps
- Install the Lower Part: Slide the lower part of the bracket along the bottom of the Milwaukee PACKOUT toolbox's metal handle until it's in position.
- Prepare the Upper Part: Insert the four M6 square nuts into the designated slots on the upper part.
- Assemble the Bracket: Snap the upper part into place from above, so the metal handle is securely clamped between the two components.
- Tighten the Screws: Use the four M6 hex screws to securely fasten the upper and lower parts to the wheel.
- Insert the Pins: Finally, insert the two pins into the slots on both sides to complete the assembly.
We hope this design makes your work a little easier! If you print and install one, we'd love to see your results and hear about your experience.
License
You shall not share, sub-license, sell, rent, host, transfer, or distribute in any way the digital or 3D printed versions of this object, nor any other derivative work of this object in its digital or physical format (including - but not limited to - remixes of this object, and hosting on other digital platforms). The objects may not be used without permission in any way whatsoever in which you charge money, or collect fees.
Comment & Rating (1)