


Print Profile(9)


Description
Boost Me (for free)
If you would like to see me make more parametric models here on MakerWorld, please consider giving me a boost. All support is greatly appreciated.
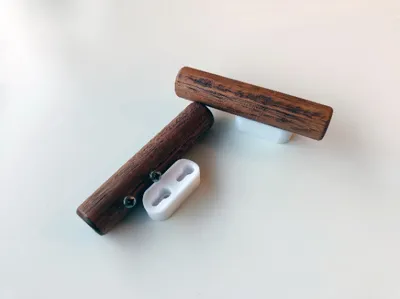
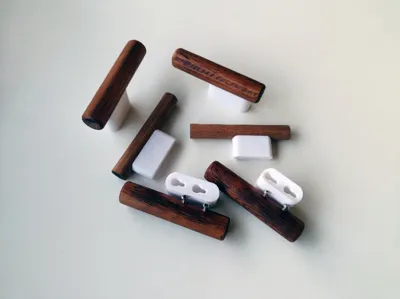
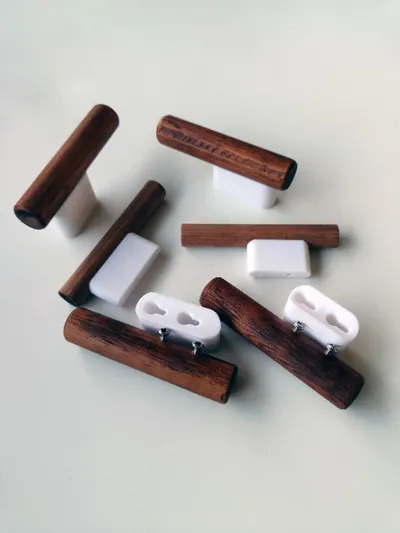
Minimalistic Wooden Wall Hanger
Yet another parametric model made specifically for the online parametric editor here on MakerWorld.
The model is made in Fusion and has been test printed after each major edit. Every iteration is verified both digitally and with physical print to make sure there are no errors making the model un usable.
CUSTOMIZATION:
Rod diameter: The diameter of the wooden rod used for the hanger (mm)
(Minimum size is 15mm)
Height: The height of the wall mount (mm)
(Minimum size is 40mm)
Keyhole Large Diameter: The large part of the "keyhole" for mounting the rod. This must be large enough to get the screws head through
(Minimum size is 5mm)
Keyhole Small Diameter: The small part of the “keyhole” for mounting the rod. This must be large enough to fit the stem of the screw
(Minimum size is 4mm. Maximum size is 2mm smaller than “Keyhole Large Diameter”)
Wall Clearance: The clearance between the rod and the wall
(The clearance is NOT from the center of the rod, but the ACTUAL clearance between the wall and the wooden rod )
Additional parts
For this hanger you'll need a wooden rod of your choice. I've gone with a pine (as I'm still waiting on my order of the oak rods) and I went for the diameters 21mm and 15mm.
The pine is way to light in both color and shade so I've stained it to get a nicer color and end result. Final finishing was oiling the wooden rods before mounting them
You'll also need some wood screws and I've gone with 3.5 x 16mm PH2 for indoor use. These were cheap and does the job perfectly.
I recommend printing the “drill guide” to ease the spacing and placement of the holes for the screws in the rod!
PS! PS! REMEMBER TO PILOT DRILL THE HOLES FOR THE SCREWS SO YOU DONT SPLIT THE ROD. I'VE PRE-DRILLED THE HOLES USING A 2.5MM DRILL. THIS LEAVES ENOUGH FOR THE SCREW TO BIND WITHOUT THE ROD SPLITTING.
Boost Me (for free)
If you would like to see me make more parametric models here on MakerWorld, please consider giving me a boost. All support is greatly appreciated.
License
You shall not share, sub-license, sell, rent, host, transfer, or distribute in any way the digital or 3D printed versions of this object, nor any other derivative work of this object in its digital or physical format (including - but not limited to - remixes of this object, and hosting on other digital platforms). The objects may not be used without permission in any way whatsoever in which you charge money, or collect fees.
Comment & Rating (0)