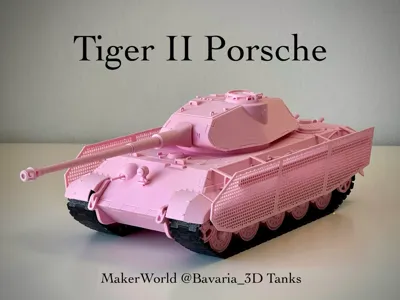
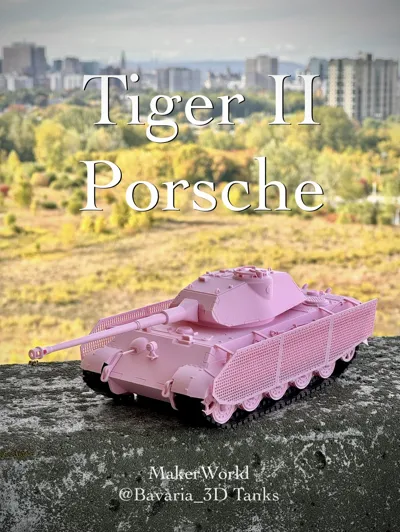
Tiger II Porsche Turret with Mesh Side Skirts 1/35


Print Profile(3)


Description
If you enjoy my work, consider supporting me ❤️ ❤️ ❤️
Buy Me a Coffee: buymeacoffee.com/bavaria3 | Ko-fi: https://ko-fi.com/bavaria3
Boost Me (for free)
Don’t miss out — follow me for more top-quality tank models!
Don’t miss out — follow me for more top-quality tank models!

All models are designed from scratch in Fusion 360 and validated through real prints using my own equipment, with no AI involved. Each design is tested and refined through multiple iterations to ensure reliability and real-world usability.
If you like my work, feel free to like, save, and share your thoughts in the comments — your feedback directly helps improve future designs.

================================
📋 Recommended Print Settings (For Best Results)
- Filament: PLA. Different materials have different shrink rates, so using other filaments might cause fitting issues or dimensional errors during assembly.
- Slicer: Bambu Studio. I recommend using my default profile — I’ve tuned it specifically for this model.
- Ambient Temperature: If you’re using an open-frame printer like the A1 or A1 Mini, keep your room above 20°C (68°F) to prevent warping.
- Print Bed Preparation: Wash with soap and water, then dry thoroughly to ensure good adhesion. For small parts, apply a glue stick for better bed adhesion.
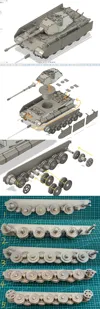
🔧 Assembly Diagram Notes
- You’ll need super glue to attach all the components together. This is an early build of mine, so all the wheels need to be glued in place.


The Tiger II Heavy Tank’s running gear uses a complex interleaved road-wheel mechanism, below are the installation procedures for these assemblies:


I use Bambu Lab’s software to set the top shell thickness to 0, choose “Grid” for the infill pattern, and set the infill density to 50%—this will simulate the mesh effect. This effect can be achieved by using the default settings that I have already configured


================================
Boost Me (for free)
If you like my work, consider leaving a boost — it really helps me keep creating more exciting models!
Membership
A lot of you have asked about selling prints of my models. If you want to use my designs commercially, just sign up for the commercial license membership — you can click this box to subscribe directly.
Documentation (1)
License
You shall not share, sub-license, sell, rent, host, transfer, or distribute in any way the digital or 3D printed versions of this object, nor any other derivative work of this object in its digital or physical format (including - but not limited to - remixes of this object, and hosting on other digital platforms). The objects may not be used without permission in any way whatsoever in which you charge money, or collect fees.
Comment & Rating (57)