Search models, users, collections, and posts
Peristaltic Pump
IP Report

Print Profile(1)

Classic Supports, X-Y Hole compensation -0.1mm
Designer
4 h
2 plates
Open in Bambu Studio
Boost
86
200
3
1
169
38
Released
Description
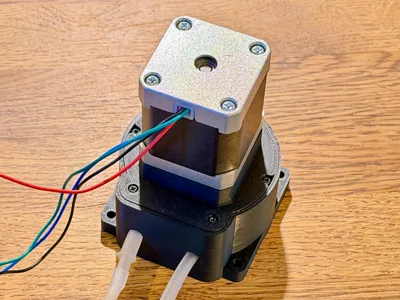
This is a peristaltic pump designed around 4/6 mm silicone tubing and driven by a JK42HS48-1204 stepper motor. I printed the parts in PLA for testing — works fine so far, but long-term durability hasn’t been checked yet.
BOM
The model does require some supports when printing. For assembly you’ll need:
- 8 × ball bearings 3×7×3 mm
- 2 × ball bearings 8×22×7 mm
- 1 × steel rod Ø5 mm, cut into 4 shafts ~12.5 mm each
- 4 × screws M2.6×6 (short)
- 4 × screws M2.6×12 (long)
- Silicone tube 4×6 mm (tested with standard aquarium air hose)
- Silicone tube connector (Prevents the tube from being pulled into the pump; it should be installed as close as possible to the housing on the suction side).
Assembly is straightforward once you have the hardware. The pump runs pretty smoothly and is easy to adapt for fluid transfer projects, though keep in mind this is still a prototype.
Assembly instruction
Rolls
- Assemble all rolls, push two bearing on both sides of the roll.
- Put a shaft rods into bearings

Rotor
- Push roll shaft sockets into both bottom ant top rotor parts
- Put rolls on shafts into a sockets
- Finalise the rotor assembly by putting on in the right orientation the bottom part, screw it together tightly.


Main Pump Internals
- Put a silicone tube into one hole on a casing, put a bottom bearing and the rotor into, mind the connector which should be as close as possible to the casing
- By rotating the rotor put the tube in a place all around
- Pull the tube through the second hole
- Push the ring into it's place in the casing so it limits the tube vertical movement

Casing
- Push the top cover and screw it tightly

License
This user content is licensed under a
Creative Commons Attribution-Share Alike
Comment & Rating (3)