3D-printable NFC Spinning Keychain


Print Profile(1)

Description
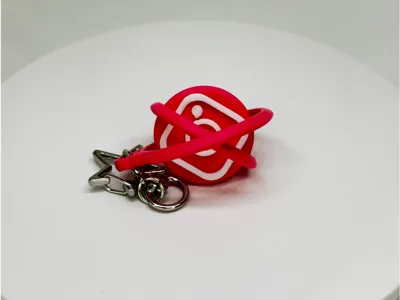
🔑 NFC Spinning Keychain: Functional Fun at Your Fingertips
Elevate your everyday carry with this 3D-printable NFC Spinning Keychain! It's not just a satisfying, dual-ring fidget spinner, but a clever enclosure for a small NFC tag, turning your keychain into a versatile digital tool.
Features & Printing Specs
- Dual-Ring Spinning Action: Enjoy a smooth, addictive spin with both the inner and outer rings moving independently.
- Integrated NFC Enclosure: Designed for a secure, print-in-place tag integration. The central cavity has a 27 mm diameter and 0.3 mm thickness to fit standard small NFC tags.
- Print-in-Place Design: The entire mechanism prints as one piece, requiring careful post-processing to activate the spin.
⚙️ Critical Printing and Assembly Instructions
Printing (NFC Tag Integration)
To embed your NFC tag mid-print, you must set a pause in your slicer:
- Bambu Studio Pause: Add a custom pause at the 1.8 mm layer height (or just before the layer that closes the cavity).
- When the printer pauses, carefully place your NFC tag into the exposed 27 mm cavity. Resume the print to securely seal the tag inside.
Post-Printing Separation (Crucial Step!)
⚠️ CAUTION: The spinning mechanism uses tight tolerances. Patience and care are vital during separation—too much force may snap the pins.
The rings are held together by temporary pins that need to be "popped" to enable spinning:
- Separate Center/Mid Ring:
- Firmly hold the middle part (the NFC housing).
- Hold the mid ring and gently pull it vertically away from the center pin's hole. You'll feel a slight 'pop' as the pin separates.
- Repeat on the other side. The center part should now spin within the mid ring.
- Separate Mid/Outer Ring:
- Firmly hold the mid ring.
- Hold the outer ring and pull it vertically away from the mid ring's pins.
- Repeat on the other side. The outer ring should now spin around the mid ring.
For years, 3D printing felt out of reach. Living in a country with strict rules made owning a printer impossible. Even after moving to the US, life kept the dream on hold—until I saw a kid in Dubai making keychains on a Bambu Lab printer. That was my moment! With help from a supportive relative, I bought my first printer. Now, after learning and creating, I’m proud to share my first design on MakerWorld—proof
Comment & Rating (0)